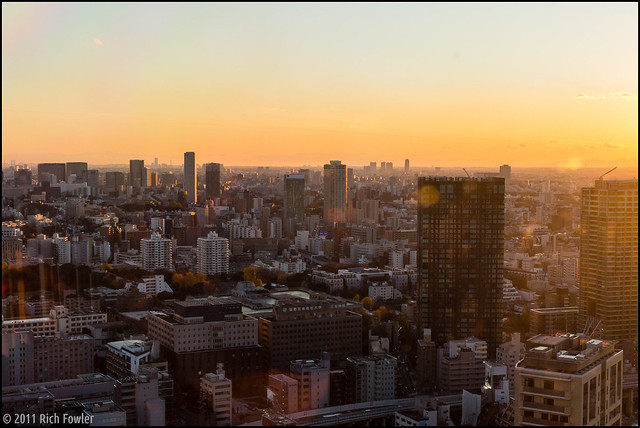
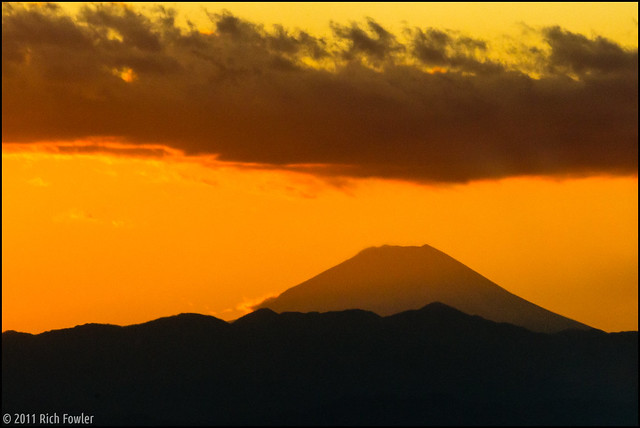
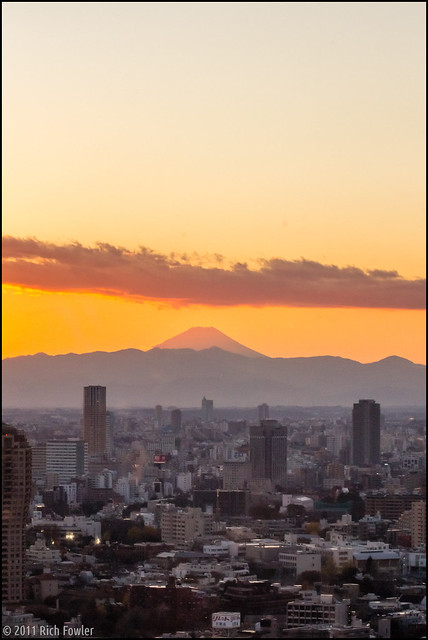
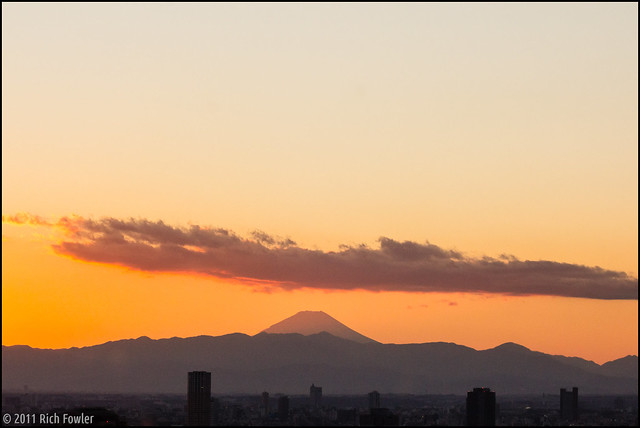
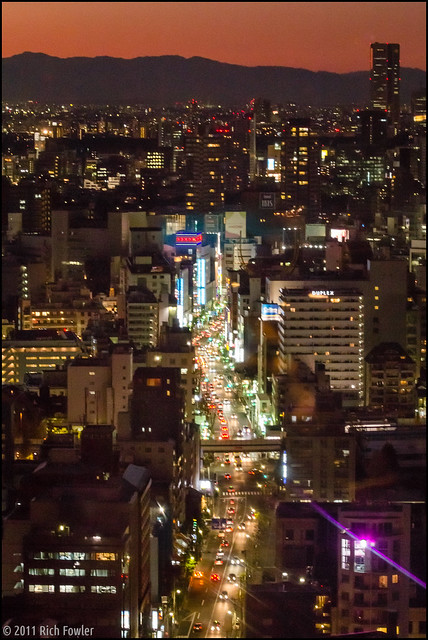
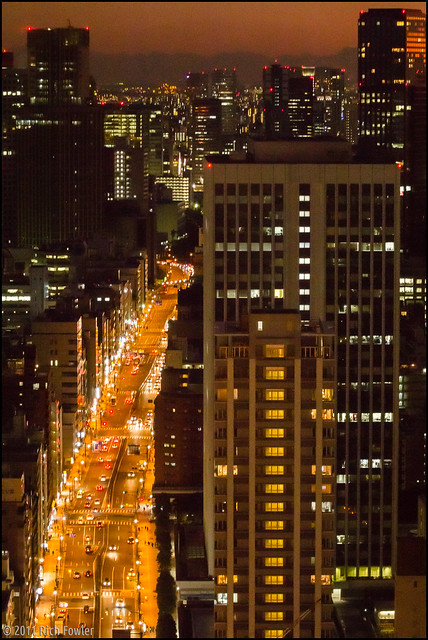
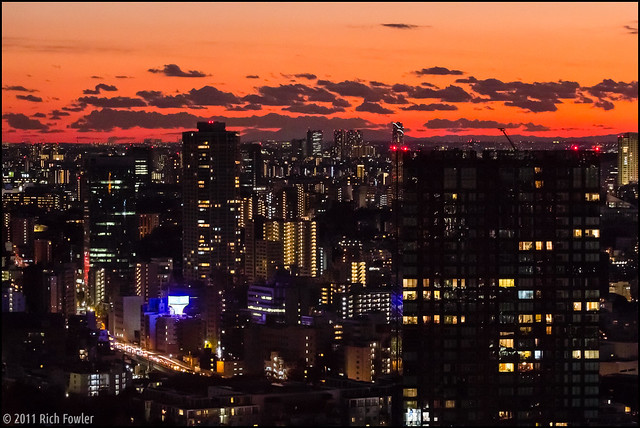
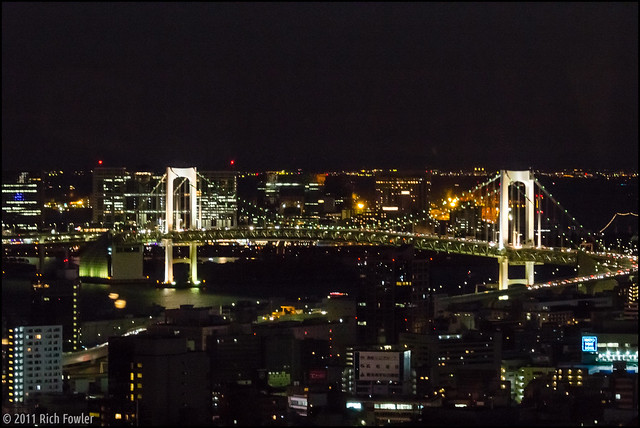
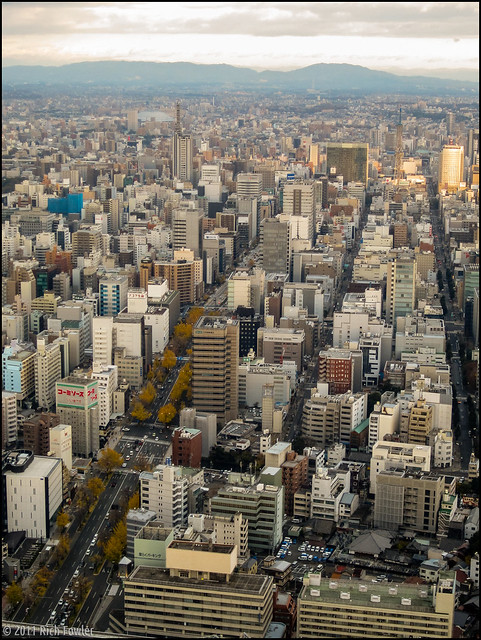
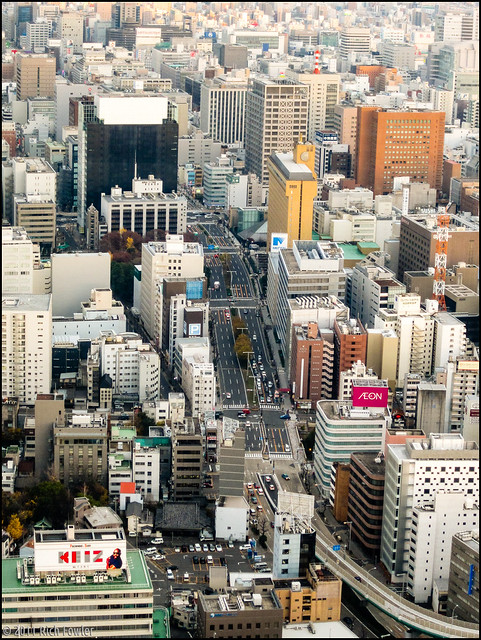
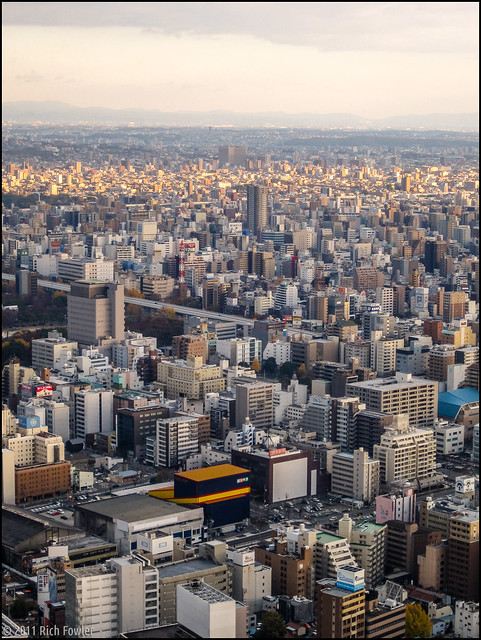
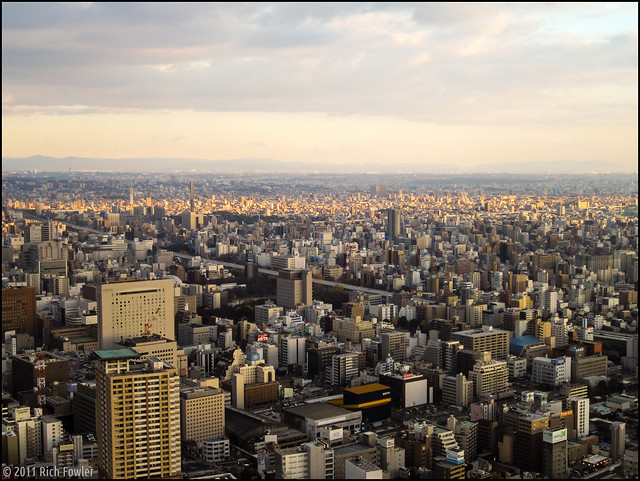
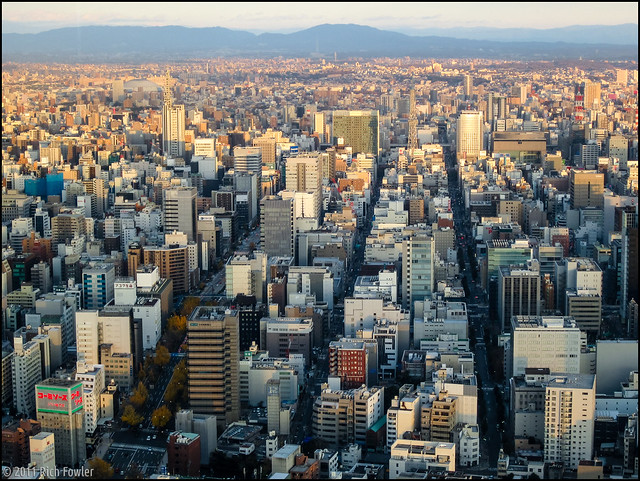
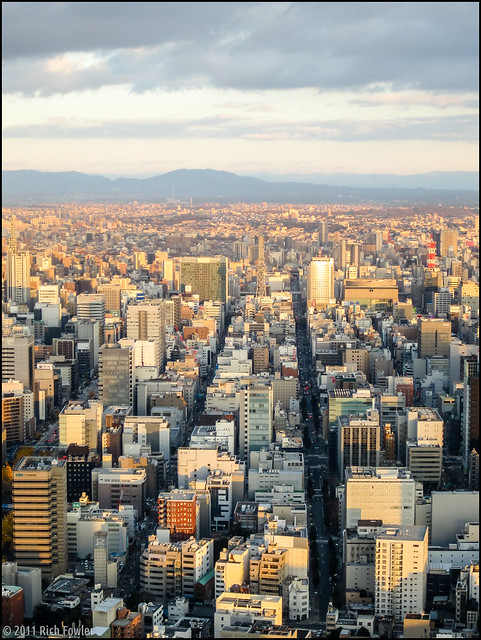
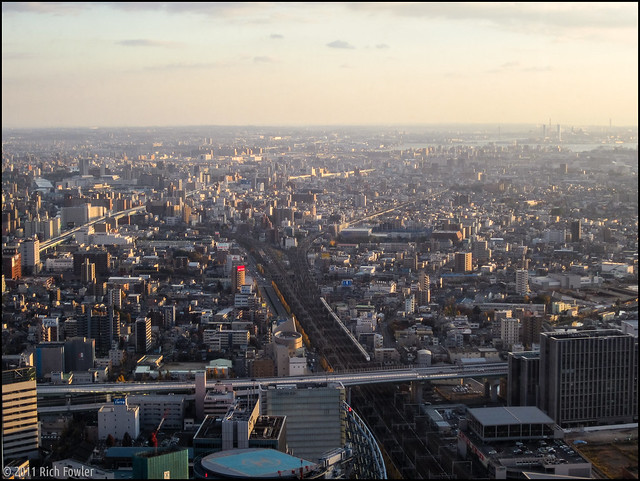
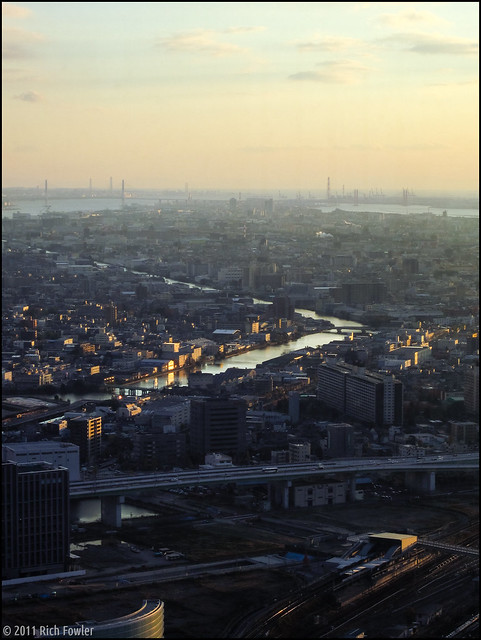
The Best $50 Lens Ever.

 Art, Photography, Technology  Comments Off on The Best $50 Lens Ever.
Dec 272014
 

Okay, when I got the adapter, it was $150. But the lens itself was an amazing find.

I’ve had my A7 for a few weeks, and now my plan is to get rid of my Canon 60D and all of my Canon gear, except my IXY. I don’t need the extra gear.

I started looking around for a good telephoto replacement that I can adapt to my A7. I did a lot of frowning at the computer screen as I looked at some of the major online retailers, but it’s really hard to commit to buying a used lens I haven’t laid hands on.

We have a good local camera store that has a lot of used lenses, so I went by to take a look. They had a “mystery box” full of lenses they just got in, and I spent about 20 minutes looking through, until I found a great little Canon 70-210 f/4 Macro in an FD mount. The glass was perfect! $50, and it was mine.

I put it on my A7, and, uh-oh. It wouldn’t focus out to infinity. Was it the lens, the camera, or the cheap $30 adapter I got on Amazon a few years back for my Nex? Turns out it was the adapter. I picked up a Metabones adapter, which is in the middle of the price range for adapters at $100, and now it focuses out perfectly.

Since the 70, 100, 135 and 210mm lengths are all marked on the barrel, it means I can use the lens with the A7’s image stabilization, too! It’s a dual action focus/zoom barrel. Pull to zoom, twist to focus.

The macro part of the lens was a nice discovery. At 70mm, you can turn the focus into the macro zone and get up close. It makes this a great all-purpose travel lens. Honestly, this and my Leica 35, and I don’t really feel like I need anything else. The 35 for wide shots, and this for anything else.

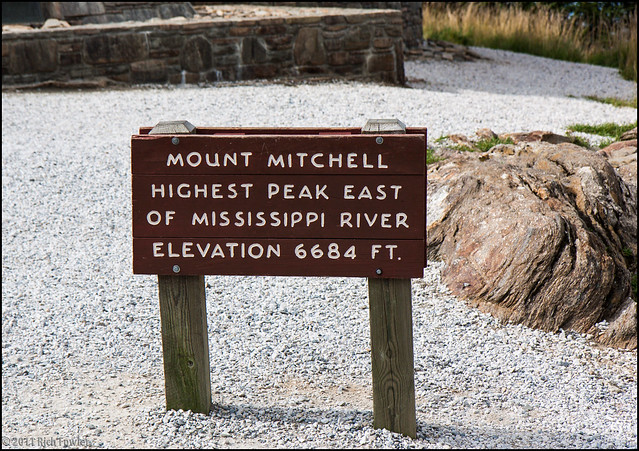
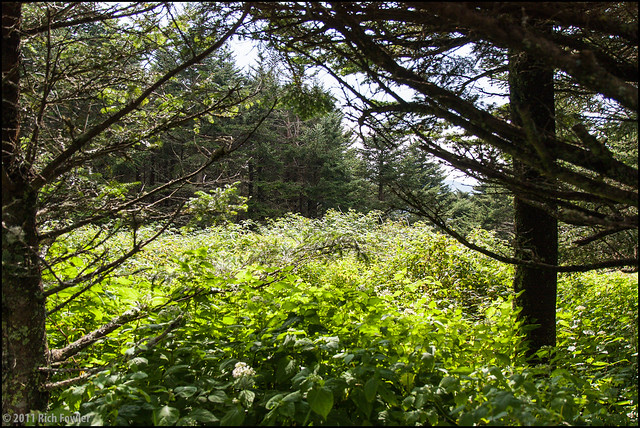
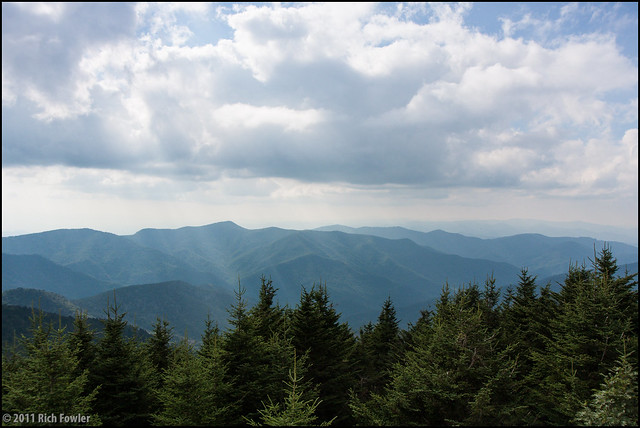
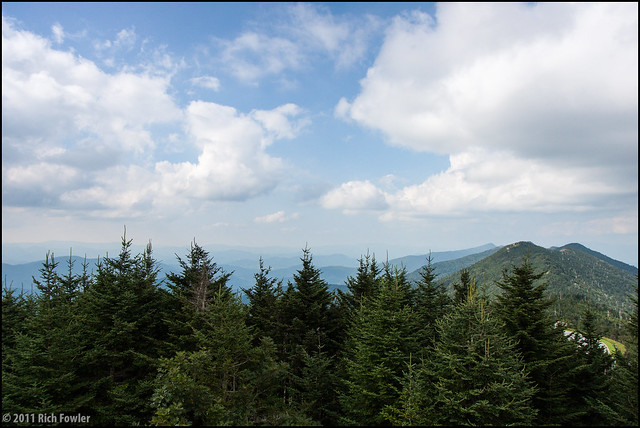
I put both lenses and camera through their paces in the NC mountains, and got some great shots. I’m really enjoying this combo.

Sony A7 Mark II

 Art, Photography, Technology  Comments Off on Sony A7 Mark II
Dec 172014
 

After the JLPT in DC, I ordered the new Sony A7 Mark II body, and it showed up a few days later.

If you’re expecting stats, then move on. This is more of an impressions report than anything else. What I liked, what I didn’t.

My initial thoughts? Tinged with confusion because the manual wasn’t so hot. I wound up calling Sony because I wasn’t sure why some functions wouldn’t work with my manual focus lenses. Part of it was on me, but part of it was a slightly confusing message that kept popping up.

Once I got that sorted out, I fell in love with it.

The menu UI isn’t perfect, but the shooting experience with it is great.

The viewfinder fooled me a few times into thinking I was looking directly through glass. It’s really sharp. Better than the rear LCD panel.

The customizable C1-C4 buttons on the body make it a manual focus shooter’s dream. I assigned the focus magnifier to C2, so I just have to press it once or twice, and I can get nice sharp focus. Then I assigned the image stabilizer to C1, so I can set the focal length of my MF lenses with a button press, a dial turn, and another button press. That’s about as fast as you can make it. I put ISO on C3, so I can tear through my ISO settings, depending on what I want to shoot.

There’s a ton of customization in the menus. It’ll take a little while for me to tweak it just the way I want it, but there’s a lot I can either tweak or ignore.

The camera feels great in my hands, and shoots great. Is it loud? Who cares? Honestly, I don’t get the obsession over shutter noise on the A7 cameras. I guess it goes make a certain amount of noise, but not enough for me to care. I’m more into getting good shots. It does that!

The image stabilization is great. It feels like I get 2-3 more stops of hand-holding out of the camera. There’s a noticeable difference when it’s turned off.

It also has a well-thought out auto-bracketing mode, that I set on 3 shots 1 stop apart, and just left it there.

The NFC is useful if your phone does NFC, I guess. You need to download an app and you can control the camera with your phone. It’s kind of hit-and-miss. There’s a whole Sony app store for the camera. It’s kind of cool, but it’s also sigh-inducing, too. (Another user ID and password, and something else to manage? Ugh.)

What’s most important to me is that I can take the pictures I want without thinking about the camera. I think about the photo, and that’s about it. In that regard, this camera is great.

My only gripe is a lack of native full-frame E mount lenses that are affordable. There aren’t many full-frame lenses on offer, and the ones that are AF are all pretty expensive. I already have some Leica M glass from 10+ years ago, so I’m covered, but it would be nice to have one native full-frame AF lens. Gotta start saving on the side for that, I guess.

Fireworks!

 Photography  Comments Off on Fireworks!
Jul 052014
 

I went with my GF and her mom to the local fireworks display. This year, I was going to get the photos right! I studied! I had the right tripod! I was ready to go! (I even bought earplugs, because it’s always so freakin’ loud here.)

And then with 2 minutes before it all started, a group of people sat right in front of me and screwed up my setup. Thanks.

Undeterred, I improvised as best I could, but by the end of the show, I found out that my focus had shifted all the way to the wrong side.

I’m going to take a look at the photos soon and try to salvage a few. If it’s possible, I’ll post them here.

The Cintiq 13HD

 Art, Photography, Technology  Comments Off on The Cintiq 13HD
Apr 212014
 

A few months back, my Intuos graphics tablet died, so I replaced it with an Intuos Pro.

Well, I’m 3+ months into using it, and it’s not really working for me. It may be the change from a smooth surface to the rough surface of the Pro, or the general feel of the stylus, but whenever I use it for longer than 30 minutes, my fingers hurt.

I’m holding the stylus as light as possible without dropping it, and my fingers still hurt.

So I have spent the last week or two looking for an alternative.

I like my Samsung Galaxy Note 8, and I like drawing directly on the screen, so I decided to look along those lines.

I spent a LOT of time looking at the Microsoft Surface Pro and Surface Pro 2. The Surface is a nice ultra-portable laptop, but I had a few reservations about it, chief being a display that is just too small for me. I think Microsoft did a great job with the Surface, and it’s pretty to look at, but I don’t like the Windows 8 interface, and the extra money to get 8GB of RAM and another $140 for a keyboard are, in the end, deal-breakers for me. I will probably revisit the platform when they come out with a new version, or my VAIO dies.

I also spent a lot of time looking at Yiyinova displays. The 22HD was the only one I was seriously considering, but the VGA connection bugged me. I would have had to put in a second graphics card to run it, and I didn’t want to mess with that. I already run two DVI displays, so there wasn’t any room to hook up a Yiyinova without adding another card. (And it doesn’t do HDMI.)

While I was flailing around, I found that MacMall was having a big sale on Cintiqs. They use an HDMI connector, and I still have one of those left on my graphics card.

To be honest, I wasn’t even considering one, because of the pricing. But the current Cintiq line has some nice specs, and it’s something I’ve always wanted. Even on sale, the new Cintiqs are a bit out of my price range. So I checked MacMall’s refurbished Cintiqs. Bingo! That’s the pricing I’m willing to go with. The refurbs are significantly cheaper, and come with a one-year warranty.

I decided on a 13″ Cintiq because I don’t have room for anything bigger. (Not much, anyway.) Also, the 22HD was $1599. Ouch. The refurbed 13HD was only $799, plus tax and shipping. I could live with that.

When it showed up, the tablet itself was pristine. No scratches, dust, or fingerprints. Nice. The stand and pen case, well, those were dirty, but not damaged. I have a tub of yellow goo called Compu-Clean that works wonders on this kind of stuff. It removed all of the dirt, dust, and other random stuff from the rubbery parts.

I’ve been using the 13HD over the weekend, and I really like it a lot. Setting it up with my dual-monitor system was kind of a pain. My main monitor is 1920 x 1200, and the 13HD is 1920 x 1080, so if I used the Cintiq as a mirrored display with my main monitor, my main monitor would get all messed up. (It changes the resolution to something that looks unpleasant.) I wound up mirroring my second display, a 1920 x 1080 Asus display. The Asus display isn’t terrible, but it’s kind of janky and over-saturated, and I’ve never been able to get the colors to not look weird. As a box that shows video, it’s fine. As something color-accurate… that ship never sailed, and probably never will.

One other minor beef with the 13HD is the stand. It’s cheap, and prone to collapsing if you aren’t really careful with it. So be careful with it. You only get three angles to choose from.

I like the controls on the side, but the controls on the Intuos Pro are better, and it’s a $500-$600 cheaper tablet. Instead of the great circular control of the Intuos, there’s a circular button with four buttons on it, and one in the middle. Meh. It’s okay, but not nearly as flexible. Instead of 8 more buttons (4 above, 4 below), there are only 2 above and 2 below. For the money, I want more buttons.

But these are minor complaints. Using it is a joy. While my Galaxy Note 8.0 has a capable pen and digitizer (also by Wacom), the S-Pen is too small and becomes uncomfortable over time. Also, there’s a distinct lack of really good drawing programs in Android. Autodesk Sketchbook Pro is the only program I can be remotely productive with, and it’s lacking far too many tools. (Gradients, anyone?) In spite of its limitations, I love drawing on my Galaxy Note 8.0. It bring a kind of immediacy I just can’t get from a graphics tablet.

The Cintiq improves on that experience quite a bit.

Using the 13HD with Clip Studio Paint (also known in the US as Manga Studio Pro) is a breeze. I love CSP for designing quick and dirty graphics and forms. It also runs Photoshop CS6 just fine, too. I tweaked the settings for Photoshop to change the controls to suit my workflow better. The only downside– I had to shove both programs in my Asus monitor window. Oh well.

I haven’t had a chance to put Lightroom through its paces yet, but I will soon. I hope this will speed up my photo editing workflow– using a pen on sliders should be faster than mousing over a bunch of sliders. We’ll see.

Snowmageddon For Real

 Photography  Comments Off on Snowmageddon For Real
Mar 022014
 

We finally got hit by the a decent blizzard a couple of weeks ago, so I took a bunch of pictures. The snow event lasted for about two days. Very inconvenient, but also fun.

This is a placeholder post until I get the photos up and in.

Slide Duplicating Rig Completed! (Converting FL Bellows to NEX Mount!)

 DIY, Photography  Comments Off on Slide Duplicating Rig Completed! (Converting FL Bellows to NEX Mount!)
Feb 022014
 

I finally got the parts and tools together, and got this rig together.

I have a Canon FL Bellows with a slide duplicator on the end, and a Sony NEX mirrorless camera. Fortunately, the NEX isn’t too picky about accepting other lenses, so long as you have an adapter that ends in an E mount.

I followed the advice in this post on the Fred Miranda forums (which I mentioned earlier), and I figured I would elaborate on how to attach the L39 to NEX mount on to the Bellows FL, because the OP didn’t really go into much detail.

First, get an L39 (Leica Screw Mount) to NEX mount adapter. There are tons of them out there. I got a Fotodiox adapter for about $20 on Amazon. You want one with a shiny metal liner (which the L39 lens would screw into) that’s held in place with 3 grub screws. (Grub screws are headless screws that are buried in little holes on the sides of the barrel.)

To back out the grub screws, you’re going to need the tiniest screwdriver you can get. In my case, I needed a 0.7mm hex head. It’s just the head– it can be screwed into a handle, or you can just use the bit. I found mine at Harbor Freight as part of one of those microtool interchangeable head hand tools.

It also helps if you have a really bright light, and a magnifying glass. You’re going to be dealing with a lot of tiny screws.

Ok, Got Your Stuff? Let’s Install It!

First, remove the FL mount ring. It’s the shiny metal ring on the back of the FL Bellows. Start by removing the two screws holding the handle on, remove the handle, then remove the retaining screw on the ring. Back the ring out by unscrewing it clockwise. (Righty-loosey for once.) The ring should come off pretty easily. If it gets really tight, you’re turning it the wrong way.

When the ring is removed, there should be one little flat-head screw left at the top of the remaining mount. It will poke out into the area you’ll be mounting the L39-NEX adapter, making it impossible to get the adapter to hold on, so back it out. Take all of these parts and store them in a little baggy. Or recycle them. It’s up to you. (I’m in the baggy camp.)

Back out (but don’t remove!) the grub screws in the L39-NEX mount until the threaded shiny liner pops out. You may need to use a tool with a handle to get enough torque to break the seals.

Now you need to attach the NEX mount to the end of the bellows. It’s more of a matter of positioning the mount and making sure the grub screws are tight. There are two tricky parts here.

First, the bottom right screw is hard to get at when the mount is in the correct position. I used just the head of the driver tool. The bellows hardware gets in the way otherwise.

Second, the red dot on the mount needs to be in the right position. I put it right around 9 o’clock on the ring. To get it close enough, I mounted the NEX and carefully backed out one of the grub screws a hair, then gently moved the mount until everything was parallel and square.

I suppose you could add something like Loctite or JB Weld to make sure it never comes off, but in 5 years some other mount may be the favorite of the day, so I would advise against doing that.

What’s going on here is that the grub screws from the mount are grabbing the end of the old FL mount, which is a smooth tube. It’s a friction fit, so don’t torque it too hard, and be careful when using it for shooting. (Support everything!) I have no idea how prone this setup is to falling apart– only 3 tiny screws are holding the whole thing together.

Duplicating Slides

I dropped in a 35mm f3.5 lens and checked out a test slide, and it fits in the frame just fine now. There’s just enough distance between the bellows and the sensor now that I can get the whole slide duplicator in the frame. I’ll try the 50mm f3.5 macro later and see how it works.

Snowmageddon Round Two? (Random Stuff Post)

 Art, DIY, Education, Music, Photography, Technology  Comments Off on Snowmageddon Round Two? (Random Stuff Post)
Jan 282014
 

Well, we’re all waiting for the snow to start. We’re supposed to get anything from 2 to 6 inches of snow today through tonight, and as I’ve said many times, we don’t do snow well here. I’m staying off the roads today and tonight, so that means no piano class.

Bummer.

If I Can’t Go to the Music School, Bring the Music School to Me!

I’m going to catch up on my Coursera classes: the Write Like Mozart class, and Pat Pattison’s Songwriting class, which I signed up for again last night.

I signed up for his Songwriting class last year, but I didn’t have time to finish it. What I saw, I really liked. He gives a really good insight into how pro songwriters write songs, and how to improve my own songwriting. (Hint: it involves lots of practice, just like anything else.)

I might also watch some Max 4 Live tutorials. That also looks really interesting.

Bitwig Studio

Bitwig Studio is coming out in late March for $399. The part that’s really interesting to me is the ability to run it in Linux. I think that’s a brilliant idea. But from what I’ve heard, there’s no ReWire compatibility yet, so that’s a big minus for me. This is a good preview of Bitwig, and you can find more videos on their channel.

I wouldn’t mind demoing it to see what it’s like, but $400 is a bit steep for me after G.A.S. ate a lot of my money over the holidays.

I probably shouldn’t buy another new instrument until I’ve gotten good at using the ones I already have.

Rewire and Vocaloid Editor

Speaking of ReWire, I finally found a VST that will let me ReWire the Yamaha Vocaloid 3.0 Editor into Live or Cubase. Cool! You can find it here (the site is all in Japanese). Look for this text “V3Sync ReWire Synchronizer Version 1.3.0 をダウンロード” in the middle of the page, click the link, and install like any other VST. Point the Vocaloid 3 editor to the VST, and it should work.

I know you used to be able to ReWire directly from most Vocaloid 2.0 editors. What happened with 3.0? I have no idea.

Piapro Studio is a good alternative now that it’s at version 1.2. Now you can use sound banks from other companies, too, if you register your non-Crypton sound banks at Crypton’s Sonicwire.com website. I haven’t tried it yet, but I will soon.

Monitor Stand Update

The monitor stand is working really well. I installed it about a week ago, after letting it off-gas for a few days. It adds about 4.25 inches to the height of my monitors, so it took a few days to get used to, but I’m used to it now.

Naturally, just as I say that, I noticed a crack in the wood filler on the right side, near my heater vent. That’s what touch-up paints are for.

Slide Duplicating Project

This is a project I’ve been wanting to get back to for a while. I’m waiting on a Leica Screw Mount to Sony E Mount adapter, and then I may be able to make some good progress on it. I’m going to try what someone did here and remove the FD mount from my Canon FL Bellows, then attach it to my NEX with a LSM to E Mount adapter. That should give me enough focal length to get the duplicate slides in full view.

I hope.

Or I can just throw the whole mess on the copy stand. But I’d rather use a slide copier, because I can aim that at Mr. Sun, and get natural daylight for copying the slides. Artificial light always has weird spectra, even light bulbs that say they are “daylight balanced,” only do so in a way that fools your eye. It does not fool the sensor or the software.

More Coursera Fun

 Education, Music, Photography, Technology  Comments Off on More Coursera Fun
Jan 202014
 

Prof. Donald Hornstein is a fun lecturer to listen to. I highly recommend his new Coursera class on Environmental Law. If you have any interest at all in the environment or in law, take it. (Even for you lawyers out there– it’s a fun refresher.)

I take my CLE every year at the UNC Festival of Legal Learning, and every year, I look forward to Don Hornstein’s lectures. They’re not just entertaining, they’re also fascinating. He takes a subject that at times can be really dry and breathes life into it.

I also signed up for a class called “Write Like Mozart.” It started a few weeks ago, so I’m already behind. I’m going to have to hustle to catch up, but there’s some really interesting stuff going on there. I’d like to learn more about 18th century voice leading!

Is Paddy the Coolest Thing Ever???

I was sitting here, surrounded by my MIDI gear, when I had a thought that other people have already had. “What if I could use this stuff to edit my photos in Lightroom? Wouldn’t it be a heck of a lot faster?”

The answer is yes, so long as Lightroom doesn’t break the plugin you’re using.

Paddy is a program developed as donation-ware, that lets you use just about any MIDI controller to control the sliders in Lightroom to develop photos. If you’ve used Lightroom for any appreciable length of time, you know that fiddling with the mouse to change levels for all of Lightroom’s sliders is finicky business. Sometimes the sliders misbehave, sometimes the mouse misbehaves, either way, it’s tedious.

What Paddy does is take that tedious, repetitive mouse clicking, and if you have an old MIDI mixer with some motorized faders, you can zoom through editing photos in a snap. The faders will automatically go to the positions of the current photo in Lightroom, and you can just mess around with them as you please. I love the idea of this kind of tactile feedback, as well as the idea of mixing MIDI and photo developing.

This is one of those things I need to put on the “Come back to this in a few months” pile and see how the software is progressing.

You Komplete Me

 Music, Photography, Technology  Comments Off on You Komplete Me
Dec 052013
 

Komplete Ultimate showed up today. It comes on a shiny little hard drive, and the install takes about an hour or two. I installed the full version of Kontakt first, then registered it, then installed the Komplete Ultimate cross-grade, and everything went just fine. I’m excited to get more into it. All of it. There’s a lot of it!

I’ve been looking at some of the other deals out there. One VST I picked up was SynthMaster, because it sounds great, and it was on sale for $49. I really like the sounds it makes. If you pay more, you can get more patches. In the case of SynthMaster, some great sound designers have made some really amazing patches, so I picked up a few to go with it.

I also picked up Chromaphone by AAS, because I’ve been looking for a good percussion modeling VST. I realize that Chromaphone does more than that, and, in fact, it does a lot of really wild and interesting things, too.

The last thing I picked up was a second monitor, because photo editing with just one monitor drives me nuts. Also, working in Reason with only one monitor also drives me nuts. I like having the sequencer/mixer in one window, and the rack in another. I found a Dell monitor on sale at Amazon, but it showed up with a bunch of dead pixels, so I sent it back. Unfortunately, I couldn’t get another one, so I had to spend a little more to get an Asus monitor.

Now that I have two monitors, though, I realize that I need to do something about my desk.

It’s always something, huh?

Oh, my new dryer showed up yesterday. It dries clothes beautifully, and it was cheap. Did mention it was cheap?

Celebrating Pocky Day in Manhattan

 Food, Japanese Language, Photography, Travel  Comments Off on Celebrating Pocky Day in Manhattan
Nov 112013
 

Happy Pocky Day. (11-11!)

I celebrated by heading to the Metropolitan Museum of Art. The recommended donation now is $25! Ouch! I saw a lot of exhibits at the museum that bring back memories of my childhood, like the Egyptian section and the Temple of Dendur. We used to come to the MMA when we lived in NJ, and I always looked forward to it. It’s one of my favorite museums in the world.

After looking at the Egyptian section, I looked at the American Decorative Arts section, then at the sculpture garden, then another favorite section of mine, Arms and Armor. I’ve always been fascinated at the various inventions humans have created to protect themselves from… other humans. And plate armor just looks cool. I’d hate to wear the real thing, though.

Then I broke for lunch. Lunch was in the basement cafeteria, which is the cheapest place to get lunch.

First I had to find it. It took a little wandering and map-consulting, but I found it.

It was about $25 for lunch, but it was good. I just wish I could have gotten a plain turkey sandwich, instead of something with cranberry mayonnaise on it. I like cranberries, and I like mayonnaise. I would just rather pick the dressing myself.

I swung by the medieval statues I saw on the way to the basement, and snapped a few photos with my phone, then snapped some more of the statue garden on my way to the modern art section.

I wandered around the modern art section, and finally found my favorite painting in the building. It’s a Jackson Pollock painting called “Autumn Rhythm.” I don’t know why I love it. I just do. That’s art.

By then it was about 2:30, and time to head out. I found souvenirs for everyone, headed out the door. I got a few shots of the building on my way out with the Nexus 5.

On to Times Square, and Kinokuniya

I grabbed a train to Times Square, then headed to Kinokuniya to do some more shopping, but really, by now I have all the books I need. This was more of a “make sure” trip. I really wish I had a Kinokuniya or similar book store nearby.

Then I headed back to the apartment to clean up and get changed. I was going to meet up with some friends in Greenwich Village for dinner. I got all cleaned up, and headed out.

Oh, My Battery!

We met up at Oh! Taisho! at around 7 or so, and had a nice conversation at dinner. The food was good. It was yakitori and other bar-style food. We talked forever, then went over to Starbucks and talked some more. It was a lot of fun.

But my battery was almost dead by 9. I had to borrow a portable battery charger from a friend of mine. I wasn’t happy about that. This is after recharging the battery once while I was changing. I’m not sure if it’s a driver thing, or a Kit Kat thing, or a Nexus 5 thing.

By about 10 or so, I had to head back, because I don’t want to be out too late and wake up my SO’s parents, so we said our goodbyes.

Tomorrow I go back home. It’s supposed to snow.

Career Forum Day Two, etc. etc.

 Food, Japanese Language, Photography, Travel  Comments Off on Career Forum Day Two, etc. etc.
Nov 092013
 

Day two of the Career Forum, and my last. I’ve seen everything I want to see, and talked to everyone I want to talk to. I talked to a few companies, had a couple of brain cramp moments, but generally feel okay about it.

If something comes through, great! If not, I’ll keep freelancing.

I headed back to the hotel, changed, and had lunch. Then I got my stuff together and headed to the USS Constitution, to get a good look at it before the last tour of the day. I just made it to get on board, but I missed the last guided tour. I did get a chance to take some photos with my NEX and my Leica 21/2.8M ASPH lens, though.

I went back to the hotel, rested for a little while, then headed to the same Japanese restaurant I went to last year, Shiki in Brookline. It’s about a 45 minute trip by the green line. I had 20 minutes to kill before my table was ready. There wasn’t anywhere to wait, so I waited outside.

I had udon. It was good. The service was a bit on the slow side this year.

Tomorrow I head to New York.

Glass in Durham

 Education, Music, Photography, Technology  Comments Off on Glass in Durham
Oct 052013
 

Google brought its Glass wearable device to Durham today, and it was a madhouse. A controlled madhouse, but the lines were huuuuge.

Kudos to the Google staff, who managed the hordes of people who showed up. I only had to wait in line for about 30 minutes, and I came a little late. (Like at 11 am.)

Everyone was excited. We got little booklets that explained how to use Glass before we even went in. And they had waiters bringing us water so nobody got dehydrated.

Once I got in, I had to sign a release, then we went off into our little orientation groups. Then we got to try it on for about 10 minutes.

It’s a really neat device. My unit didn’t connect to WiFi, though, so it didn’t do much. But I can see how having it could be really useful for anyone who shoots video. I’m not as sold on the serious photography aspect, but I’m a camera snob. If the lens is too small, I have problems taking it seriously.

But I bet you could make some really interesting videos with this.

The heads-up display isn’t really a HUD. It’s more like a little TV that hovers just off and to the right. It’s not quite as earth-shattering as I was hoping for.

In my vision of a vision enhancing technology, it would be a real HUD that would give you an overlay layer on reality, like drawing big fat arrows on the pavement as you’re driving along to tell you where to turn, instead of making you look at a little monitor and look away from the road. It would kind of be like a world where your computer is a really good, really fast graffiti artist.

But I think that kind of tech is about 4-5 years away at least.

After we played with it, we could go upstairs and get food and beverages for free, and a poster. I skipped the food, grabbed a poster, and left. I had music composition later on, and I needed to get ready for it.

That’s been a fun class so far. Lots to learn, but a nice environment. I’ve already written one piece, too. It’s not great, but it’s a start.

I’m also cramming A+ material into my brain as fast as I can. I have my first A+ test on the 11th. Gotta study.

Progress Report

 Art, Japanese Language, Music, News, Photography, Technology  Comments Off on Progress Report
Jul 252013
 

So I start a lot of projects on this blog, and some get finished, some don’t. I use David Allen’s “Getting Things Done” approach to constantly examine what I want to do vs. what I can do. GTD is a lifesaver in that regard. It helps keep me focused when sometimes it feels like I’m being torn apart by ducks.

So here are some short updates on projects I’ve been wanting to work on/finish.

The Grammar Songs

I discovered that in order to make it work, I need to improve both my Japanese and my music production skills. I studied music from 4th grade all the way through college, so I know a lot about performing music, but I don’t know as much as I should about composing and producing it, which are two entirely different skill sets.

I’ve been using Coursera to work on the production side, and now I need to work more on the composition side. And when it comes to writing lyrics, that’s the result of daily writing exercises.

My Japanese is pretty good, but it’s not quite at that level yet, so I’m working on it. Same goes for melodies. I’m looking for a way to get more music theory under my belt.

Japanese Studies

Those are going pretty well. JOI makes it easy to load up on classes for grammar, conversation, and vocabulary when I need to, and they meet my level, which is a godsend. Being an advanced student in a room full of beginners can be helpful sometimes, but it’s hard to make progress that way. So I’m glad JOI has classes that meet my needs. That’s going well so far.

Also, because of work, I work with Japanese people on a pretty regular basis. The only downside is that since we’re in the US, we mostly speak English and follow US business customs. Not all the time, but a lot of it. Those times when I need to slip into Japanese Mode it comes in really handy.

3D and 2D Art

Well… that had to get put on the “I’ll do it after the JLPT” pile. There’s just too much going on right now, and too many projects require my attention, so I find it’s best to whittle it down to what I can handle. I still want to get into it, but I need to find the right time/place to do it.

I sketch whenever I can. I’m not very good at it, but it’s relaxing, and it’s fun. It also helps me with my photography, and my eye for how I want to compose photos.

Where ARE the Photos?

That’s another thing that’s being put on the shelf for now. I have a giant pile of photos to edit, and just no time to do it. Editing requires big chunks of time for me, and unless I’m getting paid to do it, I just do it when I can. I’m going through the older stuff and gradually adding it, though. I don’t know of a good way to bump old posts up to the top of the site just because they have new material. Maybe I’ll create a new tag?

Calligraphy/Shodo

Well, ever since my class in Raleigh ended, I’ve been going to my usual calligraphy classes. Before the classes in Raleigh ended, though, I spent some time studying Edo-moji, and that was a lot of fun. Now I’m trying to decide what to do next in calligraphy/shodo.

Other Site Stuff

I recently moved the site over to Suffusion, and I like it as far as CMS/frameworks go. I can’t really call it a template, because it’s more like a framework you have to set up and tweak yourself to get it to really sing. My current design is a little Spartan, but I’m from the Jakob Nielsen school of web design. It needs to be easy to read, and accessible first above everything.

Learning Lightroom 5 with George

 Photography, Technology  Comments Off on Learning Lightroom 5 with George
Jul 182013
 

I’m getting the hang of Lightroom 5 now thanks to George Jardine’s excellent new video series on mastering Lightroom. It’s really worth checking out if you want to get the most out of your photos, or if you’re like me, and stare at a so-so photo for 10 minutes, trying to figure out how to tease out the little bits that will make it better.

Sometimes a photo just isn’t salvageable, and that’s a shame. But George’s videos bring more photos into range of “fixable” for me.

One of the tools he really focuses on is the tone curve, more so than the other exposure controls in Lightroom 5. The nice thing about the Tone Curve is that it will “unbunch” bunched-up tones, bringing out the contrast. It does so without smushing up other tones as much as the sliders do. At least that’s my experience so far. I need more practice with the tone curve to make it work really well, though.

I picked up his Library videos a while back, and those were really useful, too. I have all of my photos cataloged and stored in folders where I can find everything fairly quickly, all on a small portable USB-3 hard drive I move from computer to computer. That way I don’t have to worry about messing up my catalog file. I just back that up to a removable HDD on a regular basis.

I recommend all of his Lightroom videos, they’re worth the money and very informative.

The money you’ll save on never buying presets again will more than cover the cost. Really, why would anyone use presets? No two photos are alike, so why would you treat all of your photos as if they’re all the same? I don’t understand the thinking.

My main problem now is plowing through the 10,000+ photos in my library backlog. I love to shoot photos, but edit them? Not so much. Picking just a few is always so agonizing. I love them all, even the really bad ones.

Fireworks!

 Photography  Comments Off on Fireworks!
Jul 042013
 

Last year I tried to take photos of the fireworks in Chapel Hill, and was met with kind of “meh” results. This year I met up with my SO and her mom, and we went to the stadium again for more small-scale fireworks, and I tried to get some photos that were better than last year’s.

I probably should have brought my new tripod with me, but I was worried about it causing a problem at security. (It wouldn’t have. I was over-cautious.) Next year I’ll have to use a tripod, or a monopod.

The photos were okay, but nothing really earth-shattering. Some were artistic, in the way blurry photos can be sometimes.

The fireworks were fun, if a bit loud. They were exploding right on top of us, because they were launched right inside the football stadium.

The method I used was to put the camera on BULB, set it to F/13 or so, 100 ISO, then just open it up when the fireworks go up, and let it go after a second or two. A cable release works best here to avoid camera shake. The Nex has a wireless cable release, but it’s kind of annoying to use. So I wound up using my 60D.

I’m not sure how I feel about that now in retrospect.

I think the best combo would be the Nex with the Leica 21, set to F13 or F16, a tripod, and cross my fingers a bit.

I’ll have to give it a shot next year.

Back Home Again

 Photography, Travel  Comments Off on Back Home Again
May 292013
 

I’m home. The trip to Asheville was full of photo opportunities, so I took a bunch of pictures.

One night there were fireworks in the valley.

And on the 27th, I went to Mt. Mitchell to try out the auto-bracketing of my Nex.

I also picked up a new small, compact, light-ish aluminum tripod made by MeFoto. It folds up pretty small, and the legs will lock in 3 different positions. It’s nice and light, and compact. I’ll have to give it more of a workout to see how it holds up to more rigorous travel, but so far it looks good. It’s a lot better than my old Slik tripod that cracked and broke, or my 25-lb Manfrotto, which is great for video, but terrible for carrying up a mountain.

Now I’m back home, because I have work tomorrow. Lately I’ve been working for a Japanese company in RTP, helping their legal staff understand the US legal system and US culture. It’s been a win-win of sorts, because they get help on English stuff, and I get to use my Japanese every now and then.

Snow and NEX BIOS Update

 Photography, Technology  Comments Off on Snow and NEX BIOS Update
Feb 132013
 

Two exciting things happened in my world today.

First, it snowed! Okay, it didn’t stick, and it wasn’t a whole lot, but it was pretty.

Second, Sony released a proper BIOS for the Nex 5N! Now it will do auto-bracketing of up to +/- 3.0 EV! That’s huge! Now the Nex is a “proper” camera in my opinion. I’m sufficiently pleased with it to the point that I’m okay with it if Sony abandons it from here on out. (They probably will, anyway, new NEX models have been out for a while now.)

Snow in the Mountains Again.

 Photography, Travel  Comments Off on Snow in the Mountains Again.
Dec 272012
 

It snowed last night and this morning in the mountains. I was up here with the whole family for Christmas. It was 2010 when it snowed about a foot up here. This time, it’s just a light dusting, maybe half an inch to an inch, which is really nothing for the mountains.

While I’ve been up here, I have taken a ton of photos of the mountains. Editing them is going to be like cleaning the Augean Stables.

I’ll edit this post once I’m all caught up.

In the Mountains Again

 Photography, Travel  Comments Off on In the Mountains Again
Dec 102012
 

I spent the last few days in the mountains, and came back in time for my calligraphy class in Raleigh tonight. I took a lot of photos of the mountains, and some good macro shots of Christmas tree ornaments. I really like the Canon 50/3.5 FD macro + NEX combination. It really needs a tripod to be perfect, but it’s just fun to mess around with.

Photography Stuff

 Photography  Comments Off on Photography Stuff
Dec 032012
 

One of the projects I want to get off the ground is copying a bunch of old slides I have. So I got out my old Kodak RFS 3600 scanner, plugged it in, and it just flashed lights at me. I emailed PIE International, the company that made it, and still makes a variant of it 10 years later, and they regretfully informed me that the RAM was dead.

I don’t feel like dropping more money on a scanner. I’d like to find a faster solution. And I think I did. Maybe.

According to some posts I’ve been reading on the DPReview message board, it looks like the best solution is going to be in 40-year-old technology. I picked up a Canon 35mm FD 3.5 lens, a Canon Bellows FL, and a Canon slide copier from KEH, and I also got an FD-E-mount adaptor ring to get it all to fit on my Nex.

It kind of works. It kind of doesn’t, because I haven’t figured out how to make the bellows fit tight enough to the body so that I get all 100% of the slide image in the slide copier. I can get about 98% of it, and me being me, that last 2% bugs the heck out of me. The solution probably involves removing the FL mount from the bellows, and changing it to something thinner, but I need to get help on that.

I tried mounting a 28mm lens, and that was a total bust. If I go wider than 35mm, the slide copier stops working, because I can’t focus it properly. So I’ll need to spend some time figuring out how to fix the lens mounts.

I also picked up a Canon FD 50mm f3.5 macro lens with a 2x extension tube. That’s a lot of fun.

Flick(r) on the Forehead

 Photography, Technology  Comments Off on Flick(r) on the Forehead
Nov 152012
 

Getting Lightroom and Flickr to play nice with each other has been a bit tricky for me, but I think I’ve managed to find all of the tools I need.

Setting up the Flickr Publish Service

For starters, I had to set up the Flickr publishing service in Lightroom. I keep hearing that there’s a plugin that’s even better at Flickr, but I managed to get the native Lightroom plugin to work pretty well, so I’m not going to mess with it yet. You can find a lot of videos about how to set up the Flickr publishing service by searching YouTube. I just figured it out from the menu. It’s not too hard if you’ve set up other programs to work with Flickr before.

Before you Sync your Flickr account with Lightroom, be careful about how you want to handle your metadata. If you’ve gone to the trouble to write up a bunch of comments and titles for your photos, make sure you set up the Flickr publish service for Flickr so that it doesn’t overwrite them with the photo metadata in Lightroom. (Unless that’s what you want.)

LR/Mogrify 2

I came across this plugin while looking for more information on setting up Flickr and Lightroom, and there’s a ton of people who love it. I headed to Photographer’s Toolbox, donated some money, and got the plugin.

MAKE SURE you download LR/Mogrify 2. If you get a bunch of errors in Lightroom, then you may have downloaded version 1 accidentally.

I had to install ImageMagick first. There’s a link on the LR/Mogrify page to ImageMagick, and ImageMagick is free.

LR/Mogrify 2 uses ImageMagick’s mogrify function to add some post-processing magic to your photos when you publish them.

I use it for 2 things:

I want to put a thin black border on the edge of all of my photos, so they look better in my blog. LR/Mogrify does borders really well. You can add as many as you want, and they’re non-destructive. They don’t cover any of the image. Instead, they add to the “canvas” size and wrap the border around the edge. I set my borders to 0.3% of the image size, equal on all sides, but you can do all kinds of fancy stuff with it.

I want to put a watermark on my photos that looks a little better than the built-in Adobe watermark. I found a post here that shows a really easy way to set up a drop-shadow watermark that will work on both light and dark photos.

To set up the watermark, you need to set up two instances of Mogrify Text Annotations. Mogrify doesn’t work exactly like the post shows anymore. You need to add a second line in the entry for text annotations. In the first entry, enter your watermark, pick a light color, and set the opacity to something you like. In the second entry, enter the same watermark, pick a dark color, and set the opacity. With the second entry, set the offset to 2px for each. This will create the drop shadow.

To test my LR/Mogrify setup and other Flickr Publish Service settings, I picked four photos that were verticals, horizontals, light, and dark, and set up the Publish Service for the Hard Drive exactly like I did for Flickr, to see how it would turn out.

It took some tweaking, but I got a look I like.

I still hadn’t published anything to Flickr at this point. Now I had to sync up my library with my Flickr sets.

Syncing Your Flickr Photo Collections With Lightroom Using ReSync

The next thing that needs to be done, if you’ve already got a lot of photos on Flickr, is to get your collections on Flickr in sync with your library in Lightroom. Doing it manually would be an insane amount of work if you’ve published a lot of photos.

That’s where Flickr ReSync comes in.

Download the latest version. 0.9.4 works just fine with LR 4.2, unless there’s a newer version up there. Follow the installation instructions. It installs like any plugin. Unzip and copy to Lightroom’s plugins folder.

Once I had it installed, I wasn’t sure how to get it to work. I couldn’t find a big shiny “Press me!” button. After going through the readme file in the zip file of version 0.6, I figured it out. Here’s how to use the plugin:

First, from Lightroom, after you’ve activated the plugin, restart Lightroom. (Just in case.)

Now, import all of the photos from your hard drive that are also in your Flickr account into your library. It might take a while, so go get some coffee.

While Lightroom is grinding through that, I’ll tell you how ReSync works– it matches the date and time you shot the photo with the date and time of your photos on Flickr. As long as you haven’t trashed your metadata, you should be fine.

Now that you have a library full of photos, you need to sync them up with your Flickr account. ReSync will create a bunch of Lightroom smart collections that will correspond to your various photosets in Flickr, and link them up with the photos you already have posted in Flickr.

To start syncing, go to the Library menu in Lightoom, drop down to Plug-In Extras, then select Automatic ReSync from the Flickr Resync submenu.

Go get some more coffee. This is going to take a while.

You may wind up with a stack of photos that the program can’t figure out. It’s pretty good about presenting you with a set of choices. Pick the photo you want to sync up with the photo on Flickr.

Now you should have a bunch of smart collections in your Flickr Publish Service area.

Fixing The Flickr Publish Set Order Bug in Lightroom 4.2

There’s one other thing that tripped me up: the sort order in the Lightroom library may not be the same as the sort order in your Flickr sets. I noticed that my sets were getting tossed in all directions, and Lightroom was the culprit. My photo sets were getting put in reverse order, from last to first. Annoying.

Here’s how I fixed it.

Go to library mode.

Now look at the bottom of main window in grid view. You should see a little drop down that says Sort: I picked Capture Time, because that’s how I want my sets to be sorted.

Then I set the order to a->z.

This alone won’t fix it. After that, go down to the filmstrip at the bottom of the screen, click on the thumbnail image of one of the photos, and drag it over to the side. Release it. Now drag it back to where it was.

The Sort: field should now say User Order.

Add a dummy tag or fiddle with all of the photos in develop mode, or just put them all on the map. Do something that makes Lightroom want to republish everything.

Republish the whole set. It should come out in the order you want now. This is a bug that Adobe has yet to fix for whatever reason.

Another good way around this is to use Jeffrey Friedl’s Flickr Publish plugin. Now that I have Lightroom obeying me, though, I don’t want to change anything. Part of me is afraid that changing my publishing plugin will cause me to lose all of my sets, and I cannot have that happening.

At first, finding all of this information required a lot of work, but once I got everything set up, I was kicking myself for not doing this sooner. It’s slightly complex, but the tools that are out there make it really easy to do.

I’ll put all of the important links here:
LR/Mogrify 2
ImageMagick (Needed if you’re installing on Windows)
Post on drop shadow watermarks in LR/Mogrify
Another post on how to do watermarks in LR/Mogrify, but nothing on drop shadows.
Flickr Resync
Jeffrey Friedl’s Flickr Plugin

Lighting up Lightroom

 Photography, Technology  Comments Off on Lighting up Lightroom
Nov 122012
 

I bought Adobe Lightroom 3.0 a year ago, before my trip to Japan last fall, along with the Photoshop CS5 upgrade. At the time, I figured that when I got to Japan, I would shoot a bunch of photos, and have the time to edit and sort them out. And somewhere in there, I’d have time to figure out how Lightroom worked, too.

How naive.

In reality, when I wasn’t wandering around in my spare time, I was studying until I passed out during the week. There was no time to learn something like Lightroom, which looked alien to me, who has used various iterations of Photoshop since version 3.0. (Not CS 3.0, 3.0.)

When I got back from Boston this year, I decided that my photos are not going to organize themselves, so I fired up Lightroom. “Let’s get this over with,” I thought with the same excitement one feels when going for a root canal.

And then I found out that Lightroom had been upgraded to version 4.0 (now 4.2, going on 4.3), and all of the cool kids were raving about it. Well, truthfully, they were raving about 3.0, too, but now it seemed like Lightroom did some cooler stuff, and generally processed photos better.

So I upgraded.

Learning to Love Lightroom

At first, I started messing with things to see what did what, and watched a few Adobe TV videos to get the feel for it, but while the library was pretty easy to figure out for someone like me who is familiar with databases, I had no idea what was going on in the develop module.

While I was desperately searching for some kind of help, I just happened to come across a link to George Jardine’s videos about Lightroom. Really, if I hadn’t been reading a totally unrelated thread on the Adobe message boards, I’m not sure I would have found these videos, and that would have been a shame.

George’s develop video series is about 6 hours long, and it contains 18 videos. I spent a weekend marathoning it, and by the time I was done, I finally understood how Lightroom’s develop module works, and I managed to figure out a way to process photos in a way that gives me results I like.

If you’re someone who likes to learn via YouTube, and are struggling with getting Lightroom to sing, I highly recommend George Jardine’s videos. They’re awesome. Just give up a day or two and watch them, then play with Lightroom to see what he’s getting at.

I have a bad habit of buying 4-inch thick $50 computer books, and later using them as doorstops. I have discovered that I just learn faster by watching videos of someone showing me how to do it.

One other thing: it took me until the series was completely over to really get everything sorted out in my head. I would recommend waiting until the last video before messing with publishing anything online, because you’ll wind up republishing it again.

And again.

If you’re like me, and have a massive pile of unprocessed photos, I highly recommend Lightroom. Once you get the process down, it’s an order of magnitude or two faster than Photoshop to power through with lots of quick, non-destructive edits. Now I don’t have to worry about saving 10 different versions of a 50MB file just to make sure I don’t screw things up. I can just dump all of my photos in one place, and let Lightroom do its thing.

More importantly, from within Lightroom I can publish my photos to my Flickr account, to my Picasa account, or send them to Costco to be printed up however I want. I love the plugins.

Here are a few links to some useful Lightroom sites:
http://thelightroomlab.com
http://www.lightroomforums.net/
http://tv.adobe.com/product/lightroom/episode/highest-rated/playlist/
http://www.lightroomqueen.com
http://www.mulita.com/

Calibrate that Nasty Monitor!

Before you start editing a bunch of photos, I would suggest that you do two things:

1. Calibrate your monitor. If you don’t know what that means, head to http://www.digitaldog.net and learn all about it.

I use a Spyder 3 Pro, and it does a pretty good job. You don’t have to get a Spyder, but get something to help you calibrate.

2. If you can’t find lens profiles for your camera/lens combo, you might want to create some of your own. Go to the Adobe web site and search for Adobe Lens Profile Downloader and Adobe Lens Profile Creator. With the downloader, you can search for profiles other people have uploaded, and with the creator, you can just make your own for those weird lenses you got off of eBay.

Another thing to consider, if you’re finicky about color, is the XRite ColorChecker Passport. It’s pretty handy for getting those white balances nailed, when the light is uniform. (When you’re dealing with mixed light, well, good luck with that.)

Liberated from Leica Lens Limbo (or Nex!)

 Photography  Comments Off on Liberated from Leica Lens Limbo (or Nex!)
Oct 292012
 

I mentioned that I’m using a Sony Nex in the blog on the trip to Boston, but I didn’t go into much detail about it.

Right before I headed off to Boston, I found a really good deal on the Nex 5N bundle, and picked one up. What impresses me about the Nex is not only the pictures it takes, but its E mount, which, with the right adapter, will take Leica M mount lenses.

This is very important to me!

A Little Backstory

Long ago, when I was in Journalism school, I bought a Leica M6 TTL, and it was (and still is) a great camera. The only problem I had with it is that by about 2006 or so I wanted to shoot digital, because it’s a much easier workflow. Is it better than film? Well, that’s another post.

Leica came out with its digital camera bodies around 2008 or so, and while I was excited by the concept, I was not excited about the price. At the time, I didn’t have $4000-$5000 lying around for what was essentially a camera body that will be worthless in 2-3 years.

The M8 was a fine camera, and while it had all of the Leica Juice going for it, as a digital platform, it was average at best.

Then Leica came out with the M9. It’s a much better camera than the M8, but it’s not worth $5-$6k. Meanwhile, companies like Canon, Nikon, and even Sony are pushing the limits of what prosumer cameras can do.

I love shooting Leica cameras. They’re excellent machines. They’re just not worth $7000. The M9 would have to do much much more than it does to merit $7k.

And it doesn’t. Leica does a great job of fitting its great lenses to a digital body, but that digital body isn’t any better than the digital body I could get from Canon or Nikon for 1/3 the price.

So for the last 5-6 years, my Leica gear has been gathering dust because Leica has failed to reach me as a former customer.

The company has priced me out of pretty much ever wanting to buy their gear again. The lenses are incredible, but I don’t have that kind of cash lying around. In the early 2000s, when lenses were more reasonably priced, I could afford to stay in the Leica system, but until now, it’s been impossible.

Saved by Sony

Then Sony released the Nex. I wasn’t particularly impressed by the first Nex, except for its ability to take M glass. My take on it then was that it was neat, but ultimately there were too many compromises.

So I waited.

When I saw the prices coming down on the 5N, I was ready to buy. I feel like the Nex has come far enough along, and the 5N was at a price point I could stomach.

I’m happy… for the most part.

It comes with a 18-55 kit lens, which is okay, but generally forgettable. It’s something to use for making videos with, because it’s autofocus, but as a tube with glass in it for taking pictures? I’m not too impressed. It’s a kit lens after all.

I picked up a $30 adapter ring, and all of my Leica lenses fit well enough. My 21mm doesn’t fit perfectly, but it’s good enough. (The latch doesn’t completely engage, but it engages.) The crop sensor is APS sized, and that works. It crops to make the 21’s field of view like a 34mm lens (roughly), but keep in mind that it won’t get rid of the fish bowl effect you get from shooting such a wide-angle lens. Also, you lose the shallower depth of field you’d get with a real 35mm lens on a full-frame sensor.

But I can finally shoot my Leica glass again! And I didn’t have to rob anybody to do it!

Manually focusing the Nex is something that takes getting used to. It uses focus peaking to help with manual focusing, but it’s far from perfect. I still have to zoom in to make sure I’m really in focus, and that adds to the time it takes to get a shot ready. So it’s not perfect.

Manually focusing a Leica is still faster by a good deal, but the Nex is 1/10th the price. I’ll take imperfect focusing for an extra $5-$6k in my pocket.

There’s no way around this: the Nex has a terrible bracketing mode. It only goes as far as +/- 0.7 EV, which is pretty much useless if you want to take HDR photos or just bracket your shots intelligently. Honestly, I don’t know what Sony was thinking. I hope they fix the BIOS in the camera for that. My worry is that with new cameras coming out soon, they may orphan the current Nex cameras, and just leave it unfixed. I knew it going in, but it really is a bad oversight on Sony’s part.

Finally, the viewfinder; it’s a separate purchase on the 5N. If you want it integrated in the camera, you have to shell out an extra $400 for the Nex 7, or buy a $250 adapter for the other cameras that fills your “hot shoe.” It’s not a real hot shoe, but it’s the closest you get to one. So you can either have a mic, a flash, a light, or the viewfinder. That’s leaving me scratching my head and wondering what the engineers are thinking.

Take the Good with the Bad

Even with the mixed bag of good and bad stuff, I’m generally pleased with the Nex. It takes great photos, even if the controls aren’t what I’d like.

I have to spend 5-10 seconds composing each photo to make sure it’s in focus. Sometimes longer. That makes it bad for action shots. For artsy shots, or scenery shots, it’s great. But trying to photo something like a cat or small child? Not so great. But in my case, it fills a badly needed niche.

I like my Canon 60D, and the 17-55 EFS is a great lens, but it’s lacking in the kind of sharpness I got used to with Leica glass. I can’t get the kinds of photos I could get with my Leica M6 TTL and my Leica lenses. Now that I can slap those lenses on the Nex, I can just about get those photos again, and use the 60D for more action-related stuff.

The Nex is definitely not for everyone, but if you’re like me, and stuck in that Leica purgatory where you can’t afford the bodies, but you still have the lenses, it’s an affordable option.

Asheville Again

 Photography, Travel  Comments Off on Asheville Again
May 272012
 

I went back up to Asheville for Memorial Day, to help the folks out and to take a bunch of photos. I’m still a bit behind on the editing, so I’ll post them when they’re ready.

Towering Over Tokyo

 Japan, Photography, Photos, Travel  Comments Off on Towering Over Tokyo
Dec 172011
 

The first full day of my fourth trip to Tokyo was hectic.

I started off with breakfast at the hotel. 1200 yen for the buffet. It’s pretty good. Some of it is a little unexpected, but that’s breakfast in Japan. The bacon was a bit bland to me, but I’m used to hickory-smoked bacon. On the upside, you can try out a Japanese-style breakfast, or chicken out and have your Western-style breakfast if fish is too much for early in the morning.

Anyway.

After breakfast, I went over to Bic Camera to check out the PS Vita. The crowds were crazy. Everyone wanted to look at it and try it out. The WiFi version was almost sold out, and I was tempted, but I had a hard time justifying the price, which would exceed 50,000 yen if I bought everything I wanted. That’s around $700 these days. No way. That’s more than my phone cost, and my phone can do a lot more without the geographic restrictions.

Here are a few gratuitous shots of Shinjuku on the way to JR Shinjuku. The skies were amazingly clear, so the skyline looked good:
Shinjuku

Shinjuku

I headed over to Tokyo station to go to the Travel Information Center there. It took me a while to find it. It’s not in the station proper– it’s outside, in a random, unmarked building. It needs better signage for us clueless tourists, because I walked past it a few times.

I got there and spent some time talking to the ladies behind the desk there. They had a lot of good ideas for things to do, and I grabbed a bunch of pamphlets. I’ll have to sort it all out later and figure out what I want to get done in this one week I have here. (Less than a week, really. 5-6 days, tops.)

What to do next… I know. I’ve wanted to go to the Tokyo Tower forever, but I have never been able to make it happen.

Towering Ambitions

So I hopped on a few trains, and got to the Tower after a bit of a walk. I had my camera, so I took a lot of pictures.

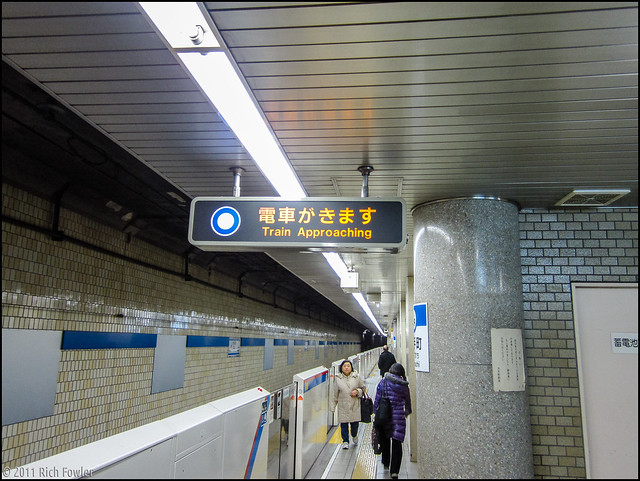
Waiting for my train in Otemachi subway station:
Otemachi Station

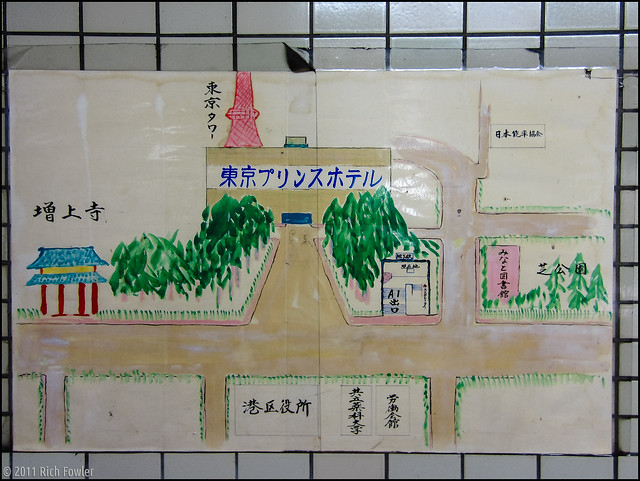
On the way out of the station near the Tower, I saw a map. I’m still not sure if it’s for the Tokyo Prince Hotel, or for the Tower:
Map at Subway Station

Getting close to the Tower:
Approaching Tokyo Tower

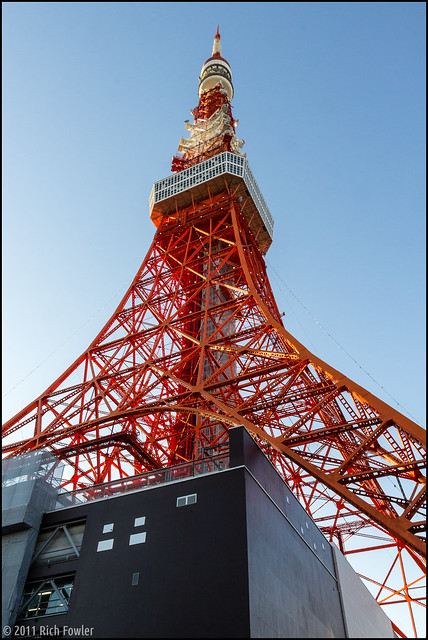
I took a few shots from outside before going in:
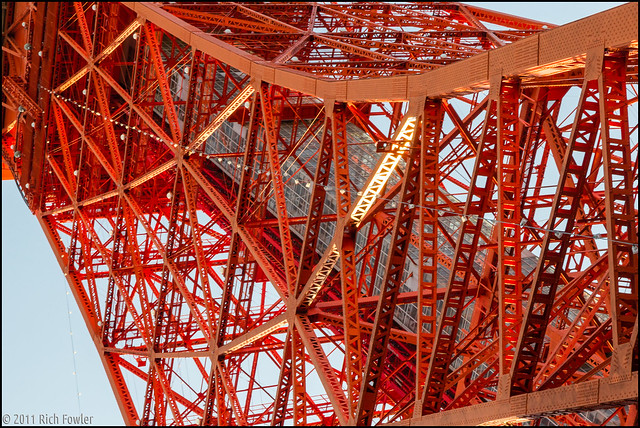
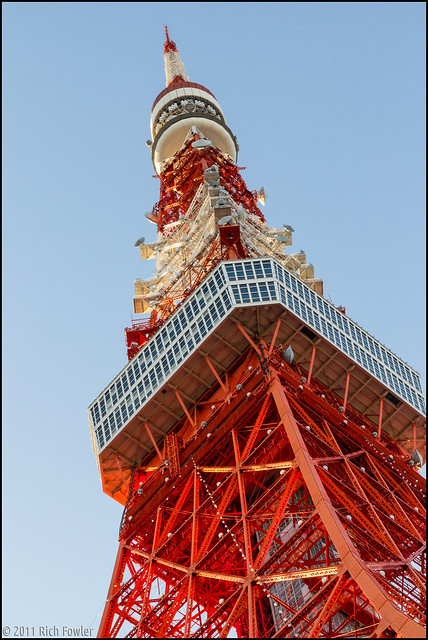
Tokyo Tower

Tokyo Tower

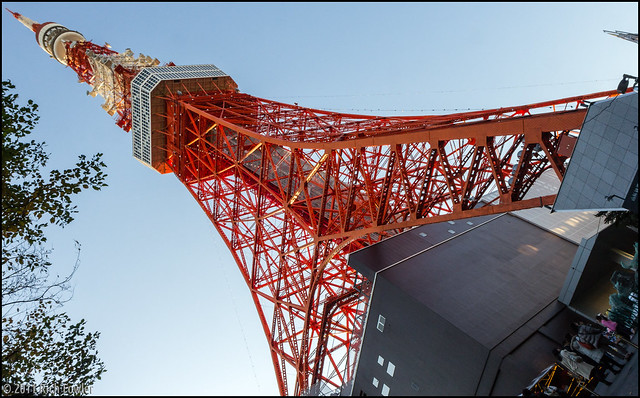
Detail shot:
Tokyo Tower

Tokyo Tower

There was a bit of a wait to get to the main observation deck, but I got there okay. It was crowded. Today you could see Mt. Fuji, so that view was exceptionally popular. It was popular with me, too!

I had my new circular polarizer, so I tried using it… and it failed utterly. The windows are coated with something that makes the polarizer do weird things.

See for yourself:
Tokyo Tower Windows Cause Photography Problems

Yeah, even with a polarizer, sometimes I just got those weird ugly rainbows in my photos, so those went into the recycle bin. I had to use the lens bare, and deal with the reflections as I could. I did okay.

The views were beautiful. I stayed well after sunset.

Here are some of the shots I took:

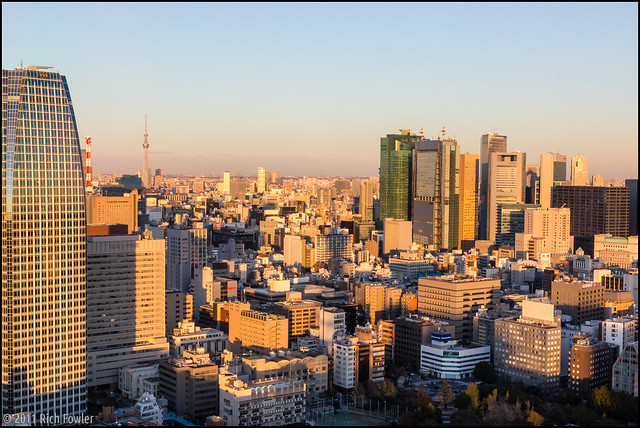
You can see the new Tokyo Sky Tree under construction in the back:
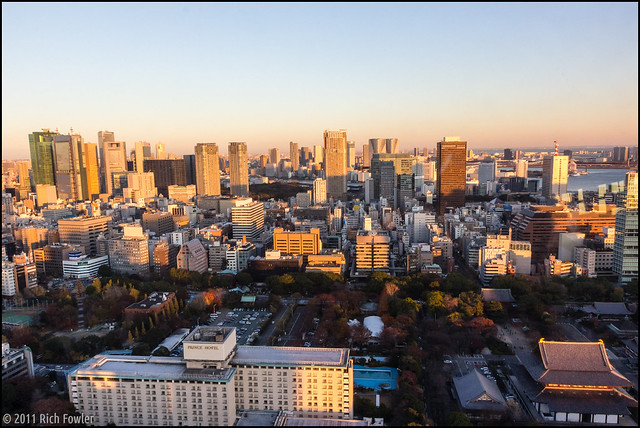
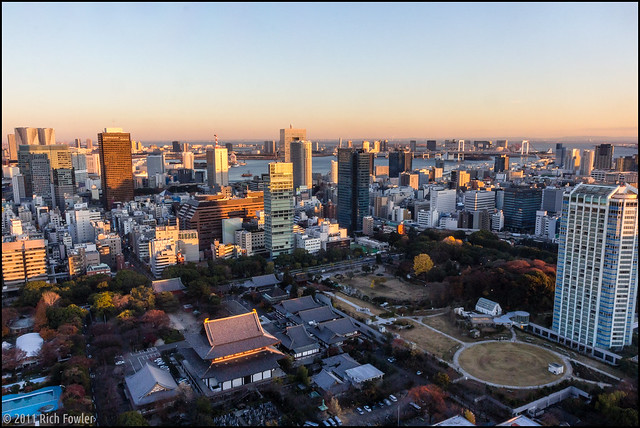
Tokyo Skyline at Sunset from Tokyo Tower

Tokyo Skyline at Sunset from Tokyo Tower

Tokyo Skyline at Sunset from Tokyo Tower

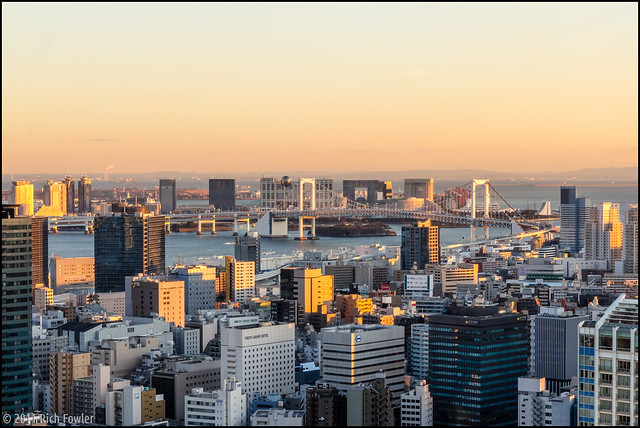
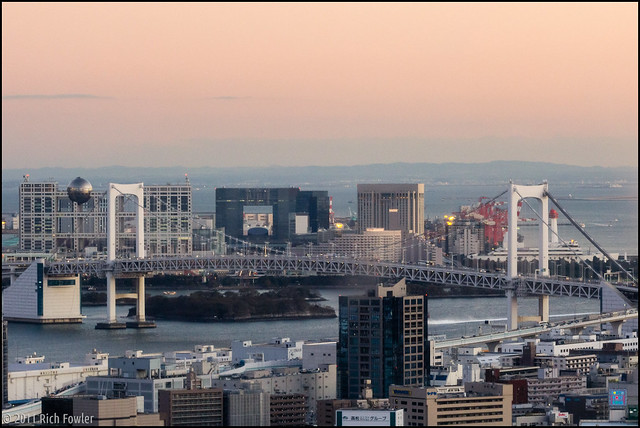
Rainbow Bridge, Odaiba and the Bay from Tokyo Tower

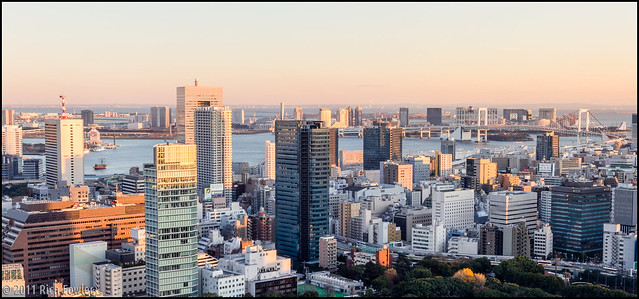
I tried to make a panorama:
Tokyo Bay/Rainbow Bridge Panorama

Tokyo Skyline at Sunset from Tokyo Tower

I really liked this shot in particular, even though there’s a reflection in one corner, and little artifacts. It’s just pretty to me:
Tokyo Skyline at Sunset from Tokyo Tower

And then there’s Mt. Fuji, which everyone was eager to get a picture of. I had my big heavy zoom lens on me, so getting shots of it was easier, but getting non-shaky in-focus shots was still hard, because the light was going, and I had to shoot around the crowds inside the observation deck. (And some photos had weird reflections in them, no matter what I tried.)

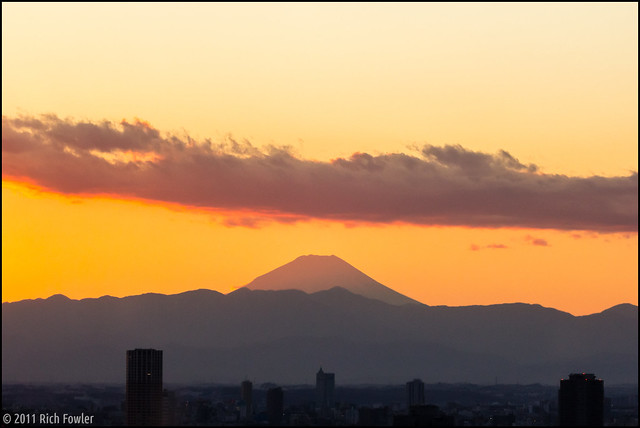
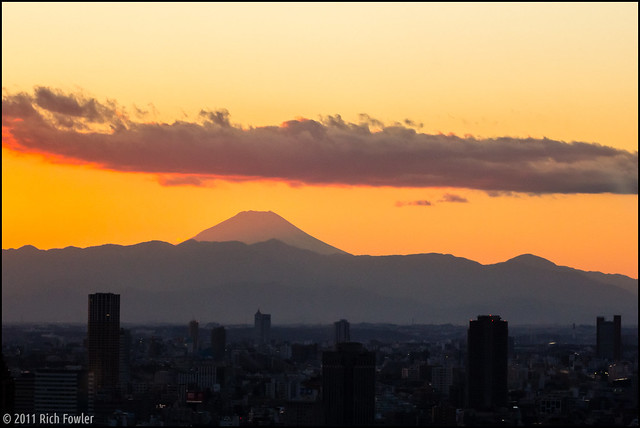
Mt. Fuji at Sunset from Tokyo Tower.

Mt. Fuji at Sunset from Tokyo Tower.

Mt. Fuji at Sunset from Tokyo Tower.

Mt. Fuji at Sunset from Tokyo Tower.

Mt. Fuji at Sunset from Tokyo Tower.

Tokyo Skyline at Sunset from Tokyo Tower

Some non-Mt. Fuji sights:
Rainbow Bridge at Sunset

Tokyo Sky Tree at Sunset

Atago Green Hills from the Tokyo Tower Observation Deck

The sun is really going down now, so Mt. Fuji looks great!

Mt. Fuji at Sunset from Tokyo Tower.

Mt. Fuji at Sunset from Tokyo Tower.

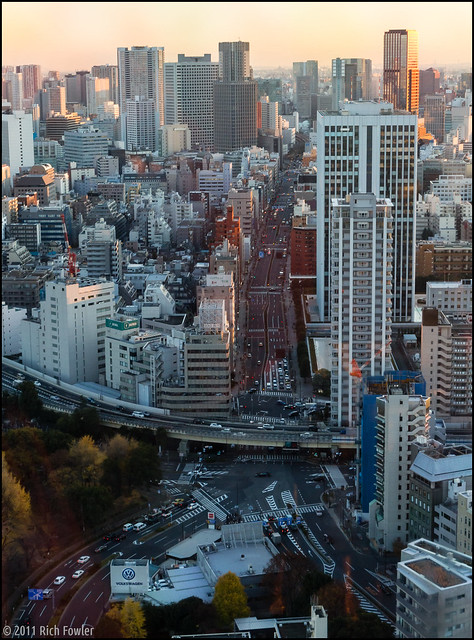
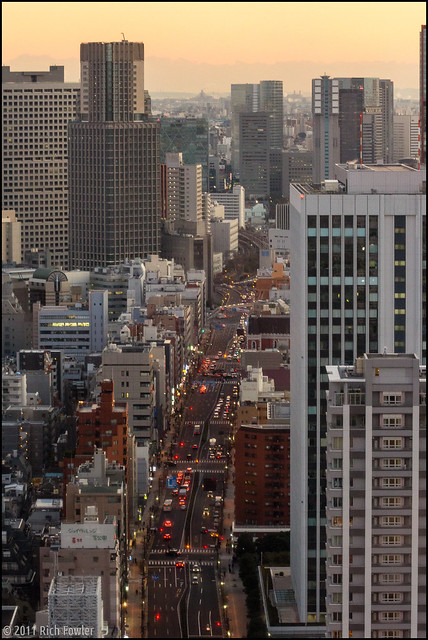
The streets are in full light:
Tokyo Skyline at Sunset from Tokyo Tower

Tokyo Skyline at Sunset from Tokyo Tower

I really like this one:
Tokyo Skyline at Sunset from Tokyo Tower

I started to get tired and hungry, so I a snack at the cafe there. It was a little overpriced, but tasty. Then back to shooting photos!

It’s night now:
Rainbow Bridge at Night

You can barely make out the Sky Tree in the background:
If you squint, you can see the Sky Tree

Tokyo Skyline at Sunset from Tokyo Tower

Mt. Fuji at Dusk.

Tokyo Skyline at Sunset from Tokyo Tower

Here are a few shots I took with the IXY. I have no idea exactly when I took them, because the IXY clock is off. Still, this one is pretty:
Mt. Fuji and the Tokyo Skyline, IXY Version.

Then I went downstairs to the museum/gift shop area and looked around. They had a special “Always” exhibit, about the movie. That was pretty cool. They even had a big scale model of the neighborhood in the movie.

Always Set.

Always Set.

While I was down there, I saw a flier for fireworks tonight by the Rainbow Bridge at 7:00. It was 6:20-ish. Maybe I could make it if I hurry.

Chasing Fireworks

I stopped outside the Tower to take a few more photos, and headed to the Oedo Line at Akabanebashi, then rode to Shiodome to grab the monorail.

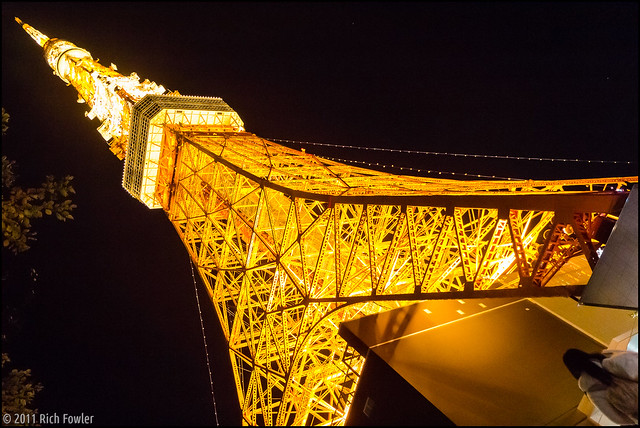
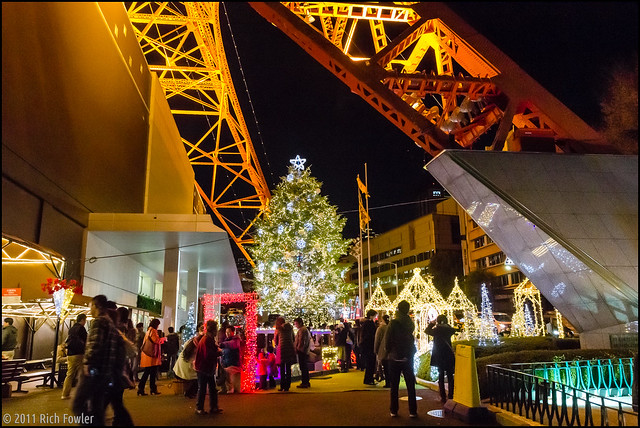
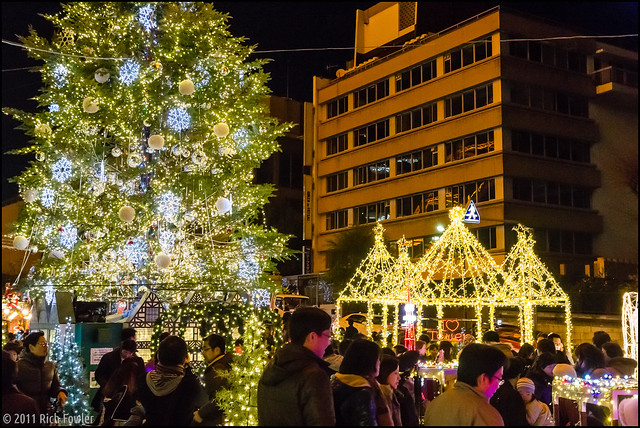
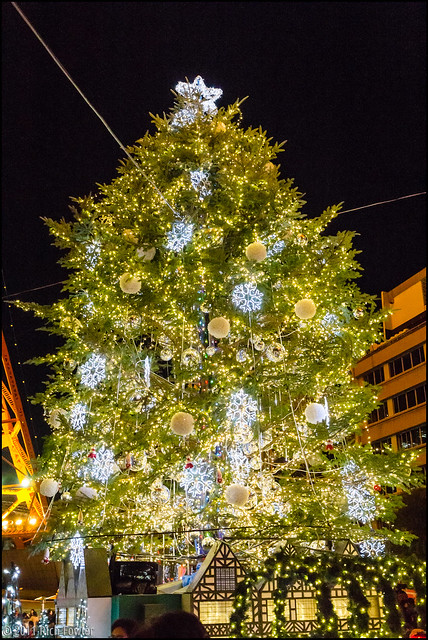
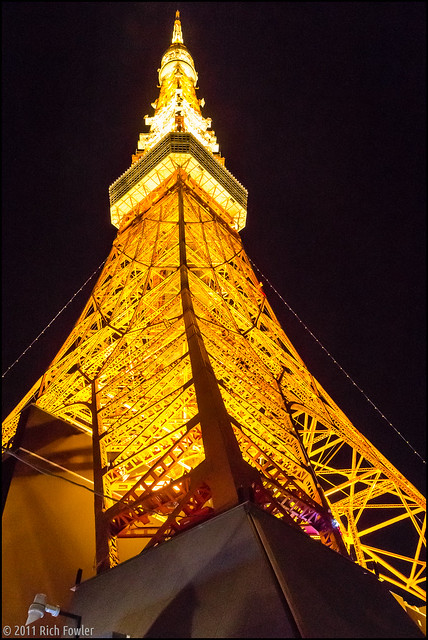
A few last shots of the Tower and the surrounding Christmas lights:
Tokyo Tower at Night

Christmas Light at Tokyo Tower

I thought the “I heart Tower” sign was cute:
Christmas Light at Tokyo Tower

Christmas Light at Tokyo Tower

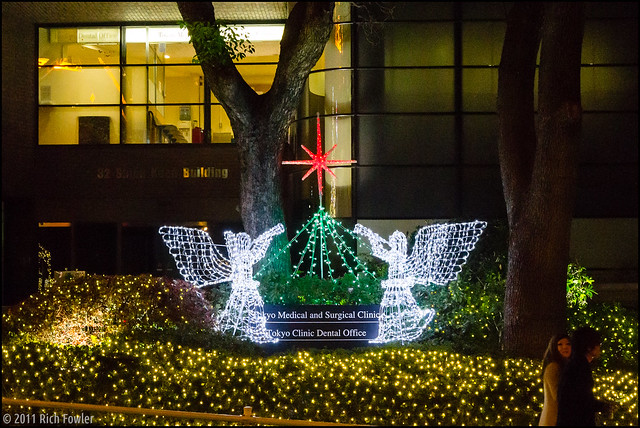
Even dentists do Christmas lights here:
Christmas Light at Tokyo Tower

Tokyo Tower at Night

On my way to try to catch the fireworks, I got a little lost transferring from the Oedo line to the Monorail, so I lost some precious minutes.

As I was riding the monorail (which is pretty cool, by the way), I saw the flashes in the background between the buildings, and missed the fireworks. I got to the Rainbow Bridge area by 7:15, and they were already long over.

Boo.

So I hopped back on the monorail, took it to the Oedo line, and headed back to Shinjuku for dinner.

Skewered.

I’ve seen Memory Lane on some TV travel shows. It’s an area in Shinjuku that’s supposed to give you a feel of Showa-era Tokyo dining. Narrow alleys, lots of small restaurants all bumping into each other. I thought, “Hey that might be fun.”

So I wandered around, and settled on a small place selling yakitori. I sat down and ordered some yakitori, and found out that there was a 300 yen “seat charge.”

Seriously?

I was hungry, and I hoped that maybe the food would be worth the 300 yen extra.

It wasn’t.

It was overcooked, chewy, and generally not very good. I’ve eaten a lot of yakitori. I know good and bad. That was bad, with an extra 300 yen thrown in to boot.

I left and grabbed something else at a conbini to make up for it, then wandered around a bit more. I stopped by Yodobashi Camera in Shinjuku to see if the Vitas were selling (the WiFi was), and then to Labi to see what they were doing. More of the same. I enjoy wandering through Japanese electronics stores, because they seem to be much more exciting than the products they’re selling. It’s not just a row of vacuum cleaners, it’s an exciting row of vacuum cleaners! Something like that.

By then it was late, so I went back to the hotel, and called it a night.

Jackson Pollock and The Tallest Toilet in Nagoya

 Food, Japan, Photography, Photos, Travel  Comments Off on Jackson Pollock and The Tallest Toilet in Nagoya
Dec 112011
 

Today I went to Nagoya again. (Again?) Yes, again. There was a Jackson Pollock 100th birthday commemorative exhibition going on at the Aichi Prefectural Museum of Art, so you’re darn right I was going. It was a collection of a lot of his major pieces, even pieces from Iran, which I would never be able to see in the US. So of course I was going.

Jackson Pollock is one of my favorite artists. There’s no way I wasn’t going.

I stopped at the post office on the way out of town, only to have my ATM card declined. Twice. Apparently I hit the limit when I was in Toyohashi, and it’s not US midnight yet. Doh.

I still had plenty of money, but I’m always paranoid about not having enough cash on me here. In a pinch, I can usually use a credit card, but there’s always a chance that my card will be randomly declined. Either it’s security or just incompatible networks, it’s embarrassing and annoying. I wish there was a way to tell them, “Hey, it’s me! Let it go through!” Sadly, not yet.

Also, a lot of stores here will only take cash, so that’s also something to keep in mind.

It’s Not All Paint Splatters!

I got to JR Nagoya around 1, then made my way to Sakae, where the exhibition was.

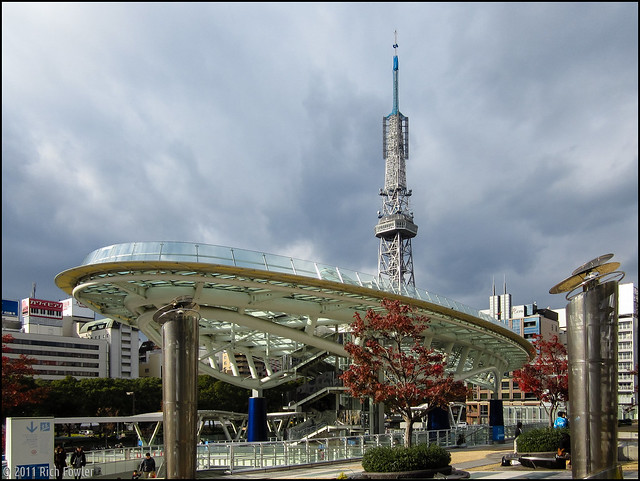
On the way, a gratuitous shot of Oasis21 with my IXY, which I keep in my pocket now pretty much all the time.

Oasis 21 Nagoya, Japan

The museum was close by. They had an amazing number of Pollock’s paintings. As I said before, some came from places the US doesn’t have good relations with (like Iran), so I got to see things up close and personal that I probably would never be able to see in the US.

I also got to see a lot of Pollock’s early period work, and his really late work, both of which were surprisingly different from what I’m most familiar with, but were both impressive in different ways.

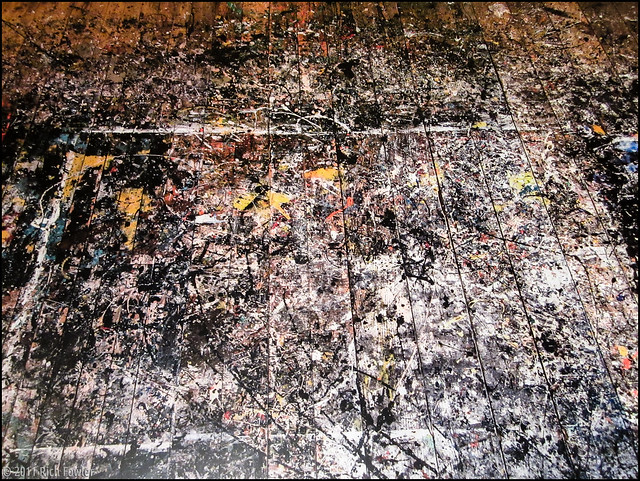
They even had a mock-up of his studio that you could walk around in, and a photo of his paint-splattered floor you could walk on. It was pretty cool.
Jackson Pollock Exhbit, Aichi Prefectural Museum of Art -1

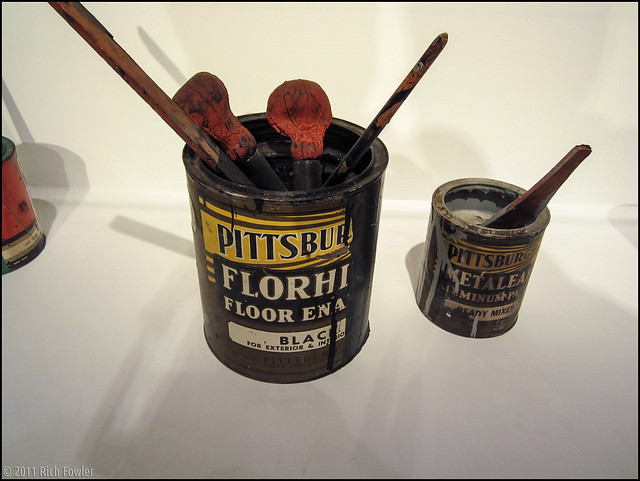
They also had paint cans and brushes and other tools he used to create his paintings with.
Jackson Pollock Exhbit, Aichi Prefectural Museum of Art -3

After a couple of hours of geeking out, I headed to the gift shop and bought some post cards and a clear file. The clear file is awesome. It’s clear, but has a band from one of his paintings on it. Way cool.

Walkin’ In The Sky

I headed back to JR Nagoya, and decided that it was time to check out the Midland Square building, which is pretty darn cool. I had been meaning to go there for a while, but with all of the rain, it was impossible. Why? Because the observation deck is all outside! It’s 47 stories up, and the observation deck is 5 stories high, and all outdoors. According to their website, it’s the tallest outdoor observation deck in Japan.

It’s cool.

Well, it’s also cold, because it’s mid-December.

But I was willing to tough it out. I got some really nice shots, and even shot a little video of the walk around the periphery.

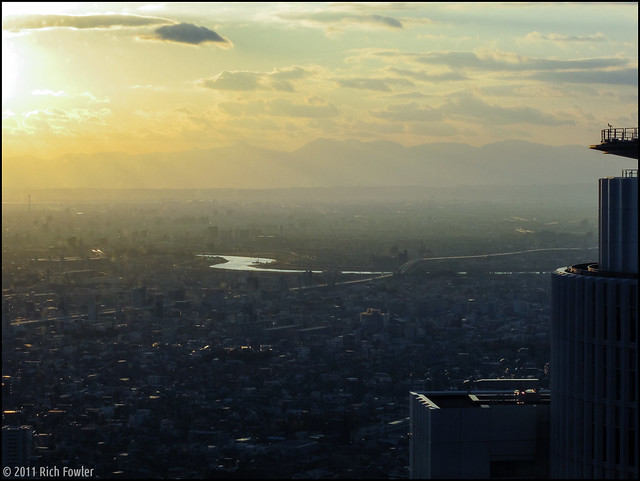
So here are some of the nicer shots of the Nagoya Skyline from my little Canon IXY:
Nagoya Skyline from the Midland Square Building.

Nagoya Skyline from the Midland Square Building.

Nagoya Skyline from the Midland Square Building.

Nagoya Skyline from the Midland Square Building.

JR Nagoya:
JR Nagoya

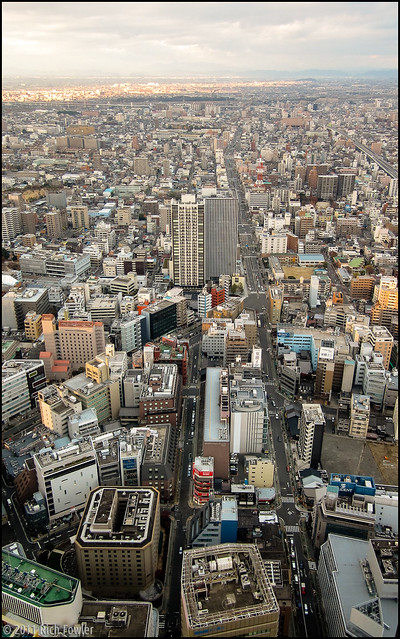
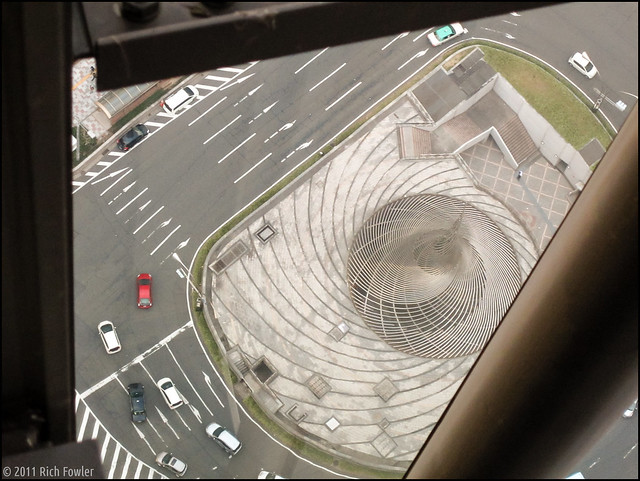
The spiky sculpture in front of JR Nagoya, from 47 stories up. Scarier than it looks!
JR Nagoya

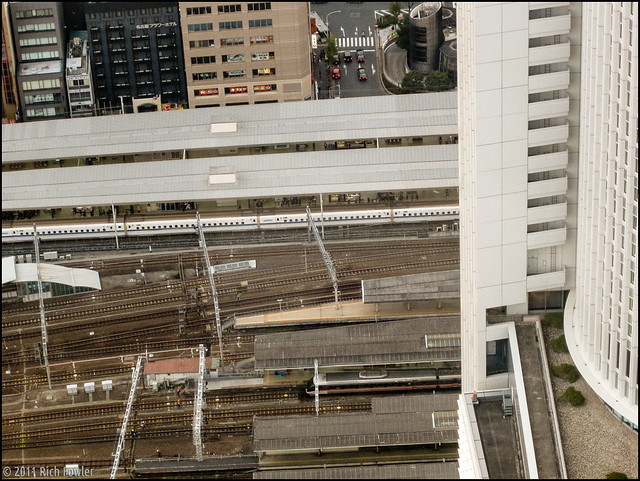
You can see people boarding a Shinkansen!
JR Nagoya

Nagoya Skyline from the Midland Square Building.

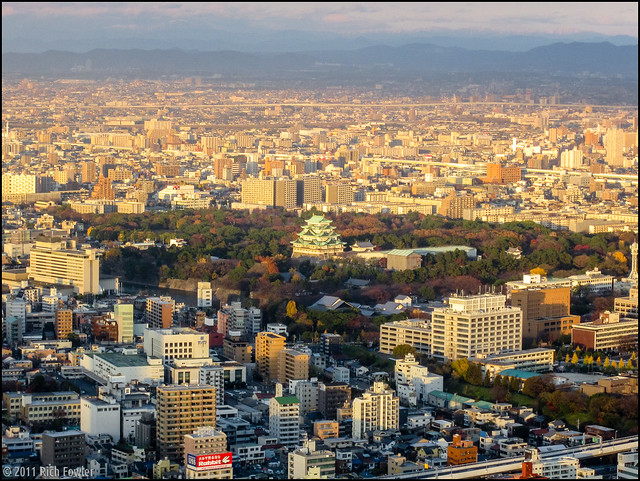
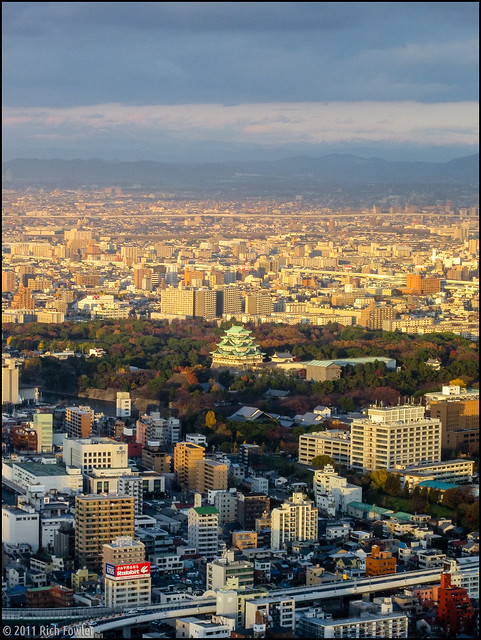
Nagoya Castle in the lower left corner:
Nagoya Skyline and Nagoya Castle from the Midland Tower

Nagoya Skyline and Nagoya Castle from the Midland Square Building.

Nagoya Skyline and Nagoya Castle from the Midland Square Building.

Looking down from the top:
Nagoya Skyline from the Midland Square Building.

I really like this angle and this shot in general:
Nagoya Skyline from the Midland Square Building.

Nagoya Skyline from the Midland Square Building.

The light in general was strong as the sun was setting, so there was a lot of dramatic lighting:
Nagoya Skyline from the Midland Square Building.

Nagoya Skyline from the Midland Square Building.

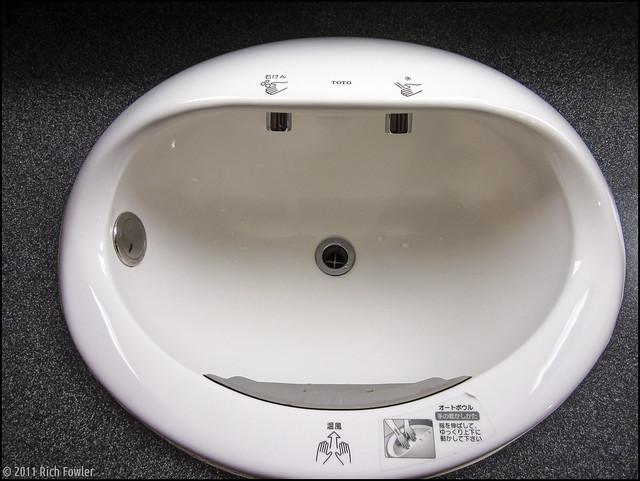
I felt the call of nature, and headed to the restroom there. That is one fancy and technologically advanced restroom. It’s almost as cool as the one at Oasis in Akihabara. Almost. But pretty close. There’s a hand dryer built into the sink, so as soon as you’re done washing, you can dry your hands without getting other peoples’ restroom cooties on your hands. And unlike a lot of air dryers in the US, it only stops when your hands are dry.

Of course I took a picture. It was cool!
The Coolest Sink in Nagoya.

I went back out and took some more photos. I only had my IXY with me, and just as I was getting into it, the battery started to die.

Boo.

I got a few more shots of Nagoya Castle, with more dramatic light as the sun was getting on with setting at a much quicker pace than I expected:
Nagoya Skyline and Nagoya Castle from the Midland Square Building.

Nagoya Skyline and Nagoya Castle from the Midland Square Building.

I managed to squeeze out a couple more photos, and then it quit completely.

This shot is one of my favorites:
Nagoya Skyline from the Midland Square Building.

Nagoya Skyline from the Midland Square Building.

Nagoya Skyline from the Midland Square Building.

Nagoya Skyline from the Midland Square Building.

Last look at the Nagoya Skyline.

And after the Christmas tree photo here, the camera called it quits for a while:
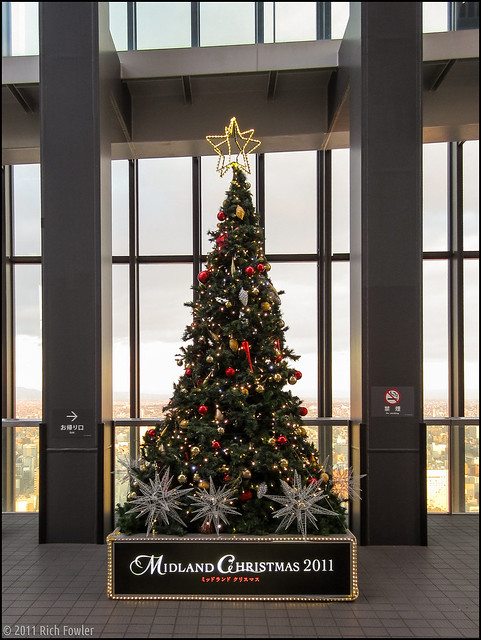
Christmas on the 47th floor, Nagoya, Japan.

Well, I did manage to get this shot of JR Nagoya:
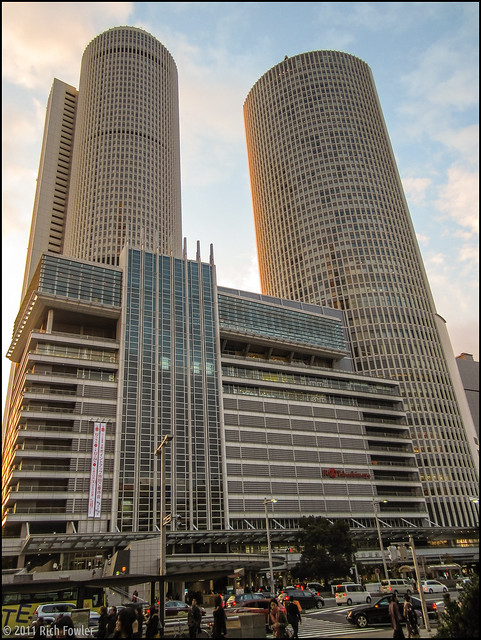
JR Nagoya

Not bad for a “cheap” little point-and-shoot camera, huh? It’s really not about the gear, it’s where you point it!

Supplies!

Satisfied with my trip to Midland Square, I decided to go look for some office supplies to take back home. I found Shimojima (シモジマ) using Google Maps, and hopped on the Sakura-dori subway line to Marunouchi. I got off there, and started walking. It’s a few blocks away.

Shimojima is 4-5 stories full of office supplies. They had stuff I didn’t even know I needed. So I stocked up!

I bought stuff like A3-sized clear folders, which are 20-page binders with 20 clear plastic pages. I can stick my good calligraphy pieces in there and keep them protected. I learned this from S-buchou.

I also stocked up on Frixion refills. Yeah, they erase in high heat, but for just jotting stuff down, they’re pretty neat pens. And the US version doesn’t take refills.

I also got some erasers, and a couple of cardboard tubes for putting paper, posters, and calendars in for safe transport. (Going back to Tokyo is going to be difficult!)

Then I headed to Sakae and Maruzen, and picked up some calendars. They make great gifts for the folks back home. They’re one-page calendars with traditional Japanese-style prints on them, printed on good quality paper. (And they’re only 1000 yen a piece. Not bad!) It’s a suitably Japanese-enough present, but not tacky. And after a year, they can toss them or whatever.

It’s almost as good as food.

I stopped off at a drug store in the Sakae Underground shopping mall to get some pain relief patches for my increasingly sore muscles. All of this moving around and carrying stuff is making me sore.

Then I headed to Hisayaodori to get some more books.

Then a trip to JR Nagoya, to go to the Tokyo Hands there, to get some Nanoblock puzzles for my neighbor’s kids.

After that, I needed dinner. Badly.

I’ve been at Mokumoku a lot, because it’s a good restaurant, but I needed to try something else. So I went Breizh Cafe Creperie. Crepes are BIG in Japan, but they’re not necessarily cheap. I got a salad, a bacon and tomato crepe, a chocolate crepe (as big as my head), and a ginger ale for 4,000 yen.

Yikes.

But they were some really fine crepes.

I finished up around 9:30 or so, then grabbed a train to Okazaki. I got home around 10:30 or so.

It was a very successful day!

First Night in Kyoto

 Food, Japan, Japanese Language, Photography, Photos, Travel  Comments Off on First Night in Kyoto
Nov 252011
 

Man, I’m tired. I raced back to the apartment after JBPP, frantically packed, tossed out anything I didn’t need, repacked, still had too much, but left anyway. Yuck. Too heavy. I tried to take the bike to the station, but realized instantly that that was a horrible idea. The walk to the station wasn’t much better.

I really want to be one of those dudes who can just travel with a toothbrush and a spare pair of underpants. Seriously, how do they do that?

I managed to get a seat on the train to Nagoya, then grabbed a Nozomi to Kyoto.

PINning Down My Tickets

Here’s a tip: if you want to use a credit card, and you don’t have or remember your PIN number, buy your shinkansen tickets at a smaller station and talk to a human, if you can speak Japanese.

If you can’t, then go to the bigger stations, like Nagoya or Tokyo, and stand in line. The people working the counters there speak excellent English, or can find someone who does. (I learned this in 2007.)

If I had gotten my ticket at Okazaki instead of Nagoya, I would have saved 20-30 minutes of standing in line.

If you have/know your PIN, just use the machines. It’s a LOT faster. But if you’re trying to do something complex, humans are more helpful.

Hello Kyoto

I got to Kyoto at around 6:30, then headed straight to the APA Hotel, which was right outside of JR Kyoto. Fortunately, I had my confirmation number with me, because nobody in either Japan or the US can spell my name to save their lives.

The room was okay, but pricey: 10,000 yen.

I checked in, crashed for a few minutes, then headed over to Bic Camera to finally get a circular polarizer. I’ve been putting off buying one for too long. I looked around a bit, and found one.

Then I headed up to the restaurants on the 11th floor of Isetan, because it was starting to get late.

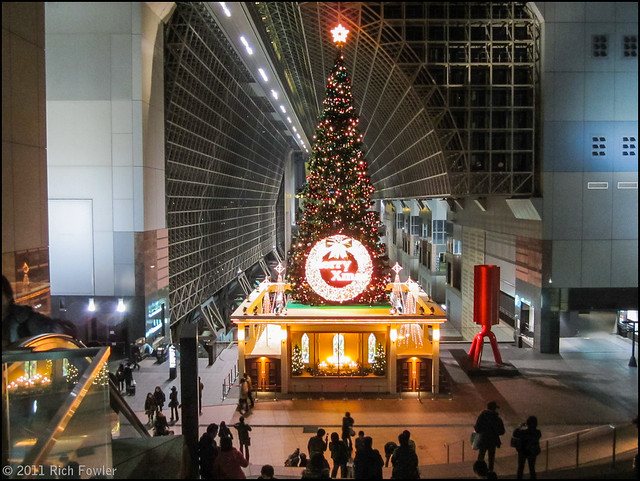
The Christmas decorations are already up:

Xmas Decorations, Kyoto Station

I found a good okonomiyaki shop, and had a good modern yaki with bacon. That’s good stuff!

After that, I headed down to the second floor of the station, and went to Cafe du Monde for a beignet… only to find out that the Cafe du Monde in Kyoto Station does not serve beignets. What the hell?? It’s Cafe freakin’ du Monde! They do sell hot dogs and coffee. But no beignets? There was a Mister Donut next to it, so I waited for 10 minutes and ordered some donut-looking things from them.

It Has a Hole in the Middle

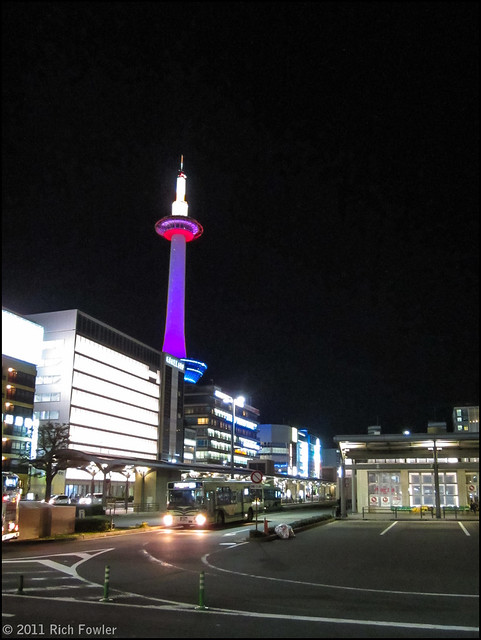
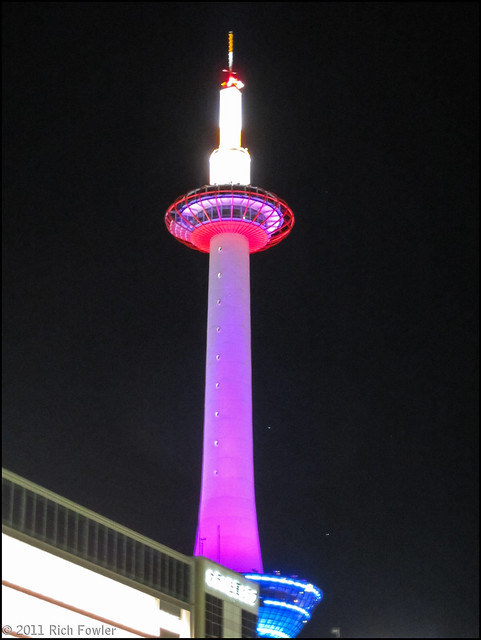
As I headed out of the station, I took a couple of photos of the Kyoto Tower Hotel, which was very purple tonight:

Kyoto Tower

Kyoto Tower

Then I went to the Lawson outside of the station, and it was jammed full of people. It was a madhouse. I decided to go ahead and get breakfast as well as beverages, because I wanted to save a trip here in the morning. (Seriously, it was nuts.)

I headed back to the room.

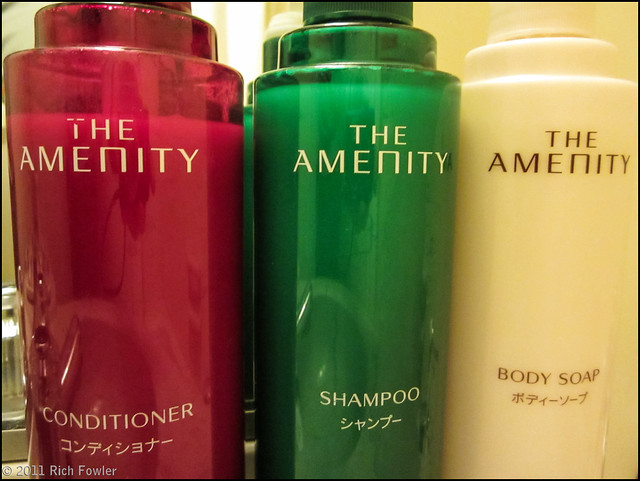
My room if full of amenities. See?

The Hotel's Amenities!

Then I ate my donuts. The MisDo (as they call Mister Donut here) donuts were really mediocre, like not very good grocery store donuts that had all of the flavor chased out of them by the bland police. Frankly, Harris-Teeter’s chocolate donuts taste better, and they’re average at best.

Now I understand why the lines at Krispy Kreme are so long here; these people haven’t been eating proper doughnuts! (There’s a difference between donuts and doughnuts, but I don’t want to get into it right now.)

The MisDo chocolate donut just tasted like it was… brown flavored.

I called home to let them know I was still alive, then I sacked out early. Gotta get up early, too. Tomorrow will probably be chaotic on a level I haven’t seen yet.

Okazaki-jo and Anjo

 Japan, Japanese Language, Photography, Photos, Travel  Comments Off on Okazaki-jo and Anjo
Nov 202011
 

I decided to go to Okazaki Castle today, to continue my Tokugawa-themed weekend. The weather started out really nice today, so I just wore a T-shirt and my black windbreaker, because it was a little windy.

There are two options to get to the Castle from where I live. Option one: walk/bike there. It’s about 3 miles away, so it’ll take about 30 minutes or so. I would also have to walk/bike back. Option two: take the train. Sounds much faster, but it isn’t. Upside is that at least by taking the train, I don’t use up too much energy to do so. (Other than the energy it takes to get to JR Okazaki.)

On the way to the station, I took a few photos:

The bike shop that moved out a few weeks ago has already been turned into a flat lot. That was fast.

Asahi Bicycles' Old Store is GONE

I pass by this rice field every day on the way to school. It’s a little strange having a rice field in the middle of a sprawling suburban city like Okazaki, but it’s also kind of cool.

Rice Field on the Way to Yamasa

I like the dog’s expression in this sign:

Don't Let Your Dog Poo in the Rice Field!

To get to the castle, I needed to take the Aichi Line, and one thing to keep in mind is that the Aichi Line isn’t run by JR. It’s a different company, so I needed a different ticket, which I could buy outside of the wicket.

Like a doofus, I used my SUICA card, and caused all sorts of problems when I got to the station near Okazaki Castle. I’m sure they see that all the time, though. A few hundred yen and a ticket later, everything was solved.

The Matsudairas’ Place

I got to Okazaki Castle Park, and made my way to the castle.

Here’s a map so we don’t get lost:

The Map to Okazaki Park

First, the park. This bridge leads to a shrine I didn’t go to, but it’s very photogenic:

Sacred Bridge and Fountain

Sacred Bridge-- yet another Perspective

The park was very pretty, and I bet it would be even more so in Spring.

The castle itself is five stories high, and hiding behind a couple of pine trees.

Okazaki Castle-- Main Building (Horizontal)

There were two tickets available. For 200 yen, you can just go up the castle, or for 500 yen, you can go up the castle and to the Ieyasu and Mikawa Bushido Museum next door. I paid 500 yen, because it sounded like a good deal to me.

As I climbed up the donjon, I took a look at the various exhibits about Okazaki’s various feudal lords, and some of the stuff they found on the site. Nothing particularly earth-shattering, but interesting if you live in Okazaki, and can read/speak Japanese.

One fact of note: it’s not the original castle. Most of the castles you see in Japan aren’t original. Many were torn down after the Meiji Restoration, or were destroyed in World War II. Most were rebuilt in the 1950s to spur on tourism, and/or preserve history, depending on your point of view. How accurate they are is a good question.

I made it to the 5th floor observation deck, and the wind was just howling. It must have been around 30-40 MPH, and it was cold. I was starting to regret my wardrobe choice. I really need more warm clothes. It’s getting chilly here!

There was a chain link fence up all around the balcony, so I couldn’t use my Canon EOS to take pictures.

This is what happens with a regular SLR:

Okazaki from the Castle Roof. Fence in the way.

Instead, I snuck the lens of my IXY through the gaps in the grid to get some decent shots of the Okazaki skyline. About as decent as you’ll get for a 13,000 yen camera, anyway.

I knitted some of the shots into a panorama or two. The first one is a wee bit wobbly if you zoom in on it at Flickr.

Okazaki Panorama

Okazaki Panorama #3

I headed down and took some photos of the park and the exterior of the castle and the museum, and went inside.

A statute of Motoyasu Matsudaira (who I’m pretty sure became Tokugawa Ieyasu):

Statue of Motoyasu Matsudaira

A really cool clock made out of flowers:

Flower Clock

Another interesting clock closer to the museum:

Mechanical Clock Tower

Finally, the Ieyasu and Mikawa Bushido Museum:

The Ieyasu and Mikawa Bushido Museum

The museum is all about the Tokugawas and the battle of Sekigahara. Pretty interesting stuff, if you know your Japanese history. (I’m a little shaky.) They had the famous spear Tonbogiri as well. Well, the spearhead, anyway. One of Ieyasu’s generals wielded that one.

They had a neat exhibit where you could try lifting some mock weapons to see how heavy the real things were, and they had some armor you could try on to see how “comfortable” it was. Not bad for 300 yen.

If you have kids, that might be pretty fun if you’re in or near Okazaki for the day. Not fun enough to bring them across Japan to see it, unless they’re really big history buffs, but fun if you’re close by.

Yeah, I Like Shodo, So Sumi!

After that, I headed off to Anjo to pick up some calligraphy brushes for a friend of mine back in the US. I found a promising-looking shop by doing lots of searching online in Google Maps. The tricky bit is knowing what search terms to use. That took a bit of work, actually.

Leaving the park and heading back to the station to go to Anjo:

Iga RIver and Tatsuki Bridge

I took the Meitetsu line to Shin-Anjo and walked about half a kilometer to the shop. The lady there helped me a lot. She showed me some of their brushes, and let me try one out with water and one of those sheets that you can write with water on. You write with water on it, and it gets dark, then as it dries, it goes back to being all the same color again. It’s good for practicing calligraphy, or just for trying out brushes, but keep in mind that water does not flow like real ink does.

I found a good brush for my friend for around 3,000 yen (which is a good price for a practice brush), and then started searching for good practice-grade paper. I learned a lot about paper that day from the shop owner.

I have so much to learn about calligraphy, that I could probably spend the rest of my life on that alone and not even get close to mastering it. But I did find some good practice paper. I got 1,000 sheets for myself, and I’ll come back before I leave to pick up 1,000 more for my friend.

We chatted a bit in Japanese. I keep saying it, but it’s true: knowing some Japanese is the key to having everything go smoothly here.

Why? Because she gave me some freebies and a discount, too!

I think seeing a foreigner who could speak Japanese and write with a brush come to her shop to buy calligraphy supplies made her day. It was a great experience for me, too.

By the time I finished up with my purchases, it was already dark, and time to head home. As I opened the shop door to leave, the first thing that I noticed was that it was freezing outside.

Note to self: next time, check the weather forecast before you go out!

Also, buy some warmer gear!

Nagoya and the Port Area.

 Japan, Photography, Photos, Travel  Comments Off on Nagoya and the Port Area.
Nov 122011
 

It’s Saturday, and the sun was out. Amazing. Not one cloud in the sky.

I felt that I must go on an excursion in this lovely weather!

Carrier!

While I planned out the day’s activities, I watched a college basketball game between UNC (my alma mater) and Michigan State on an aircraft carrier in California via the Slingbox, which has decided to work again.

It’s weird when you think about it. From Japan, I watched a team from North Carolina play a team from Michigan on the deck of a ship in California, then the signal went to my house in NC, where it was then sent to me in Japan.

That kind of makes my head hurt.

After the game ended, I headed out to the station, and off to Nagoya. I noticed two things on the train ride over. First, the engineer was a woman. She’s the first woman engineer I’ve noticed so far. Cool. The second was not so cool. There was this really odd guy who was talking to himself, gesturing wildly, and going through incredible mood swings as trains came and went. I was just hoping he wouldn’t decide to suddenly heed the voice telling him to kill the big guy with the red hair 5 seats back.

There was also a guy in capri pants. No I don’t know why.

I got off at Kaneyama, so i could go to Atsuta Jinja, which is a pretty nice Shinto shrine in Nagoya with lots of history behind it. It’s where I saw an Iaido demo four years ago. It’s very park-like, but not very remarkable otherwise. It’s a nice place for a stroll, though. I was kind of hoping for something photo-worthy, but didn’t take any. Nothing really worth digging the camera out for. That said, it’s worth a trip if you’re in the area. It’s a nice place with a lot of history.

I did see a sakura tree blooming in the wrong season. So I can check that off the list. After the Nagoya Castle trip, I was kind of surprised to run into one there.

I probably should have taken a picture, but it wasn’t all that impressive, since all of the leaves were gone.

Port Call

After that, I headed to the subway station and took the train to the Port area. Getting to the Port area can be tricky if you don’t know your way around Nagoya’s subway. The purple line goes around Nagoya in a big circle, and then there’s a tail or spur of it that goes on to the Port area. You have to figure out which train you need to ride to get there. I managed to figure it out and headed down to the Port area, which took about 10-15 minutes. It’s at the end of the line.

I got out and wandered around a little bit. The first thing I noticed was a big orange boat.

Icebreaker "Fuji" at Nagoya Port -- Closeup

The second thing I noticed was a Red Lobster.

Red Lobster.

Why there was a Red Lobster in Japan is one of those unanswerable questions for me. By the Port, no less. In a land that specializes in fresh seafood.

WHYYYY???

The area has a charm to it. I like the Port Bridge:

Fuji and Port Bridge

Speaking of fresh seafood, right next to the Red Lobster was the Nagoya Aquarium, which was chock full of aquatic species.

Port Bridge and Aquarium
Since it was one of my objectives for the day, I headed on over. First off was the dolphin tank. They were very cute, but the water was kind of dirty.

Then I headed up to have a look at the dolphin show. It was included in the price of the ticket, so I might as well have a look. The dolphins were impressive, but I always have mixed feelings about performing dolphins. On the one hand, I’d rather they were free to do whatever they wanted to. But on the other, dolphins quite often get the short end of the stick in the wild, no thanks to us. And they did some impressive stuff.

After that, I headed to the aquarium proper, to do some staring at fish. There are lots of fish to stare at. I dunno… I’m not a huge fan of fish-staring. I tend to walk quickly through aquariums, unless they have something distinctive to hook me.

Fish sufficiently stared at, I left, and headed over to the Port Bridge, which is an interestingly designed footbridge that lets you cross one over from one side of the Port area to the other. (Well, I say Port area, but this is really just one little harbor. The whole Port area is much bigger.)

Port Bridge Sign

Crossing the Port Bridge

Some of the views from the bridge:

First the former icebreaker-turned-museum “Fuji”:

Retired Icebreaker Fuji

Another shot of the Aquarium:

Port of Nagoya Aquarium

And a shot of a passenger boat coming into port:

Ship pulling into dock.

After that, I headed to the oddly-shaped Port Building, which has a really neat observation deck about 50 meters or so above the ground. There are some great views from there. I had to hustle to get there before everything closed, of course. Downside was that because I still haven’t bought a circular polarizer, I had a lot of reflections in the shots I took. Ugh. But I managed to get a few keepers. The views were spectacular as the sun set over the bay.

Sorry about the reflections!

View from the Port Building

Some shots of the port area:

Aquarium, Bridge, Fuji, etc.

A zoom-in of the amusement park:

Ferris Wheel at Sunset

A shot of the dolphin show stadium at the aquarium:

Port of Nagoya Aquarium

I like this angled shot:

Aquarium, Bridge, Fuji, etc.

The Triton bridge, off in the distance:

Nagoya Port, Triton Bridge

One last shot of the port area:

One last shot of the Port Area

Finally, a shot looking towards downtown Nagoya:

Midtown in the Distance

This Really Is Turning Into A Shopping Blog, Isn’t It?

After that, I headed to Sakae and Book-Off, and had no luck finding books on Japanese Language study generally, and Minna no Nihongo, specifically. Naturally, tons of books in Japanese, but none of the books I wanted on Japanese, like textbooks and such. Well, I did find one. And I did find some light novels, too. I headed to Hisayaodori afterwards to pick up some new light novels as well.

I hopped a train to JR Nagoya and first stopped off at Krispy Kreme to get some doughnuts for snacking later this week, then dropped everything in a locker because it was getting heavy.

I headed to Bic Camera after that to see what was going on with the PS Vita pre-sales. They had finally managed to sell-out their pre-orders. I also took a look to see if they had any extra dictionaries for my Casio, but no luck. I’m trying to find the Kenkyuusha Japanese-English Dictionary for my new electronic dictionary.

I went to Mokumoku for dinner again. 食べ放題 (たべほうだい tabehoudai– all you can eat) is a scary thing. Mokumoku has some great food, especially the beef stew. It’s also good to get some vegetables in my system. I really can’t recommend Mokumoku enough if you just want to pound down some really fine organic food in Nagoya. It’s a little pricey, but then again, everything is pricey here.

I got home at 10:45 p.m. Long day, but fun.

ごろごろ and 電子辞書 (Gorogoro and Denshi Jisho)

 Japan, Japanese Language, Photography, Photos, Technology, Travel  Comments Off on ごろごろ and 電子辞書 (Gorogoro and Denshi Jisho)
Oct 292011
 

It’s Saturday, and for once it’s not raining. It’s not really sunny, but it’s not raining. I’ll take what I can get. My electronic dictionary is dying, so I’m off to Nagoya to buy a new one, among other things.

I got a bit of a late start, because I felt like lying around a little bit and just generally loafing around the apartment. There’s a good Japanese verb for this: ごろごろする (gorogorosuru). It just means to loaf around. Yep. I did that until about 2 pm or so, then headed to the station and grabbed a train.

Off to Nagoya Again

First stop was the Mermaid Cafe, to grab lunch. I wanted something simple, because for the past few weeks my stomach hasn’t been in top form. The Mermaid just does simple sandwiches and some basic pastries, and none of it is very greasy. I love their iced cocoa.

Finding a New Electronic Dictionary

Then it was off to Bic Camera, to stare at row upon row of electronic dictionaries. They have changed a lot in the 4 years since I bought my last one. Lots of color screens now, and lots of extra features, most of which I do not need. It was frustrating trying to find one dictionary that had all of the features I want, without a bunch of stuff I don’t.

The features I want are no longer available, and the dictionaries I want, I have to pay extra for. I wound up forking over 38,000 yen for the Casio Ex-Word business model. Handing over that kind of money is painful, but it has a lot of the stuff I want in it, and to be honest, I’m going to use it for at least the next four years. So I’ll pay extra to get that later.

If I think of it as a stack of 10 really useful dictionaries, and another 20 or so useful-ish dictionaries, in a form factor that’s searchable across all of them with relative ease, it’s totally worth it.

One thing it has that I really want is a working NHK accent dictionary that pronounces words through the little speaker. It’s awesome. Now I can get the pitch accent right if I’m inclined to worry about it.

I’ll review the Casio later, when I’ve had time to play with it more.

I spent a good hour or so staring, reading, poking, and buying.

When I think back to using paper dictionaries when I first started learning Japanese, there’s just no comparison. Electronic is the way to go. Even a cheap electronic dictionary is faster and easier than the best paper dictionaries.

Osu!

Done with buying at Bic, I headed back to JR Nagoya, and it was really pretty in the afternoon light:

JR Nagoya Late Afternoon Fall

After that, it was off to Osu (大須, おおす), a big shopping district with a giant covered shopping arcade and a famous temple. It’s a lot like Osaka’s Dotonbori area, or Tokyo’s Ameyokocho, with some Akihabara mixed in.

Banshouji Doori Entrance Osu

I spent a few hours wandering around in there, just looking at shops. I stumbled across the Osu Kanon Temple at some point. It’s  pretty famous in the area. I snapped a couple of photos.

Osu Kannon Temple

Osu Kannon Temple 2

As I was leaving the temple, I lucked out. It was just turning 5 p.m., so the giant clock was striking, and a little exhibition or play of sorts was starting.

Mechanical Clock Performance--Osu

The reflections in the window were pretty bad. The IXY just couldn’t handle them.

Mechanical Clock Performance--Osu 4

Mechanical Clock Performance--Osu 5

Mechanical Clock Performance--Osu 6

Sort of like mechanical dolls, set to music. They did their dance, and everyone enjoyed it.

And then it went back to being a clock again.

Mechanical Clock Performance--Osu 7

I went back to strolling. I found a pretty big electronics store that was pretty cool. It had all kinds of stuff, most of which was cheaper than Bic. Including the electronic dictionary that I just bought. (Ouch.) Same color and everything. (OUCH!) About 10,000 yen cheaper. (Ouch, OUCH!)

On the first floor, there was a sort of a community market of electronics and random stuff, where people just set up stalls. One guy had a bunch of great old shortwave radios. Oh how I lusted after his radios, but they were hideously expensive. He knew he had good merchandise, and it was priced accordingly. There were also guys selling old vacuum tubes– you name it. It was a lot like a mini-Akihabara.

If you wander to the street just north of the covered street markets, you’ll find a few used video game stores and some manga stores and the like, if that’s your kind of thing. There are some games I want to buy, but I’ll probably wait until I’m in Tokyo to buy them, because I can probably get them cheaper there. (I will probably learn to regret this.)

There’s also a Mandarake if you like toys and other collectibles. (Who doesn’t like toys?)

After that, it was off to Hisayaodori for some book shopping.

On the way, a couple of snaps of the Nagoya TV Tower. Yes, this shot is blurry, but I LIKE it:

Nagoya Tower at Night

Less blurry but not as cool version:

Nagoya Tower at Night

I picked up a few things to read, then went back to the station.

Couchin is Japanese for “This Chicken is DELICIOUS!”

I was hungry, and it was getting late, so I decided to head back to the area around Nagoya Station. I went back to the 12th and 13th floors of Takeshimaya, because there are a ton of good restaurants there. This time, I went to a place called Torigoten, because it specializes in Nagoya Couchin, which is a special kind of chicken that’s supposed to be super delicious.

I was feeling kind of run-down anyway, so chicken anything was on my radar. All of the restaurants had huge waits. This restaurant had a relatively short wait. So I sat for only 25 minutes until I got a seat at the bar. That’s not too bad for Nagoya Station on a Saturday night.

I ordered a Couchin set meal that consisted of a really good Oyakodon (chicken and egg rice bowl, with some chicken broth), and some kishimen (a flat noodle that’s a specialty of the Nagoya region) in a chicken broth served with cooked chicken.

Just what I needed, because I was still feeling crummy from my cold that I had a few weeks back. Still feels like there’s a frog in my throat.

After that, I missed the 8:42 train juuuust barely, but it was okay, because that meant I could get a seat on the 8:58 train home. I got back to Okazaki at about 9:30 or so, then got home at about 9:45 or so.

Long day, but fun.

Running to Nagoya Castle

 Japan, Japanese Language, Photography, Photos, Travel  Comments Off on Running to Nagoya Castle
Oct 212011
 

Before I get to the Nagoya Castle trip, an update about classes at Yamasa. My elective classes started a few days ago, and I think they’ll be useful in getting ready for the JLPT N1. I couldn’t get into the writing class, which was a bit of a letdown, but having two extra grammar classes will be a lot of work, anyway.

So, on to the topic at hand. Cherry trees, their blossoms, and why I wanted to go to Nagoya today.

Sakura, Sakura, Do I Know You?

I have never seen a Cherry tree in bloom up close and personal. That’s mostly because I have never been to Washington, D.C. in Spring, nor have I ever been to Japan in Spring.

I suppose I could find them around North Carolina, but to me, most flowering trees look the same. Having grown up in the South, I know of two important spring flowering trees/shrubs: Dogwoods and Azaleas. Really, that’s it. Wisteria, I suppose I can recognize, too, but not much more than that.

So please excuse me if I can’t tell the difference between a cherry and a pear tree in bloom. It hasn’t been in my cultural wheelhouse.

There are times when cherry trees get confused, and bloom out of season. Sometimes when it happens, it makes the news. (Well, it does in Japan.) I’ve seen it twice on the NHK News. Once when some trees in Tohoku bloomed in September, and everyone took it as a sign of hope after the Tsunami, and I saw it again on Monday, when they ran a story about a cherry tree blooming near Nagoya Castle in the park on the grounds.

Since I have never seen such a thing in person, I wanted to go and see it up close.

A Tree Blooms In Nagoya… Right?

Class ended early on Friday, and afterwards, I immediately high-tailed it back to the apartment, grabbed the big, heavy camera (the 60D), and raced to the train station. The castle closes at 5 p.m., but they stop letting people in at about 4 p.m. or so. I got on the 3:00 train, which meant I was really under the gun to get there in time. I got to JR Nagoya at 3:30, then had to run to the subway, change trains, then run to the castle. I got there right at 3:50.

Lucky.

I did the castle tour, because I might as well. The Google reviews on Nagoya Castle are mixed, and for good reason. It’s kind of… plain, to be honest.

Going in:

Nagoya Castle Entry

An outbuilding near the main gate:

Nagoya Castle Outer Building

I saw some deer and crows chillin’ in the dry moat as I crossed to the main gate:

Deer and Crows

And here’s the castle, with attendant souvenir shop. (The building that says おみやげ on it.)

Nagoya Castle Main Building

The good thing about Osaka Castle is that when you get to the top, there’s an outdoor viewing area.

No such luck in Nagoya.

The top floor is enclosed, the windows are tiny, and they were very, very dirty. To top it off, the scenery wasn’t much to look at, either. It was kind of a disappointment.

Instead of crying over getting lemons, I decided to try to make lemonade. So I used the vantage point of the top of the castle to try to find the out-of-season cherry tree, but I didn’t have any luck.

There is a very large park with a lot of trees on the grounds of Nagoya Castle, and I suppose that that area is really pretty in Sping and Summer, so that’s probably worth checking out. It’s fall now, but there are no fall colors yet, so it’s kind of plain.

As I wandered around, I kept looking for the tree.

Here’s the back of the castle from outside the walls:

Nagoya Castle from Behind

And this canal looked kind of cool. Lightroom helped pick out some details:

Canal

Another shot of the castle from behind:

Nagoya Castle from Behind

One More:

Nagoya Castle from Behind

A few shots from the top of the castle walls, overlooking the lake:

View from the Castle Walls

View from the Castle Walls

The Name of this Song is “Please Leave. Now.”

I walked all over the castle grounds, and just didn’t have any luck. Finally, I started to hear music, which could only mean one thing in Japan: “Get out.”

I asked a security guard or two if they had seen a blooming tree, and they told me to come back in March. Translation: “You don’t have to go home, but you can’t stay here.”

On the way out, I stopped and took a look at some of the Chrysanthemums being prepared for the big exhibition tomorrow. They looked nice, but I didn’t feel like taking any pictures.

Right by the exit, I saw the mascot character. Of course I took a picture:

Ebisubeth... the Nagoya Castle Mascot

After that, I was starving, so I set out to get some food.

The first order of business was to find a post office ATM. Thanks to Google Maps, I found one about a kilometer away. Then it was back to the subway, and off to Nagoya Station.

OMG Noodles

I finally got back to the station, and headed up to the 11th floor, where there were a ton of people (because it’s Friday), and a ton of restaurants to choose from. Picking just one restaurant was difficult, because each one had so many delicious things to try.

I wandered around for about 15-20 minutes before settling on a soba shop. I had one of my favorite dishes, zaru soba, which is chilled soba noodles with a dipping sauce. You get a little pot of hot water to pour over the noodles to get them to unstick from each other, but I made the mistake of pouring too much hot water over it and made a mess. That’s one of the joys of travel: learning new ways to embarass yourself and generally make a mess of things.

But it was all good. The noodles went great with a beer.

Revived, I headed back to Okazaki.

The Flowers of Yamasa

 Japan, Photography, Photos, Travel  Comments Off on The Flowers of Yamasa
Oct 212011
 

Okay, I’m done with the sky.

For the last couple of days, I’ve been taking pictures of flowers, to see how the macro function works on the IXY. It’s pretty good. Not stunningly great, but better than a cell phone camera, and that’s all I can hope for.

So behold, the shy, dainty flowers of Yamasa. (Okay, some of them are weeds, but the still looked interesting to me, and it was something to do in-between classes!)

Flowers at Yamasa


I like the detail on the left flower. The right flower is out of focus. A weak point of the IXY’s macro mode.

Flowers at Yamasa 2


It’s a little head-on and bulls’-eyed, but I liked this flower. The IXY did a decent job, considering I was hand-holding the camera.

Flowers at Yamasa 3

Flowers at Yamasa 4


The IXY did a good job with this weed/plant, too.

Flowers at Yamasa 5

Flowers at Yamasa 6


And finally, a shot of the South Okazaki Hospital sign/top floor, with lots of power lines in the way:

South Okazaki Hospital Sign From Yamasa

Next up is a story about my trip to Nagoya Castle. Good times.

The Skies of Okazaki

 Japan, Photography, Photos, Travel  Comments Off on The Skies of Okazaki
Oct 192011
 

In-between classes, I started messing around with my new Canon IXY. Mostly, I took pictures of the sky, because I saw some interesting stuff in it. Yesterday, I saw some neat looking contrails from jets going wherever they’re going. Today, I saw some beautiful shimmery clouds.

Oh, and I also took a photo of a goldenrod weed near the school. Just because.

The 10-minute breaks are welcome, but sometimes it’s difficult to figure out what I want to do for 10 minutes. It’s just enough time to realize it’s not enough.

And now, the photos:

The contrails looked cool, and had a kind of lonely feel to them:

Contrails 1

Contrails 2

Sideways shot!

Contrails 3

Power lines interfere with a lot of my photography in Japan.

Power Lines

It’s annoying.

Power Lines 2

I liked the blue wall and yellow/green plant combination here. Just a weed near Yamasa.

Goldenrod, I think.

I really like this shot. The sky was kind of shimmery, and Aoi Hall was its usual corrugated self. Makes an interesting shot. Thanks, Lightroom!

Shiny Sky 1

Now just the sky without Aoi Hall:

Shiny Sky 2

One more:

Shiny Sky 3

If you look at it the right way, doesn’t this look like a dragon’s head? Just a bit?

Dragon!

Nagoya Matsuri

 Japan, Photography, Travel  Comments Off on Nagoya Matsuri
Oct 162011
 

I took a bunch of photos for the parade, but there were so many that editing them will be a real chore. I’ll post them later. If you really want to see what the parade looks like, check out my 2007 Nagoya Matsuri Parade posts.

Since it rained like hell yesterday, all of the big parades for the Saturday portion of the Nagoya Matsuri were cancelled, and squashed into today.

The weather was perfect, too. So naturally, that meant that everyone was going to be crammed into the “best spots” for taking pictures and the like.

I tried to get there somewhat early, but my idea of early isn’t quite up to snuff when it comes to the idea of early here. (This is the “Land of the Rising Sun,” and I think some of the folks here take it to heart when it comes to these sorts of things.) My casual approach and my unfortunate height meant that I was in for it today.

As in 2007, the Kagura floats were fun to watch, but hard to take pictures of, because of my mortal enemy, the big floppy hats and prominent bald heads of the older segment of the population here. They had a knack for popping up at inopportune moments, but that’s just how it is here.

I’m tall, so people felt like they had some sort of mysterious privilege to just cut in front of me because they were short. What they didn’t realize is that they weren’t all that short, and wound up blocking my view, or screwing up my pictures.

More annoying than that were the security guards. Their job was to get in every other picture and screw it up. And when they weren’t doing that, they would just hassle people randomly for the sake of looking like they were doing their job, which is important when your job isn’t really all that necessary. It’s a parade in Japan, one of the safest countries in the world. It’s not like people are going to suddenly start acting up or anything. But they have to poke people and tell them not to stand there, or to move over, and so on and so forth. Because otherwise it doesn’t look like they’re doing their jobs, I guess.

Ugh.

But you just have to shrug it all off, or else you’ll go crazy and wind up getting arrested by the cop standing next to the security guard.

It’s just part of living here. Living here vs. other places is about making a set of trade-offs. If you want to live somewhere else, you have to make another set of trade-offs. You’re not going to find a tailored fit in an off-the-rack world. That goes for people and places.

Just like four years ago, I took way too many pictures. I’m pretty sure that editing them will be painful. (Note: It is. I’ve got it down from 500 to 98 photos.)

There were a few marching bands in the Flower Car Parade which followed, and one even had bagpipes. There were a few staged battles in the streets, and of course, Tokugawa Ieyasu ended things. The guy playing him was good, and said some funny things.

The Most Amazing Bus Station Ever

After the parade, I headed down to Oasis 21, which is a really fancy bus terminal, but it also has some open areas that were turned into an event stage and an area full of info booths from cities and prefectures from all over Central Japan.

First, I went to the rooftop area, a few floors above Oasis 21, which is a giant glass oval with a big fountain and pond in the center. It’s really interesting architecturally, and of course the views of the Sakae area of Nagoya are excellent.

Then I went down to the event area and looked around the booths, and talked to some people down there. That was a lot of fun. I got some information from the Aichi Prefecture people about some possible side trips, and some info from the Okazaki booth as well. There are so many cool places I’d love to go visit, but there’s only so much free time in my schedule, and frankly, only so much money in my budget.

Not to mention that some of these places are only reachable by car.

Travel in Japan can get expensive if you’re converting everything from dollars, and the exchange rate is only around 77 yen to the dollar. (And that’s on a good day.) It’s pretty painful.

After all of that, I grabbed my bag of pamphlets and headed back home. (Free clear file! And it has a strange local mascot character on it! Score!)

Mall-ed on a Saturday

 Japan, Photography, Photos, Travel  Comments Off on Mall-ed on a Saturday
Oct 152011
 

I was going to go to Nagoya today for the big festival, but it was cancelled due to rain. They’ll just do everything tomorrow, when the weather is better.

I eventually started going stir crazy, so I went to the mall today for the first time since I came back to Okazaki.

I decided to walk, since it was raining off and on, and I didn’t want to mess with the bicycle.

On the way out, I was greeted by a somewhat unsettlingly large mass of birds near the apartments.

The Birds! (Wide shot)

The Birds!

Then I headed to Aeon Mall. It takes a while to get there on foot.

When I got to the mall, I went by Aeon to buy some ink, paper, erasers, notebooks, and stuff like that. Then I wandered around a bit and checked out the bookstore. It’s big, but I couldn’t find what I wanted. (I’m always on the lookout for grammar or JLPT books.)

The mall has a huge selection of restaurants on the bottom floor. I’ll have to check some of those out when I have time… hey! A Subway! Okay, that’s pretty American of me to notice the Subway, but it’s been 2 weeks now since I’ve had anthing from my home country. Maybe next time I pass through here, I’ll pick up a sub.

I headed over to the bookstore on the way to the mall. It’s along the main highway. It’s small, but it has a pretty good manga section, and I was running out, so I reloaded on some new tankoubons to read.

Then back home to dry off.

On the way back, I saw this church:

Church at Night

Okay, it’s blurry, but it was kind of cool how the cross lit up the night.

Tomorrow it’s the Nagoya parades, weather permitting.

Through the Trip Prep Looking Glass

 Japan, Photography, Technology, Travel  Comments Off on Through the Trip Prep Looking Glass
Sep 202011
 

Note: This is about stuff I did before the trip, but I’m actually writing it about 10 days into the trip, but I’m going to put this chronologically before it anyway, so that it makes sense.

Because It’s There.

Before this 3-month trip to Japan, I decided to do what I did before I came to Japan four years ago– go to Mt. Mitchell. Mt. Mitchell is about 6,700 feet high, the highest mountain east of the Mississippi River in the Continental U.S.

The sign says so:
Mt. Mitchell--Sign

I don’t know why I feel this compulsion to go there, but it’s probably because I went there four years ago at just about the same time and the resulting trip was just amazing.

So before I go to Japan I went there to sort of psych myself up and put my brain into Travel 7,000 Miles Mode.

I went there sometime in mid-August.

I loved the scenery, and the mosquitoes loved me.

Have a look:

Going up to the observation platform:
Mt. Mitchell-- Woods

Another view along the way:
Mt. Mitchell-- View on the way to the observation deck

Even on cloudy days, the view here is great:
Mt. Mitchell--Views From the Observation Deck

Mt. Mitchell--Views From the Observation Deck

Mt. Mitchell--Views From the Observation Deck

This time I didn’t fall or hurt myself, so I took that as a good omen.

Getting ready for the trip was a bit hectic, since I’m going to be in Japan for around 87 days. The longest a U.S. Citizen can stay on a landing permit is 90 days, so I’m going to be cutting it kind of close. I’m writing part of this from Okazaki now, so looking back, I’d say that some things I did were smart, and others were just boneheaded.

Flying is Annoying, and Other Obvious Things

The most frustrating bit of travel preparation was getting my flight squared away. I was once again forced to deal with American Airlines.

I had agreed to finally pay the ransom for my kidnapped frequent flier miles, only to find out that I had to wait until I had been “ticketed” before I could upgrade. Then, by the time I was “ticketed,” (because apparently them charging me $2,000 isn’t enough, they had to make me wait a week) it was too late to upgrade, because all of the upgradable business seats had already been given away.

So now I have to wait until the day of my flight to go and beg and whimper for the upgrade I already have the miles for… which they already took from me once.

If You Take Medicine, You May Need This. It’s Annoying, Too.

Another thing I had to get before going to Japan was a yakkan shoumei, which is a piece of paper to show the folks at customs if you have more than 30 days’ worth of medicines to bring into Japan.

It’s a real pain in the butt to prepare this, but if you contact your local Japanese embassy, they’ll e-mail you the forms to fill out. I wound up sending about 20-30 pages worth of stuff in the end. It takes a solid 2 weeks to get one, and that’s if you FedEx your paperwork to them, and fax your application. I’ve gone over this before in my 2007 Japan trip posts.

Shipping Ahead Only Works If You’re Smart

I spent a few days getting supplies together and shipping them ahead to Yamasa. I’m grateful that they’ll let me send stuff ahead, because it’s less junk to carry. The downside is that I wound up shipping future me way too much crap.

I’m planning on taking the N1 or N2, depending on my grade on the summer N2, so I sent a bunch of JLPT prep books ahead. I also sent a bunch of general grammar books ahead, too.

I wish I hadn’t sent so many books to future me. They’re heavy and expensive, and I probably won’t use them all.

And I wound up shipping things I just don’t need, like coffee. I like coffee. I drink it. But they have perfectly good coffee here. Why did I pack 2 bricks of coffee? And cocoa? Why did I pack it? I forgot why. But I did.

Oatmeal. Okay, I love steel-cut oatmeal. When I’m in the US, I eat it every morning. I cook it in my rice cooker using the porridge setting overnight, and it comes out great. I figured that there’s no way in hell that I would find steel-cut oats in Japan, so I sent 4 pounds of it over.

Dumb. Dumbdumbdumb.

Turns out that there’s a grocery store in Nagoya that stocks Odlum’s steel-cut oats. It’s in Sakae, right next to Maruzen. Actually, it’s cheaper than shipping from the US.

Much cheaper.

Experience Is Sometimes a Good Teacher, and Sometimes Isn’t.

I thought I would need an inflatable doughnut to sit on, based on my prior experience.

Nope. Didn’t need it.

The jury is still out on the protein bars. I sent a few ahead, just in case. I’ll probably go through them, just to avoid sending them home. They were really handy last time, so I sent some ahead this time.

But generally, I shipped too much stuff ahead, and most of it was stuff I did not need, or could have easily done without. Priority Mail to Japan is cheaper than Royal Mail (what isn’t?), but it’s still expensive, and Priority Mail is the only option you have for shipping from the US to Japan. There isn’t a significantly cheaper option, unless you grab an extra suitcase.

Upsell or Really Good Advice?

Speaking of suitcases, I went on a bit of shopping trip before I left. I bought a monstrously large Samsonite suitcase, a 29-inch model that’s light as a feather, and big enough to stuff Jimmy Hoffa in (allegedly). The sales lady tried to upsell me on a model that was $80 more.

I thought she was just trying to get a good commission, but my skepticism was my downfall, because I really should have listened to her.

The more expensive model was 4 lbs. heavier, though, and I was being slightly nuts about weight and cost, so I went cheap on the suitcase.

Big mistake.

The cloth handle just couldn’t take the weight of the filled suitcase very well, and the wheels had a hard time keeping up with me.

Get a suitcase with double wheels and sturdy handles. This suitcase didn’t have double wheels, it only had single wheels, and crappy ones at that.

I went big and light because I tried to go one suitcase with it– more on that in another post.

Do I Win at Umbrella Yet?

I found a collapsible umbrella that’s big enough for me– it doesn’t suck, but it’s slightly annoying, in that you have to “reload” it to “fire” it open again. Annoying, but it’s around 55″ big (sort of golf-lite), so I stay dry enough. If you search long enough on Amazon, you can find anything.

I also picked up a tiny external Western Digital 1TB 2.5″ HDD for storing photos, movies, etc. on.

As usual, I tore through The Container Store, and bought lots of little stuff, none of which I can remember off the top of my head. I’m sure I’m using some of it, I’m just unable to remember any of it.

I bought a $6 strap handle from Staples for carrying boxes around. I’m going to have to lug boxes around at some point, so I’m going to see if it’s a solution. Not like I can fit a cart in the suitcase.

Camera!

I swapped out my EOS Rebel XSi for an EOS 60D body. All-in-all it’s a nice upgrade. I really like the 60D.

But there’s one problem with any SLR, and that is that it’s an SLR, and about as unobtrusive as a tank at a 3-year-old’s birthday party. I use it for the tourist spots, and places where I’m okay with dragging it around, but it’s a bit of a dilemma for daily use.

Denser Than a Neutron Star!

Space Bags. I bought a lot of the Travel Size. The size that’s one size smaller is really useless. Space Bags are somewhat useful, but they pose a problem– if you reduce the density of all of your clothes down to that of a neutron star, then your bags become ultra-heavy. Also, you lose all of the cushioning you get from air-filled clothes.

Useful…ish?

Other Stuff I Love to Take on the Road

Motorola Xoom Android Tablet: I loaded this up with my eBooks to the extent that I could, as well as games and other stuff. I’m so glad I have this. The battery life is still around 8-9 hours, too, so it’s generally good to have around.

Motorola Razr V3X GSM phone, unlocked. This is my workhorse travel phone for “Oh crap!” moments. This is what I use for communication when I want to make sure that I don’t accidentally get dinged for data charges, because it’s a dumb phone.

Downside: it doesn’t do Japanese texting. Just pop in the SIM and go. No software to get in the way of calling.

Nexus One: my aging smartphone buddy. Unlocked, of course. (Am I the only person who still insists on buying unlocked phones?) I packed it full of music, because the app memory is crippled at only 1 GB.

There aren’t many apps that I can port to the SD card, and I hate that. But it’s GSM and unlocked, which makes it mighty. Mainly it’s mighty for 4 apps: Google Maps (most important), GMail, Chrome, and Music.

Aging Sony VAIO laptop: 3 pounds, but still felt heavy. It’s probably the extra battery.

Adapters: I’m still looking for the ideal power adapter solution for travel. The fewer I need to carry, the better. Motorola sucks in this department. The Xoom and the V3X still have 12V plugs. I’m using my old 2007-vintage iGo laptop power adapter for my laptop, so it would work with the 2-prong power outlets in Japan. For some reason it won’t work as a USB charger anymore, though. Bummer.

Traveling is an ongoing experiment for me. I’m always tweaking some variables to see how it improves my experience.

I just wish I could get away with less crap.

London School of Economics (Lessons Learned from London)

 Great Britain, Photography, Technology, Travel  Comments Off on London School of Economics (Lessons Learned from London)
Jul 202011
 

Whenever I travel, I learn some new lessons about what works, and what doesn’t. Here’s my list for the London trip.

Now watch me totally over-analyze everything I packed.

The Best Camera Bag That Isn’t a Camera Bag

Camera Non-Bag: The Mountainsmith Kit Cube is very clever, and very useful. But, it comes with a couple of caveats. First, you must pad the bottom of the cube with something.

My backpack fell on the stone floor at Parliament when I was going through security, and it messed up my Zoom lens because the bottom just doesn’t have enough padding. It’s also not very rigid, which is both a blessing and curse. Rigidity would give it some more strength, but it would also lose its flexibility, which is its strong point.

So while it’s a great carrying alternative, keep in mind that it needs extra padding. I’ll probably go get some 1-inch upholstery foam or something.

There’s also an annoying leather bit that covers the adjustable cord that I immediately cut off. I have no idea why it’s there, as all it does is make it difficult to adjust the cinch for the cover.

With those caveats, the Kit Cube is awesome, because it’s compact and stealthy. It is the anti-camera bag, everything I’ve ever wanted. It fits into whatever bag you want to stuff it into, and it does so quickly and efficiently.

If you do any kind of photography, I highly recommend it… with those caveats.

Storing and Moving Money

The Eagle Creek Silk Neck Travel Pouch is really comfortable, but for the love of all that’s good, hand wash it in a sink, or put it in a mesh bag if you’re going to put it in a washing machine.

I just dumped mine in the washer, set it on hand wash, and the cord wrapped around the agitator and got ripped out. So I had to buy another one, because it happened the day before I left.

Doh.

After all of that, I only used the Neck Pouch when I was flying.

It’s too much of a pain to use for everyday stuff. It is small enough that I’ll probably use it again when I go overseas, because it was great for use on the plane.

Money Belt: Left it at home again. It’s a pain to rub my belly every time I want to buy something. Maybe I’ll get rid of it one of these days.

I used a chain wallet instead that I bought for my big Japan trip 4 years ago. It works really easily. Just loop the chain around a belt loop, and stop worrying so much. It’s big enough to handle even the most ridiculous currencies. It also looks kind of cool.

One huge mistake that I made was carrying traveler’s checks. I got ripped off on the exchange rate, and generally they’re an anachronism.

My credit union now has a special debit card that you can put a fixed amount of money on just for travel. The idea is that if it gets lost, someone can’t clear out your entire account. Sounds like an interesting idea, but I don’t know how practical it really is.

The best deal I got on currency exchange was from my credit union before I left.

The next best deal was using my debit card at an ATM. There are a ton of FOREX shops all over the place, but keep in mind that you are the source of their profits.

Protecting Electronics

I love the sleeves for laptops from Waterfield Designs. I have one for my Vaio laptop, and I picked one up for my Xoom tablet as well. I use a leather case from KeviKev.com for my Xoom, and I used the measurements from that to get a custom sleeve to fit the Xoom from Waterfield Designs.

It’s a bit on the overkill side to use a case and a sleeve for the Xoom, but I don’t want to break it.

Another great pickup from Waterfield was the sleeve case for my aging Nexus One. It has an extra pouch on the back, where I stuck an extra battery when I was flying, and my Oyster Card when I was in London. Very handy.

Dealing With Liquids

GoToobs from Humangear are awesome. They come in 3 oz (88ml) and 1.25 oz (37ml) sizes, which run for ~$8 and $5 each, or come in 3-packs.

They are a little expensive, but they are silicone, so they can take a lot of abuse, and they don’t leak. The tops have a good strong lock, too, and you can remove the tops to reveal a wide mouth that makes them easy to fill with whatever liquids you need to fill them with.

The opening they squirt through is covered by a thin layer of silicone with a + shape cut in it, to minimize leaking even further. Seriously, these guys thought this stuff through. I found them at a local luggage store, and at the Container Store.

I have used the cheaper containers before, and there’s just no comparison. You get what you pay for. Really.

The Container Store also carries legal and letter sized reinforced plastic pouches for ~$4 each that are an absolute steal. They’re waterproof enough and will hold a lot of clothes, or in my case, books, and are a heck of a lot cheaper than the Eagle Creek packing cubes.

They’re in the office supplies section of the Container Store.

I wanted those bags because I wanted to protect my books, etc. from anything that happened to rupture in my suitcase, but I can easily see using them for clothing. They won’t hold quite as much as the Eagle Creek pouches, but they’re cheap.

The Container Store also has some heavy plastic carrying bags for carrying liquids, which I used to transport my liquids, like energy drinks, GoToobs, Woolite, soaps, sunscreens, hair gels, and the like. I wanted to make sure that stuff didn’t leak out of the plastic bags they were in and get all over my books, which were in the legal sized reinforced plastic pouches.

Sounds anal? Well, yeah. But none of my stuff leaked.

Power Converters, Travel Adapters, and Charging Electronics

This was a major headache for me, because I stressed out about it a lot before I left. I really wanted to reduce the amount of crap I was carrying. I loathe carrying a bunch of adapters for my electronics.  Also, since I was going to the UK, which has funky power plugs, I needed a solution for that as well.

Brookstone makes a very good universal travel adapter that comes with two USB ports. It’s almost perfect for traveling anywhere.

I say almost, because it has this hinged cover over the US input side, and my laptop wouldn’t plug in, because the blades hit the hinged cover right at the hinge. Bad design on that part. Everything else I own plugged in just fine, but everything else I own is 2-pronged, so I have no idea if it supports 3-pronged cords. The glowing bit from the USB ports was kind of annoying at night, but I got used to it.

For my laptop, I got a plug adapter at Radio Shack. Worked just fine, but cost $20.

I bought and returned a power converter. I didn’t need 120 volt power, and the weight on those things is just nuts. Even the good ones break constantly.

Look at your electronics. If they can’t take 240 volts, just leave them at home. Most decent electronics can handle 240V, but read the label.

A $15 CyberPower retractable USB cable set from Wal-Mart was a great buy. It came with adapters that would fit micro-USB 5-pin, 8-pin, 5-pin mini B USB, and USB B– the square USB end that connects to printers and scanners. The cord got a little bit twisted over two weeks of heavy use, but it was $15. It still retracts enough for my needs, and it still works as a recharging cable.

With the USB cable, I could recharge my Nexus One without carrying the power plug for it. The plug that was Motorola-sized, however, would not charge my Motorola Razr (my backup emergency phone), because that requires 12 Volts.

Motorola is the bane of my travel existence.

My Xoom also won’t recharge over USB. It will only charge over a skinny pin plug that uses 12 volts as well. So that was 2 chargers I had to carry, plus one for my GeekPod as well. Someday I shall overcome this by replacing this stuff with stuff that uses USB to charge.

For $8, I found a USB cable with a plug on the end that allows you to plug in all kinds of phone and USB connectors to charge all kinds of phones. It doesn’t have a brand name. I got it at Intrex Computers, a local chain. I didn’t use this much, but what was great was that this gave me the microUSB plug I needed to fit into my old BatteryGeek GeekPod cable, so now I can charge my Nexus One with my GeekPod, if I need to. I can also use the Nintendo DS tip I have from the GeekPod to plug it into the USB cable so I can charge the DS with my laptop, so there you go.

All of that fits in a tiny bag, doesn’t weigh much at all, and that’s what matters the most.

Clothes, or OMG Cotton is SO Evil!

I learned some valuable clothing lessons from my long Japan trip in 2007, the most important of which is: COTTON IS EVIL. I love the feel of cotton, but it is the Devil’s work to have in my travel bag.

If I wash it in the sink and hang it up, it will not dry in one day. It may not even dry in two or three.

It does not breathe.

And Cotton shows sweat. It really shows sweat, so it makes me look gross when I’m exerting myself.

Cotton’s only saving grace is that it feels really good. Until I start hiking, carrying a load of any kind, and start sweating, of course.

And that’s what I do when I’m in travel and tourist modes.

So that’s not good enough.

For this trip, I vowed to make all of my clothing lightweight, synthetic stuff that breathes, dries quickly, doesn’t show sweat, and washes easily.

Socks: Balega. A joint North Carolina/South African operation. The socks are made of Coolmax, so they breathe, are easy to wash, and dry fast.

Boxers: Ex Officio. Best boxers ever. I bought 5 pair, because I don’t want to wash underwear every night. I washed 2 pair at a time. 1 packet of Woolite would do 2 boxers, and they dried overnight fabulously. I wear these even when I don’t travel. They’re really comfortable.

Shirts: I went with a variety from The North Face and Scott E-Vest. All were some kind of breathable nylon/Coolmax material. Some were long-sleeved for sun protection, some were short-sleeved for knocking around the room. Golf shirts from Scott E-Vest were great for looking dapper. All washed up fast, and dried overnight.

Pants: I used to use the Scott E-Vest travel cargo pants, which were linen, but they don’t make those anymore. It’s just as well, because linen pants don’t hold up to my kind of travel abuse.

I replaced them with The North Face Paramount Peak pants in 3 colors: a light khaki color, a mustard-brown color, and a dark green. All have zip-off legs for conversion into shorts, all have built-in nylon belts, so they don’t set off security scanners, and all come with one zippered side pocket, for storing those small things that like to fall out of pockets.

They also have a pair of Velcro cargo pockets, which are useful as well. The top pockets are a little too shallow for my taste, so things can fall out of them. But I’ve only ever lost one thing from them, and I found it rather quickly. I like the older version better. It has much deeper pockets.

All in all, they’re great pants. They shed stains, but not rain. If you’re caught in the rain, they will protect you for about a minute or so, then they’ll get soaked. But they dry in a hurry, so it’s not a big deal.

Jackets: I didn’t need my Polartec vest. I used my old L.L. Bean Gore-Tex jacket the most, but it’s showing its age. Newer rain jackets really are rubbish. They all feel like I’m wearing a trash bag, and for $100, that’s a rip-off. You don’t even get Gore-Tex for that. I wore my Scott E-Vest micro-suede jacket on the flight to keep warm and to carry extra stuff, but it’s not really rain gear.

I bought a $5 poncho at Dick’s Sporting Goods just in case. I never used it. It was just wasted space. I’m sure it’s useful for something, but I don’t know what.

I’ve already documented my problems in finding a decent umbrella that will also cover me properly. The drugstore umbrella is always a bad idea, although I suppose it beats being rained on, but not by much. The £15 Marks & Spencer’s umbrella was better, but it was bulky, unwieldy, and a royal pain in the butt to carry around.

I want to find a small umbrella that unfolds to a huge size. Surely someone makes such a thing.

Misc. Clothes Stuff: I wholeheartedly endorse clothespins with hanger hooks. They’re easier to carry than clothes hangers. I carry ~8 of them. Makes hanging wet clothes a breeze.

Also, it’s a lot cheaper/easier to just pour Woolite into some GoToobs than to carry around the little pouches.

Tech

Cameras: I dithered at first about taking my Canon Rebel with me, but I’m glad I did. It took great pictures.

The main lens I use is a 17-55 F2.8 EF-S lens by Canon, which is perfect for shooting with an APS-sized sensor digital Canon SLR. The Rebel has a field of view cutoff that leads to a magnification factor of about 1.6, so that gives me a 24-80mm equivalent lens. It’s not one of Canon’s L lenses, so it has a plastic body instead of a metal body, but if you take care of your gear, it shouldn’t be an issue.

The 80-200 F2.8L is monstrously heavy, and turns into a 120-320mm lens. It’s marginally useful, especially if you drop it. It weighs 5 pounds, which doesn’t sound like much until you have to carry it all over the place.

Next time I would make sure to bring a lens brush, to remove all of the glass bits right away. Would I take the big zoom again? Depends on where I’m going, and for how long.

Computers: Lighter laptops are always better. My Sony Vaio Z is old, but it weighs less than 3 pounds, which is great for carrying. Of course, buying a spare battery kind of ruins the whole purpose of getting a lighter computer, but since there weren’t any power ports on the flight, I didn’t have a choice in the matter. Just finding a Sony battery for a computer that old was a pain.

The Motorola Xoom got used a lot, because of free hotel WiFi. Irritatingly enough, even though I have accounts with my Kindle and Google Books, I could access neither from the UK. So even if I wanted something new to read, I was out of luck.

Seriously, what’s the point of having these services for travelers if they don’t follow us where we go? It’s bad engineering from where I’m sitting. I suppose we should blame the lawyers for making deals that hurt consumers.

Getting a SIM card for the Nexus One was relatively simple, and I never used up all of my data. Vodafone was cheap. Much less hassle than trying to do it in Japan.

Bose Noise-Canceling Headphones: Bought these 4 years ago. Best $300 I ever spent. Wish they were smaller.

Google Maps. Don’t Leave Home Without It.

Having Google Maps on my phone was a real lifesaver. That’s something that I’d highly recommend for any future travel– a smartphone with a good data plan and Google Maps. Android over iPhone, because the iPhone version of Google Maps pales in comparison.

I would star the places I wanted to see in the morning on my Xoom, then find them on my Nexus One as I wandered about during the day. I used the navigation feature to figure out how to get there by train.

It’s really easy.

Amazingly, stupidly easy.

I could get a walking route, a driving route, or a mass transit route to wherever I wanted to go. The mass transit routes sometimes had good timetable info, too.

Odds and Ends

Oyster Card: Order yours six weeks before you leave for London, because the mail there is slow. It’s highly useful, and will save you a bunch of money.

Heathrow Express: It’s a lot faster and easier than using the Piccadilly Line to go to Heathrow. It costs £18 if you buy the ticket at Paddington/Heathrow, but if you buy online, it’s only £16. It’s £23 if you buy a ticket on the train. (So at least buy it at the station if you can!)

It’s a nice ride, and on top of that it’s an express, so you don’t have to stop at a bazillion stations along the way. You also have a place to put your bags, and you get a seat to sit in, plus WiFi. Those are all things you don’t usually get on the Piccadilly Line.

Food is Expensive in London. Everything is Expensive in London.

London is ungodly expensive. Pounds aren’t dollars, so if you’re not careful, you can get lulled into thinking, “Oh, it’s only £10 for dinner.” That’s $17.50, buddy. Those “cheap” £10 meals can drain your wallet in a hurry. That’s why I liked Base2Stay, because I could buy grocery store food and cheap food and stick it in the fridge. I saved a few dollars that way.

Marks and Spencer’s, the Cooperative, Gregg’s, Pret-a-Manger: all have lots of sandwiches and other food for cheaper than you’ll pay in restaurants. The Cooperative has better deals than M&S, and often has deals on soft drinks. I saved 20p on Fanta Lemon Ice there, and by eating some sandwiches instead of eating at restaurants all the time, I saved some money.

I loved the porridge in a cup from Gregg’s and M&S. Just add boiling water, stir and eat. I preferred the Golden Syrup flavor. £1 per cup. Not cheap, when you consider that I can get 4 weeks’ worth of oatmeal for $6 in the US, but that was my morning luxury.

I Still Hate Audio Guides

I began to loathe audio guides in London. All they did was get in my way and gum up my gear– especially my camera. The worst offender for entangling my gear was the multimedia guide at the British Museum, which had a little plastic pen that swayed around and clattered into things constantly. I really wanted to pitch it.

The most obnoxious use of audio guides was at Westminster Abbey, where if you didn’t get one, you didn’t learn a thing. Even the map had information removed so that you had to use the audio guide. I refused to rent one out of anger. At that point, I had had it.

More Miscellany

Clear expandable file: It’s really handy for those receipts.

Mead 5-Star collapsible 3-ring notebook: It was really handy. I removed the reinforced college-ruled paper, and replaced it with plain 3-hole copier paper. It took up very little space. The rings are on the outside of the notebook to keep the form factor small, and since you can use whatever paper you want, and however much you want, it’s very flexible. I used a lot of it for JLPT studying.

Inflatable Neck Pillow: I didn’t use it. I probably should have. My neck hurt like a sore tooth on the flight back.

Royal Mail: OMGEXPENSIVE. Even postcards are outrageous to send back. I’m never using that again, and I don’t recommend it. It’s cheaper to just buy another suitcase and deal with the airlines. No, really, I’m serious. I had to send some books back, and while the people at the Royal Mail are very nice, the prices are outright robbery.

In the end, I wound up carrying more stuff than I’d like, but it wasn’t as bad as the 2007 Japan trip. Still, I had a full pack on my back, and a full bag, but a lot of it was books for studying for the JLPT.

One day, I want to be able to carry one little bag as I travel, but since I love my technology and photography, I think that day is still far off.
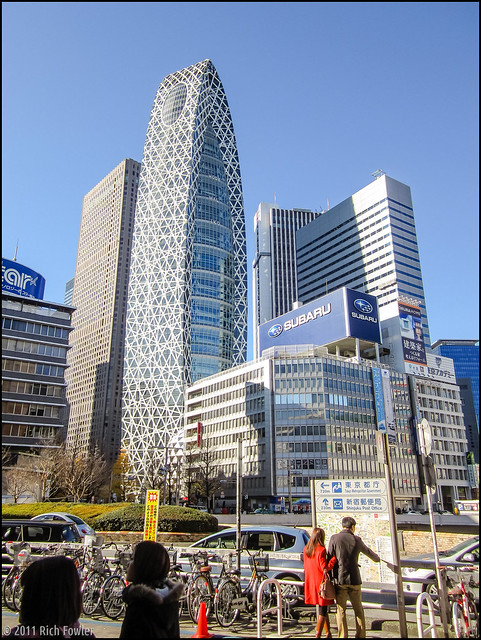
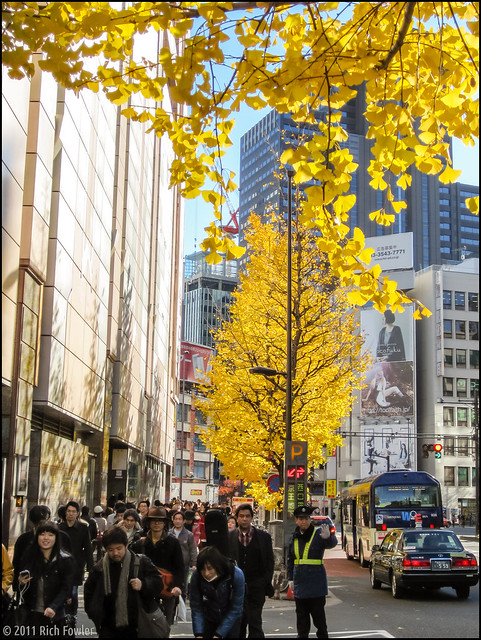
Towering Over London

 Food, Great Britain, Photography, Travel  Comments Off on Towering Over London
Jul 092011
 

Today was a really busy day. I saw the Tower of London and Tower Bridge, then went to Piccadilly Circus yet again to pick up some tea at Fortnum and Mason.

After that, I had some noodles and karaage, and picked up some Japanese confections at Minamoto Kitchoan. On the way I came across the Whittard shop, but didn’t buy, and found out that Uniqlo moved.

After all that, I went back to the hotel, cleaned up, and set off for the Tate Modern, saw the Miro exhibit, saw a bunch of other cool stuff there, then walked across the Millennium Bridge to the Underground and went home.

I’m totally exhausted, but I love traveling.

See the Jewels and Kiss Your Day Goodbye

I dragged myself out of bed reasonably early to get to the Tower of London today. Going there on a Saturday is a really bad idea, by the way. It’s totally jammed with tourists, and there’s no way to get out of there in under three hours unless you just want to stand in the middle of it, look around, and just leave.

If you want to see the crown jewels, you can kiss the whole afternoon goodbye. The line was monstrously long. I skipped it.

I took Rick Steves’ advice, and bought my ticket from a gift shop outside of the tube station called Traders’ Gate.

As you leave the station, go down the stairs, and it’ll be on your right. They’ll give you a piece of paper with a pink/yellow/white copy, and you take that to the main entry gate. It works exactly like a ticket, and you avoid the huge lines for tickets. Brilliant.

Well, they still get you for £18, but at least you don’t have to line up for it.

So That’s Why My Ancestors Left

I walked in just as one of the Beefeaters’ tours was starting, so I joined it right away. The tours last 55 minutes, and are entertaining, if a bit grisly. We saw the Bloody Tower, Traitor’s Gate, the White Tower, the courtyard, and the chapel.

Then I headed for a bench and took a break. My trusty hiking shoes have been breaking down, and my feet are paying for it. The shoes themselves are fine, it’s just that the soles are no good anymore, and there’s no amount of insert trickery I can use to avoid that. So when I walk for more than a couple of hours, my feet hurt like hell. Pacing becomes vital.

I wandered around the courtyard a bit and took some pictures, then wandered to the walls, and wound up in the tower that houses the old crowns, minus the jewels. That was somewhat interesting, if a bit sad-looking to see crowns without jewels (not even fake ones) in them.

I got some good photos of downtown London (also known as The City) from the walls, headed back to the courtyard, and on to the White Tower, which is full of armor, including the Rude Armor of Henry VIII.

I love a nice armor collection, so I enjoyed the White Tower a lot. My favorite weapon was a combination mace/gun. If you run out of bullets, just bludgeon your enemies, I guess. It looked painful either way.

There was also a dragon made out of bits of armor. It was very cool.

The path through the White Tower leads you to the basement, which used to be a torture chamber, and is now a gift shop. So I guess it’s a modern-day equivalent: you squeeze into a room with a hundred tourists, all shuffling around trying to find tchochkes to commemorate their visit to the Tower. I shuffled for a few minutes, about went crazy from it all, and got the hell out. There’s not much worth buying there that you can’t buy at the main gift shop, and the main gift shop has less of an apres-torture chamber feel to it.

After that, it was on to the Bloody Tower, to see where Sir Walter Raleigh and his wife were cooped up for 13 years, and where the two princes were murdered. Such a cheerful building.

But you don’t go to the Tower of London for warm fuzzies, you go to get a good dose of history. And history here is full of people doing really nasty things to other people.

Back in the courtyard I caught the changing of the guard, and then I was pretty much done with the Tower as a whole.

Escaping from the Tower

I headed out towards the Tower Bridge, took some photos, bought some stuff at the gift shop, and headed to Piccadilly Circus for some shopping and a late lunch.

First it was off to Fortnum and Mason, famous purveyor of teas, jellies, and other things. Tea and shopping bag purchased, my mission there was over. That shopping bag will surely spark envy in the U.S. Mom will love it.

After that, I went across the road to a wagashiya, which is a place that sells Japanese confectioneries, called Minamoto Kitchoan. It was a neat place, with all kinds of authentic Japanese confectioneries, with authentic Japanese prices. I picked up an anmitsu bun (which is a bun filled with red bean paste), and some youkan, which is a kind of sweet red bean paste in a block. It goes well with green tea.

I also bought a small jellied peach-like thing. I forget what it was called, but it was delicious.

Lunch was at a place called Wasabi, which had a deal where you can get 2 items for around £5. I got karaage (Japanese fried chicken) and yakisoba (noodles in sauce that are sauteed). I wish I could have gotten more than two pieces of karaage, but that was the combo deal. The food was very good, but the floor was a bit dirty, so I wasn’t too thrilled about putting my bags down.

Then it was back on the streets, wandering around Picadilly Circus and sightseeing. I was going to stop by the UniQlo in Piccadilly, but it was closed until later this year, and I didn’t feel like going to SoHo, because it’s a pain to go to Tottenham Court Road from just about anywhere.

I decided to head home for a shower and break.

Follow the Orange Poles to the Tate… Uh, Where’d They Go?

After cleaning up, it was off to Southwark to the Tate Modern, to look at the Joan Miro exhibition, as well as some other great pieces of modern art. When you exit from Southwark Tube station, just follow the orange street lights to the Tate… well, until you run out of orange street lights, which I did at one point.

Fortunately, I had my Nexus One and Google Maps, and could figure it out. But there weren’t any signs or anything after the quaint orange light poles ran out, which is really very annoying.

The Miro exhibition was fascinating. Modern art changes so much, and to watch a modern artist change so much over his lifetime was something I haven’t had the chance to see. It was a really well-curated exhibit.

I also got a chance to look at some of the other galleries there as well. Rodin’s “The Kiss” was impressive, and I did see a couple of works by Jackson Pollock— he’s one of my favorite artists. I also saw a lot of photo montages by John Heartfield, which were fascinating. And of course a few Dalis. Dali is always fun.

There was also a photography exhibit on Afghanistan then and now, with images from the 19th century British expedition and from 2010-2011. I would not call it photojournalism, but it is an artistic expression. I don’t know. It felt forced. I’m not going to get into the politics of Afghanistan. The images were vivid, but it’s the photographer’s statement about what he feels about Afghanistan, not necessarily a reflection of reality. That’s how photography is.

I don’t know that photography ever really accurately represents reality. It just represents our perceptions of reality, since the person behind the camera frames the image, and chooses what to put in the frame, and what to leave out of the frame. So as an art exhibition, it was interesting, and I’ll just leave it at that, because I can’t judge it as a representation of reality. I’m not on the ground there, so I can’t make any statements either way.

After all of that, I headed out of the Tate, since they closed the gift shop before I could buy anything, and headed to the Millennium Bridge to cross the Thames. It was around 10 p.m., so the sun was just starting to go down.

London in summer is pretty interesting, with sunset so late in the day. I would imagine that winter is brutal, though. Sunset at 4 p.m. or so, I would guess.

I got some lovely shots of the bridge, the river, the skyline, and St. Paul’s, then it was back to the hotel to call it a night.

That was a great day, but I’m exhausted.

Jul 082011
 

I had an ambitious plan today, and got whooped by the National Gallery. That’s one tough museum to get through, even on roller skates.

I started out early enough, but made my first error when I headed out the door and down the street, having forgotten to brush my teeth.

I hate it when I do that. I doubled back, lost 15 minutes, and restarted.

On to Charing Cross, and Trafalgar Square. I took about 40 minutes to take a bunch of photos of Nelson’s Column and the other various Things to See there.

None of the photos are unique in any way, shape or form, but it’s the sort of thing I felt compelled to do anyway. After 9/11, and more recently the disasters of 3/11, I have learned to take lots of pictures of every place I visit, because you just never know.

Saying “It will always be there” is foolish. It’s obviously not true.

It’s really difficult to get a decent shot off in Trafalgar Square, because to get a decent angle, you have to move across the street, and that means waiting for the pink plumbing van to move from the stopped traffic in front of that nice looking church, or the giant double-decker bus with an ad that says “GET STUFFED!” to unblock your view (and to classy-up the photo a bit with its removal.)

I suppose if I had a tripod and a stack of neutral density filters, I could do a 10-20 minute long exposure, and make it look like everyone had disappeared, or something similarly creepy.

Then there were the times when I was trying to take a picture of something like the Olympic countdown clock, and I was patiently waiting my turn, and people just kept rudely jumping in front of me to photograph each other standing in front of it.

Honestly, I have no idea why they’d want to pose in front of it, but nevertheless it was still annoying that they kept jumping in front of me.

Photography is sometimes fraught with peril, and sometimes it’s just flat out irritating.

Art, Inconveniently Housed.

On to the National Gallery, which is full of family pictures of Jesus.

It’s a pretty building, but the layout of the place is kind of annoying. I lost 20 minutes just trying to put my bag away.

I went up the giant steps on the Trafalgar Square side, then went down 2 flights of steps to one cloakroom, only to be told there was no more room. So I had to go back up 2 flights, across the whole building, then down 2 more flights to another cloakroom to drop off my bags. Then back up 2 flights, halfway across the museum again to the Central Hall, just so I could start the tour I wanted to do in the proper order.

Sigh.

I picked up one of those audio guides again… am I the only person who gets grossed out when he thinks about using the same headphones that thousands of other people have used? It makes me shudder to even consider it.

So I yanked them out and put my own ear buds in, listened to a few descriptions, then promptly stopped using it. It just bogged me down. I really need to stop using those things.

Paintings by the Numbers

The collection at the National Gallery is really good. It’s not top three, but it’s definitely top ten. Only one Hieronymus Bosch, though. (“Christ Mocked,” if you want to know which painting.)

One of these days, I want to see a bunch of Bosch’s paintings. For someone who painted in the 15th century, his work has a great surrealistic feel to it. It reminds me of Dali’s work. Or maybe Dali reminds me of Bosch?

Note to self: Go to Madrid one of these days to see “The Garden of Earthly Delights” in the Prado.

Van Eyck’s “The Arnolfini Portrait” is a classic medieval painting at the National Gallery. It was great to see a major painting like that up close.

I also got to see Botticelli’s “Venus and Mars,” which I think is an excellent painting. I love the pensive (or maybe bemused?) look on Venus’ face.

I enjoyed the El Grecos that they had there as well. I think he could have painted a children’s birthday party and it would still have had a haunting quality to it.

That Ain’t Lemonade.

About halfway through my gallery run, I decided to have lunch. Once again, I was at the mercy of the floor plan of this building. I was in the Sainsbury Wing, which is where all of the 13th-15th century paintings are. On the 1st floor, there’s a dining hall, so I went down there to eat. I looked at the menu, and it was a sit-down, fancy food kind of place. (Oysters, meat dishes and pies sort of thing.) Definitely something that would consume many pounds and much more time than I could afford.

My only other choice was to go up a flight of stairs, go all the way across the museum, then go back down two flights of stairs to the Getty Entrance and eat at the cafe there. It was a sandwich shop kind of place. The drinks were a miss, though. The “Victorian Lemonade” was gross.

Important lesson learned: ALWAYS read labels before you buy things here. Just because it says “Lemonade” doesn’t mean it’s going to TASTE like lemonade. It was some sort of lemons mixed with ginger and sugar and “aromatic herbs,” all carbonated, served lukewarm.

Gross.

The BLT was okay, although it was a bit weird, and the chocolate chip/hazelnut cookie wasn’t bad. The important thing was that I had calories to keep going.

Art, Part Two

Back to the art grind. My feet were killing me towards the end. It’s probably time to get new shoes.

I really liked Boilly’s “A Girl at a Window.” I think it’s a print of a lost original, but I love the expression on her face and the composition. I also liked the “Portrait of Susanna Lunden” by Rubens. And of course the “Self Portrait at the Age of 64” by Rembrandt was great. I love his expression in that painting.

I loved Renoir’s “The Umbrellas,” and saw a bunch of Van Goghs, including “Sunflowers,” which is fine, but I’m not too keen on the dark yellows. I like Van Gogh’s other stuff just fine, though. Of all on display, I like his “Wheatfield with Cypress” the most.

I was really more into the 19th and 20th century paintings, but alas, that was when I had realized that I had already spent FOUR HOURS there. All of the medieval and renaissance stuff just bogged me down.

The Monets, Manets, and Seurats were all good. It’s easy to remember that Seurat was into pointilism– “Seurat knew a lot about dots.”

There was a special exhibit on Italian altarpieces, which was interesting, but looking at religious artwork is like visiting shrines in Japan. I can only see so much of it before my eyes glaze over. Since I had already seen all of the 13th-15th century paintings, the altarpieces just kind of blended into the rest of them.

Sadly, I am that shallow at times.

You can get a “60 minute tour” list of what the museum considers to be the most important pieces if you just want to hit the highlights. You can use the audio guide with it… but I wonder if you can actually do it all in 60 minutes.

Anyway, it’s useful as a reference for what the curators think is important, because there are a lot of pieces by artists most people have never heard of that clutter up the place. Not that their work isn’t important, or isn’t worth preserving, it’s just that there’s an awful lot of it, and while it’s good art, it’s not great art.

There are a few pieces on the “greats” list that I didn’t agree with. I didn’t particularly care for Constable’s, “The Hay Wain,” to be honest. It’s a pretty piece, but it didn’t particularly move me. I’ve already mentioned a few others above, like “Sunflowers.”

At 4 p.m., it was time for a mad dash to the gift shop, where I bought a bunch of very tasteful blank cards and postcards. Now I can send people cards and impose my aesthetic sense on them at the same time.

How convenient!

Back to SoHo

Then it was time to leave the National Gallery and head to SoHo to pick up my zoom lens, which was almost destroyed at Westminster the other day. I can still see the bits of glass dust trapped in there, so it’s going to have to be stripped down when I get home, but it’s good enough for now.

Tottenham Court Road station is a royal pain to get to these days, because it’s not served by the Northern Line. You can only get to it via the Central line, and that means lots of transfers. Ugh.

Anyway, after I got the lens back, I stopped by a crepe shop called Crepeaffaire and had a delicious dark Belgian chocolate crepe with whipped cream on the side. But it wasn’t cheap– that plus a cup of milk was almost £7.

Yikes. In dollars, that’s a whole meal plus dessert.

He Never Used a Meerschaum Pipe!

Then it was off to Baker Street, to see a certain Consulting Detective, or rather a certain Consulting Detective’s Gift Shop. There was no way I was going to see the Sherlock Holmes Museum, because every tour guide says that it’s a ripoff, and I refuse to pay for another ripoff museum.

But I wanted to get some Sherlockiana, because it makes for great souvenirs.

The annoying bit? Even I, who is just a casual Holmes fan, got annoyed by the constant use of a Meerschaum pipe in all of the Holmes shadow portraits. He never used a Meerschaum pipe… yet there he is in every trinket, Meerschaum in hand, or hanging out of his mouth.

So annoying.

I bought some less-annoying trinkets for the people back home, and then I finally staggered back to Earls Court. That was it for me today.

Caution: 175 Steps.

 Great Britain, Photography, Travel  Comments Off on Caution: 175 Steps.
Jul 042011
 

The test’s over. My brain still resembles Jell-O, but it’s time to be a tourist.

So let’s start off big. How about the British Museum? Is that big enough for you?

It’s big enough for me.

I headed off to the Russell Square tube station, and encountered a sort of tube station that I haven’t encountered before. There are no escalators, just 3 giant elevators, and a spiral staircase with 175 steps and a warning that was no joke.

When my train pulled in, the access to the lifts elevators was jam-packed. It looked like it would take a while, so like a dummy, I thought, “Well, it’s only 175 steps. How bad can it be?”

Bad.

Very bad.

Remember how I said I’ve seen people make luggage mistakes before? I saw someone make a luggage mistake that looked like it could very well have been fatal– she was trying to lug a giant suitcase up these stairs.

That’s nuts.

I was having a hard time just trying to get my chunky American frame up the stairs. 175 steps… that has to be what? 12 stories? I stopped more and more frequently as I got near the top, because I was starting to see bright lights and hear the voices of what could be long-dead ancestors beckoning.

Turns out it was just the main station.

The downside of my stupid escapade on the stairs was that it took a lot out of me. That was energy and strength that I would need for my assault on the British Museum, which is no less of a monster than the stairs at Russell Square Station.

Getting There is Half the Fun

To get to the museum from the station, I cut straight across Russell Square Park, which is a lovely green area, then dodged the crazy traffic in the circle, walked down a street, turned a corner, and bam! There it was.

It’s huge.

The British Museum is not to be trifled with.

It’s free to get in (you ought to make a donation), but things like maps, guides, and audio guides all cost money. If you want an audio guide, be prepared to leave some sort of photo ID, like a driver’s license or a passport behind.

The museum is camera-friendly. Take pictures of whatever you want. Seriously, go for it. They don’t care one bit. I had fun, because most American and Japanese museums would wig out at that idea.

Here’s the rub– if you take the audio guide and you carry a camera around your neck, you are in for some suffering. I had both, and both annoyed the hell out of me. I wound up never using the guide, anyway, as everything in the museum is well-labeled.

Skip the audio guide, unless you can’t read.

The Treasures of the World–Now the Treasures of Great Britain!

First off I took a look at the treasures of Ancient Greece. They had lots of neat stuff, none of which I can remember the names of. I am a terrible and uncultured person. But it was all very impressive, and I took lots of pictures.

The bits they took from the Acropolis were very moving, as were the sculptures of the heads of the four major philosophers, and the sculpture of Alexander the Great.

Then it was off to Egypt. I was more interested in the sculptures than the mummies, to be honest. I always thought that the obsession with the display of old dead bodies to be kind of gruesome, yet that was the part of the museum that was the most jam-packed. Figures.

I think there should be a rule that any archaeologist that displays a body in a museum also has to be displayed in a museum when they die so hordes of sweaty future tourists can gawk at them.

It’s only fair.

After those two sections, my legs were starting to die off, because this museum is HUGE, and my hiking shoes are 4 years old, and on their way out. I knew I only had one more section left in me, and then I’d have to turn tail and run back.

I decided to head to the Japan section. (Hey, that’s my main interest.) It was a nice display that carries you from the Joumon period all the way to modern Japan.

By then I was totally beat, so it was time to shuffle back to Earls Court.

I went to the office supply store on the high street on the way back to the hotel to buy boxes, packing tape, and a magic marker, because I need to get rid of these books I don’t need. I don’t want to have to carry them back with me on the plane, and I want to have more room for souvenirs.

At least that’s the logic.

Not sure about dinner tonight. Nando’s again? Or maybe just more sandwiches?

A Few Days With the Epson 1400

 Photography, Technology  Comments Off on A Few Days With the Epson 1400
Aug 192009
 

I got my Epson 1400 on Monday, so I’ve had a few days to play with it. Here are my initial impressions.

It’s big. No, I mean it’s menacingly huge. That’s no moon… okay, I’ll stop now.

It’s large enough to create problems about “Where do I put this… thing?” The extendable feed trays and output trays add to the problem. You wind up with this massive rectangular block with this one thing shooting 8-9 inches out of its head, and another tray shooting 5-6 inches out of its  belly.

It reminds me a bit of a NASA experiment. “This will be a servicing mission to deploy the feed and output trays for the Epson 1400 in low Earth orbit.”

So make sure you have enough room for it.

It’s also heavy. 29-30 pounds heavy. Don’t hurt yourself carrying it across the room. Its mass is significant enough that when it prints, it shakes the solid steel shelving I put it on. This isn’t some flimsy shelving, either. This is stuff made out of rigid steel tubing with reinforced steel shelves.

Yet when I print a photo, the shelves shake.

So don’t put it on that breakaway balsa-wood table.

The print quality is excellent. I grabbed some random photos from my trip to Japan, printed them on 4″ x 6″ glossy photo paper, and was impressed with the results. Even photos with really fussy light colors came out looking great. Bold colors are suitably bold, shadows and light areas are evenly printed.

Printing speed is noticeably slow. It takes about 2 minutes to print a 4″ x 6″ photo when you have it set at its highest output mode.

The software is thorough. You get options on top of options.

The much-hyped borderless printing is kind of a let-down. Whenever you select it, you get all sorts of warnings that the prints aren’t going to be as good as they would be if you printed with a border. The results are okay.

Installation was painless. (Except for lifting the printer.) The instructions say it takes around 3 minutes for the ink cartridges to charge. I’d guess it takes closer to 5 minutes. Just be patient.

One other thing: Staples just called me today to make sure the printer had arrived and that everything was okay. That was a nice touch. I give them a lot of credit for turning an unpleasant experience into a very pleasant one.

The Squeaky Feed Roller Gets the Grease

 Photography, Technology  Comments Off on The Squeaky Feed Roller Gets the Grease
Aug 152009
 

Straying ever further from the main point of this blog, I recently had to delve into the world of printers for the first time in a long time. My 14-year-old HP LaserJet 5 scares me with a foul odor and even fouler-looking pages now, and my 8-year-old HP DeskJet 940c can’t stay in register to save its poor little life.

Getting Stapled

Since the State of North Carolina had decreed that last weekend was to be a holiday of mass consumption in order to get the kiddies ready for school, I went into my frenzy of printer acquisition. (Because printers were on the tax-free list.) Before the holiday, I had spied a neat deal online at Staples– an Epson 1400 for $179. It’s a great inkjet photo printer that usually runs for $300 everywhere else.

Alas, they were out of stock online.

So I went to the local store, which, according to the website, had the item in stock. I looked at the shelf, and they wanted $299 for it. I asked one of the sales people if they would match the online offer, and they would. But they were out of stock, too. They had some about 45 minutes away,  and they reassured me that if I went a few days later, I could still get the deal. (Yes, I was greedy– I wanted the deal tax-free.)

Okay, here’s where you should be very careful. Yes, sales usually go from Sunday-Saturday. But online deals don’t. And I didn’t know that. If someone tells you you can get the price, you should say at this point, “Can I get that in writing?”

That was my first mistake.

Thursday rolls around, and I knew I would be near the store that still had them in stock. I decided to check online before I left home to make sure they still had them in stock– they did, but they were low. The deal was still good. But by the time I got there, they had already yanked the deal off of their website.

Actually, they had not only yanked the deal off of the website, they had yanked the printer off of the website completely. It was as if it didn’t exist. So it didn’t matter what I said to the store employees there, they wouldn’t give me the deal.

Naturally, I was a bit upset. I hate it when the rug gets pulled out from under me, but what can you do? I didn’t take it out on the employees there– it’s not their fault. So I went home, wrote a letter to Staples explaining why I was upset, and what had happened.

I didn’t expect to get the deal at this point. I had already mentally walked away. If I could get the deal through writing a letter, great, but if not, I was over it. I always keep in mind what one of my old law professors taught me, “Never fall in love with something that can’t love you back.”

He’s Not Heavy, He’s My Brother

The printer frenzy weekend came and went. During the frenzy,  I found a great little Brother MFC 7840W (which totally rocks) from Best Buy for $199, reduced from $300. With a couple of gift cards I had, I walked out the door having spent only $125 on it. Tax free, too, because of the weekend. (It was also the last one in the Triangle. Woot.)

The 7840W is an awesome little multifunction printer. It’s a black and white laser printer that also is a fax, copier, and scanner. It has an auto-sheet feeder as well. Most importantly, it does wireless network printing like a champ. I guess it does scanning, too, but I don’t need that so much. The only weakness it has is the manual feed port– you can only manually feed a sheet at a time, and you have to hold the sheet you’re manually feeding. The other weakness is a lack of auto duplexing, but I don’t care about that.

Other than that, it’s great, and it fills the smoking hole left by my dying LaserJet 5. (No, really, it’s smoking.)

One neat trick I found is that if you cover the small round window on the right side of the toner cartridge with some black tape (or really any kind of masking tape), you can squeeze out a few extra hundred or so pages. Toner refills look bearable, price-wise. (Even more so with this trick.)

Pulling out the Staples

So anyway, here I am, happy with my little laser printer. I’ll admit I wanted the Epson that Staples had to print out a bunch of my photos from my journeys. The Epson is a great inkjet for photos… and not much else. After looking online, it’s hard to get a good deal on it from a reputable seller. It costs a fortune to ship, too, because it weighs a ton.

Much to my surprise, about 5-6 days after my email, I hear back from Staples. They were looking into the matter. To be honest, whenever I contact a company, I don’t ever expect to hear back, simply due to the volume of e-mail they get. I mostly wrote to get the frustration of having wasted 2 hours off of my chest, and to let them know that yanking a deal down in the middle of the day isn’t such a nice thing to do to your customers.

We exchanged some more e-mail, and after a few more days, they agreed to ship me a new Epson 1400 for $179 + tax, free shipping.

So in the end, I can say I’m pleased with how things turned out. Two new printers worth about $600 for about $300.

I win.

I’d say the moral to the story is this: always walk out on a bad deal, and go into every deal mentally prepared to walk out. Walking out on a bad deal is one of the most liberating feelings ever. It’s really fun to do when a car dealer tries to screw you over. I’ll save that for another post.

Be willing to haggle, and be willing to negotiate. Stand up for yourself, and tell companies when they do things that tick you off. Don’t be afraid to ask for something. If you don’t ask for it, you definitely won’t get it. If you ask nicely, you might just get it.
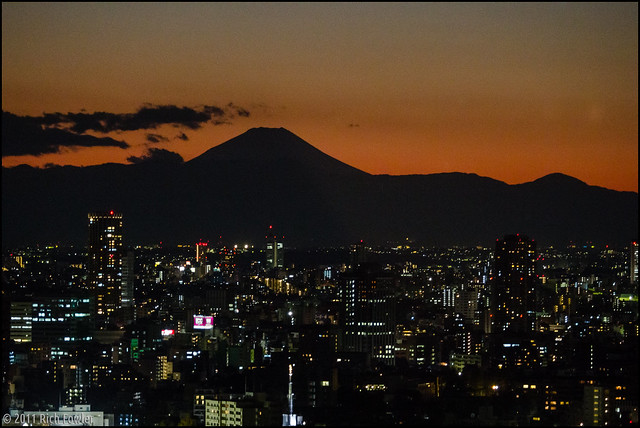
And never fall in love with something that can’t love you back. That way, you’ll always win.

Aug 072009
 

No, I didn’t go hunting with Mr. Shakespeare. This is about going out and taking pictures with my Bard camera bag by F-stop.

It’s one thing to use a bag to carry stuff around with, but it’s something entirely different to go out in the field and use it as a tool. I’ve had a few opportunities to take my camera and lenses out with the Bard and go shooting, and here are my impressions so far.

First off, size. It’s bigger than you think. I’m glad I bought the Bard instead of the Maverick. I’m sure the Maverick is a great bag, but I would be hating life at the end of a day of walking around town carrying my gear in something that huge.

The Bard itself is pretty large, and since it has firm sides, it doesn’t really “squish” down a whole lot. So when I’m carrying it around, it’s a bit bulky and can get in the way. It takes a little getting used to.

The bag has a waist strap… which I didn’t use much. I just couldn’t get comfortable with it. I might be missing out, or maybe there’s a better aftermarket waist strap. Or maybe I’m just not optimally-sized to use it. I’m going to try it again when I go out taking pictures again. Maybe I’ll like it better over time. Maybe not.

The shoulder strap is okay. It’s a $99 bag, so I didn’t expect it to be perfect. The shoulder strap is a little on the thin side, and a little on the narrow side. I like my shoulder straps thick and squishy, especially if I carry my bag all day. I’ll probably look aftermarket.

Minor gripes aside, my Canon fits perfectly with the 17-55mm f2.8 attached, pointing down. All I had to do was yank it out and shoot. I left one lens bay open, and I could stuff a rain jacket in it. (Which was perfect, because it rained a lot in the mountains.) My monstrously-huge (and heavy) 80-200 f2.8L sat in the other bay.

As a travel bag, I managed to cram an incredible amount of junk in it. Since I was going by car, I could get away with it. I’m not sure I’d recommend that for airline travel, though. It won’t fit under the seat in front of you in economy, but it will fit in the overhead compartment. So if you’re going to take it on an airplane, that’s going to be your only option.

All-in-all, it’s a very nice bag if you’re looking for an affordable alternative to the Crumpler bags. It’s a great messenger-style bag that doesn’t yell “Look at me!” or “Steal me!” quite so much, but I still got looks when I yanked out my camera. I don’t think you can avoid that no matter what bag you use.

F-stop Bard is in the House

 Photography  Comments Off on F-stop Bard is in the House
Jul 162009
 

My Bard arrived from F-stop yesterday, and it is a very spiffy bag. It came with a free F-stop Sporty camera strap (a $20 value). Thanks for the strap! I already have a very comfortable camera strap made out of some kind of soft, squishy stuff that I wouldn’t part with. I’ll make sure the Sporty gets a good home.

Now, on to the bag. In short: it’s a great bag, and at $99, it’s a great deal.

The inner dividers are all attached to the inside of the bag with velcro, and are freely removable and adjustable. That kind of versatility makes the Bard really useful as a multimedia news-gathering bag.

I adjusted one of the dividers for a snug fit for my giant Canon 80-200 mm f 2.8/L (with lens hood) in one slot on one side, and shrank one of the slots on the other side to fit the stock 18-55 mm f.3.5-5.6 IS lens that came with my Rebel XSi. My 50mm f 1.8 pops in on top of the 18-55 with plenty of room.

I’ll remove the stock lens when I go shooting in the real world, and replace it with my digital audio recorder. It’s just to give you an idea of how much you can fit in the bag.

The Rebel XSi fit easily in the middle, with a 17-55 f 2.8 IS lens and hood attached, so the camera is ready to pull out of the bag and shoot.  There’s still room for a 550EX speedlite flash next to the two smaller lenses.

My 13″ laptop fits easily in the laptop slot in the back, with room to spare. I could probably fit a 15″ laptop in there instead.  But if I put a 15″ laptop in, I’m not sure if I could fit the power brick in without losing space somewhere else.

There’s still plenty of room to pack things on top of the camera gear, but then that defeats the purpose of having a bag you can quickly yank your camera out of.
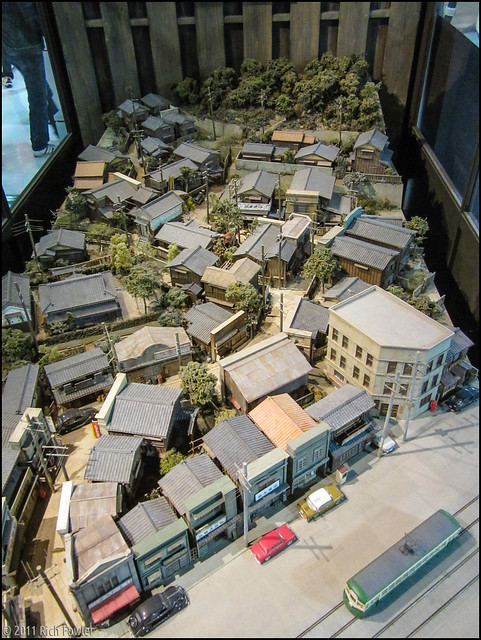
The inner pocket that covers the main compartment would be even better if  it could be zippered out of the bag, making access to the camera a little faster.
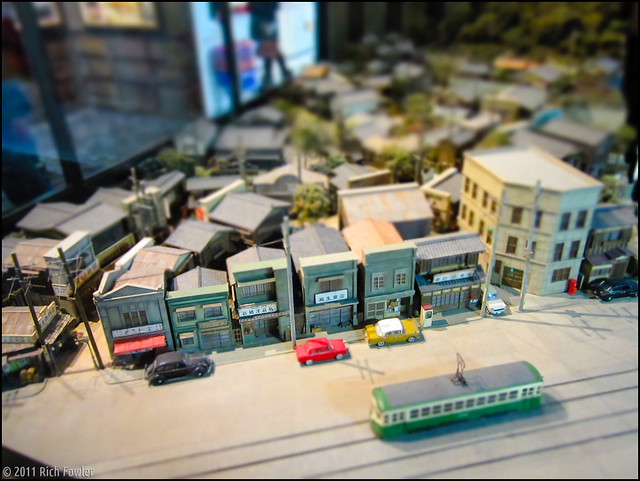
As it is now, you have to open the main flap of the bag, push the little flap out of the way, and then grab your camera.
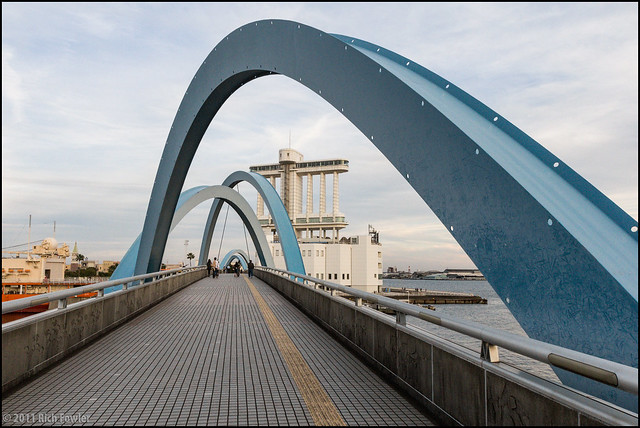
There are lots of little extra zippered compartments to put things like lens filters, cleaning equipment, spare batteries, chargers, and whatnot. (Digital cameras spawn whatnot like nobody’s business.)

The sides of the bag are good and rigid. I’m not a fan of mushy-sided bags, which is why I decided to skip going down the “Build your own camera bag” route.

I’ll be interested to see if the Bard will actually fit underneath an airline seat. The top will “squish” down about three to four inches, so as long as you don’t overpack, there’s no reason why it shouldn’t fit… unless my spatial perception is completely broken.

Nice bag. Worth the wait.

Waiting on the Bard

 Photography  Comments Off on Waiting on the Bard
Jul 112009
 

For the two or three of you wondering why I haven’t said anything about the F-stop Bard yet, that’s because it still hasn’t arrived. I ordered it on July 2nd, and didn’t actually get a message from F-stop saying that the order had been filled until the 7th. When I checked with UPS, the order hadn’t been shipped until the 9th. So it’s not here yet.

On the upside, F-stop apparently threw in a free camera strap worth $20. We’ll see how good it is. It would have been nice to get some sort of message from them explaining why it took them a week to ship the bag. I understand July 4 is a big holiday, but if you’re trying to sell to professionals, you need to turn over a lot faster than a week. Or you need to at least tell people why you’re not shipping right away.

Jul 022009
 

I’ve been hunting for a new camera bag. Specifically, I’m looking for a camera bag that doesn’t scream, “Hey, I’m a CAMERA BAG, full of expensive CAMERAS and equipment you just might want to steal!”

I also don’t want the bag to scream, “Hey, this guy has a CAMERA. He could be a JOURNALIST. You might want to walk over and HASSLE him,” to any cop or rent-a-cop in the area.

I know there are arguments both pro and con for the nondescript camera bag. Some people say it’s idiotic, because as soon as you pull out a big, expensive camera, a good thief will mark you.

True enough.

People have related having their diaper bag camera bags stolen, even full of dirty diapers. (You need to scroll halfway down to the page to find the story.) But there’s nothing you can do about that. Once you’re marked, you’re marked.

For me, it’s about what I look like when I’m not shooting, and when I’m walking from place to place. I want a bag that just says, “I’m a bag. The droids you’re looking for aren’t here. This person can move along.”

The only bags I have right now don’t serve that purpose. They say, “Hi! I’m full of cameras!” or worse, “Hi! I’m full of EXPENSIVE cameras!” I don’t even have to pull out a camera to have to worry about being marked.

And of course they also look amazingly dorky.

ThinkTank Urban Disguise

The first place I checked was my local camera store, because I’m a big believer in buying local, as well as getting my hands on the product before I buy it. I took a look at the ThinkTank Urban Disguise models they had there, but I dunno… they just felt clumsy. I know some people swear by them, but trying out the bag, it just felt a little awkward.

It also looked about as inconspicuous as a heart attack.

“Hey mister, what’s in that HUGE black bag?” “What, this tiny thing? It’s nothing, nothing!”

Yeah, I don’t buy it either.

It doesn’t look like any other kind of bag I’ve ever seen before, which would make me very, very suspicious of the person carrying it.

Crumpler

I love messenger bags, because you can dump a lot of stuff in them, throw them over your shoulder and go on your merry way… okay, in a giant man-purse sort of way.

But my masculinity is strong enough that I don’t care if it really is a big man purse. I’m a big enough man that I don’t care.

So I started looking at messenger bag style camera bags, and this is where it led me.

I looked at the Crumpler bags. They’re nice, but good God are they expensive. $150-$200 for a basic bag just doesn’t cut it. Also, they have the problem of being well-known as camera bags. (Everyone knows Crumpler is a camera bag maker now.) Their website didn’t really win me over, either.

I don’t like those “cute” Flash websites that are all glamor and no substance. Give me data. Facts and figures. Not a toy. It was very annoying.

The actual bags… I’m sure they’re great, but they’re very expensive and a bit on the flashy side. Maybe if I were a celebrity photographer, it would work, but I’m not.

Naneu

I took a look at the Naneu bags on a recommendation of someone who liked them. They’re excellent backpack bags, but not quite what I need. I like how the camera compartment faces your back, so it can only be accessed by removing the pack from your back. That way, nobody can lift your camera if you have your pack on. But it’s just not easy to just pull out your camera that way.

I need speed and ease of access, which is why I want a messenger bag-style bag in the first place. This might be nice for when I climb Mt. Everest, though.

Lowepro Classified

I also took a look at Lowepro’s Classified series… it looks pretty much like the ThinkTank, only it’s by Lowepro.  I’m sure it’s a great bag, but I don’t carry the Empire State Building in my bag. I just want something a little more… inconspicuous. That Black Monster ain’t it.

Make Your Own Camera Bag

I found this post on just building my own camera bag with a messenger bag and some Domke inserts. Others have discussed the idea as well. Timbuk2 has a similar take on how to build your own camera bag, based on a flickr discussion.

Here’s another flickr discussion on using Tenba inserts instead of the Domke inserts.

But in the long run, I think both setups are going to be a little on the janky side, and frankly, a good Timbuk2 bag isn’t that cheap to begin with. That alone will run in the $100-$150 range. By the time you add in the inserts, you’re staring $200 in the eye again. Where are the savings?

Frustrated, I stumbled across this thread on flickr.

F-Stop Bard and Maverick

Now I must admit that I really like the look of the Bard and Maverick by F-Stop. They typically make a lot of adventure-type gear bags that you’d see people use for stuff like mountain climbing or skateboarding, or surfing on lava or something. But both the Bard and the Maverick have the kind of look I’ve been trying to find. Something that looks like a messenger bag, that has good padding, will hold my gear, and doesn’t scream “CAMERA BAG!”

The only downside might be the logos on the gear, but those can be covered with stickers. No biggie there. The pricing is good, too. The Bard runs $99 on their website, and Maverick runs $129.

This comparison of the Domke F2 and the Bard really got me interested. And Skye Nacel’s posts on the F-Stop site gave a lot of useful info on the Maverick and also his comparison shots with the Bard. He also posted some good short reviews on YouTube of both the Bard and the Maverick.

But I still didn’t have enough info to make a decision on which bag to go with, so I wound up having to contact the company.

Suggestion: use e-mail. They respond very quickly to e-mails.  I had trouble getting through over the phone.

I went ahead and ordered a Bard, because I want something as small as possible. If I need something bigger, I was assured I could exchange it for a Maverick.

I’ll post a review in a few days/weeks when the bag shows up. I’m hoping it’ll be small enough to fit under an airplane seat… that may be wishful thinking. But the price sure is right: $117, and that includes UPS ground shipping.

This blog is protected by Dave\'s Spam Karma 2: 3159 Spams eaten and counting...